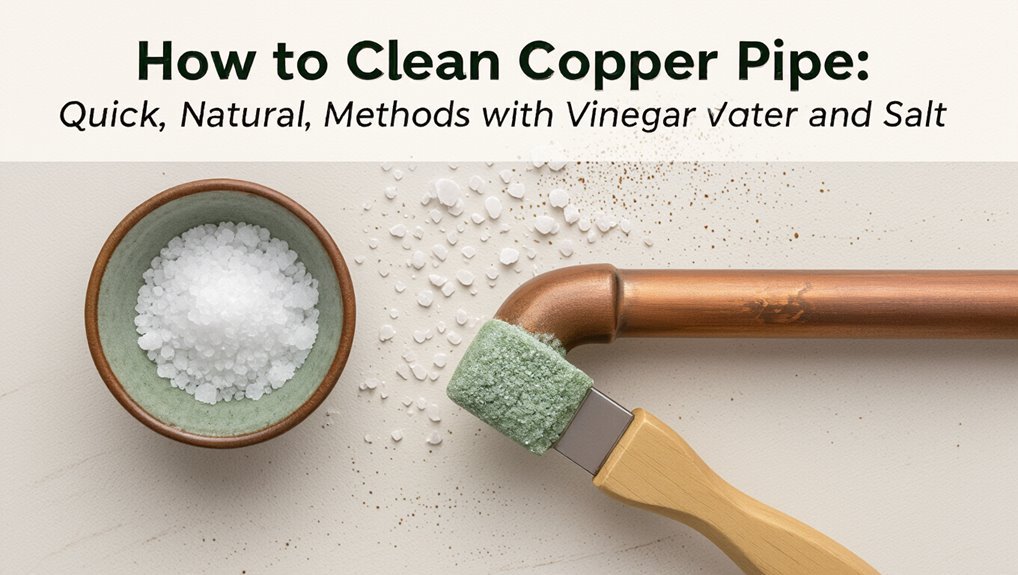
How to Clean Copper Pipe: Quick, Natural Methods That Work
To effectively clean copper pipes using natural methods, follow these key steps:
- Gather Supplies: You will need gloves, a soft cloth or brush, white vinegar or lemon juice, and baking soda.
- Shut Off Water: Ensure the water supply is turned off before you begin cleaning.
- Wipe Loose Grime: Use a cloth to remove any loose dirt and grime from the pipes.
- Apply Vinegar or Lemon Juice: Use either white vinegar or lemon juice to dissolve verdigris (green corrosion).
- Scrub Gently: With a toothbrush, gently scrub the affected areas.
- Rinse Thoroughly: After scrubbing, rinse the pipes well with water.
- Dry: Use a lint-free cloth to dry the pipes completely.
- Stubborn Spots: For tough stains, make a paste using baking soda and lemon juice, apply it, and rinse well.
- Inspect Joints: Check for any signs of corrosion at the joints.
These methods are quick, effective, and utilize natural ingredients to keep your copper pipes clean and well-maintained.
Quick 15‑Minute Copper Pipe Cleaning Checklist
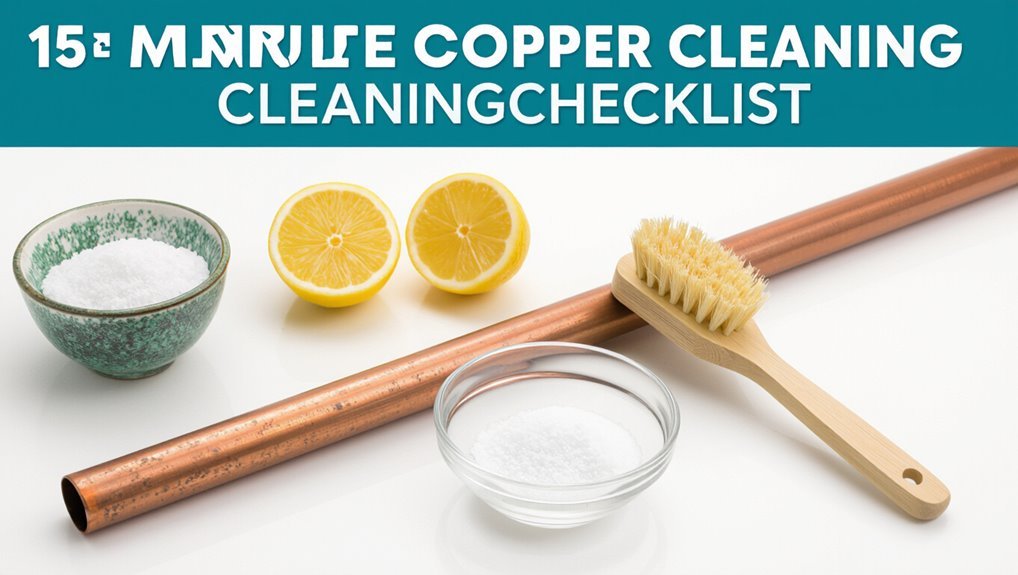
A concise 15‑minute checklist guides the user through safe, effective copper pipe cleaning: gather gloves, a soft brush or cloth, a mild detergent, white vinegar or a commercial copper cleaner, a toothbrush for joints, and a bucket; shut off water and protect surrounding surfaces; remove loose debris by wiping or brushing; apply cleaner, scrub gently along the grain, rinse thoroughly, and dry to prevent water spots; inspect fittings for corrosion and reassemble, restoring water only after confirming seals are dry and secure.
The checklist emphasizes steps, timing, and simple tools.
It prioritizes gentle abrasion, appropriate cleaners, and verifying seals to avoid damage and leaks.
Why Clean Copper Pipe: Safety, Clogs, and Looks
Cleaning copper pipe protects health by removing corrosive buildup and biofilm that can contaminate water.
It also reduces the risk of clogs by clearing mineral deposits and sediment that restrict flow.
Regular cleaning restores the metal’s appearance, making fittings and fixtures look well-maintained.
Health And Safety
Because copper pipe serves as both a water conduit and part of a building’s visible infrastructure, maintaining it affects health, function, and appearance.
Corroded or tarnished copper can harbor biofilms and mineral deposits that reduce water quality; cleaning minimizes bacterial niches and limits leaching of undesirable metals.
Regular inspection and gentle cleaning remove surface contaminants, restore flow characteristics, and reveal early leaks or joint failures before they pose hazards.
Proper personal protective equipment and ventilation during cleaning protect occupants from fumes or abrasive particles.
Safe disposal of cleaning residues prevents environmental contamination, aligning maintenance with health and building-safety standards.
Preventing Pipe Clogs
Maintaining clear copper pipes prevents flow restrictions that can lead to pressure drops, backups, and accelerated wear on fittings and appliances.
Regular removal of scale, mineral deposits, and organic buildup reduces the chance of partial blockages that impair system efficiency. Routine inspections catch early obstructions at joints and traps; flushing with clean water or a mild vinegar solution dislodges loose debris.
Installing strainers on fixtures and using softeners where water is hard limit future accumulation. Promptly addressing slow drains prevents complete clogs and costly repairs.
Consistent, minimal maintenance extends service life and preserves reliable water flow without harsh chemicals.
Restoring Copper Appearance
A properly cleaned copper pipe improves more than appearance: it reduces health risks from corrosion byproducts, minimizes flow restrictions caused by scale and buildup, and restores the metal’s natural luster for easier inspection and leak detection. Restoration focuses on removing verdigris, polishing surfaces, and protecting finishes. Gentle abrasives, vinegar or lemon solutions, and soft brushes remove deposits without scoring. After cleaning, a thin protective coating slows re-tarnish. Regular visual checks guarantee early repair. The restored look also aids resale or compliance inspections, signaling properly maintained plumbing and reducing long-term maintenance costs.
| Task | Result |
|---|---|
| Verdigris removal | Shiny copper |
| Polishing | Reflective finish |
| Protective coating | Slower tarnish |
| Inspection | Easier leak spotting |
| Maintenance | Lower costs |
Safety Steps Before Cleaning Copper Pipe
Before beginning work on copper pipe, assess the site and gather appropriate personal protective equipment—gloves, safety glasses, and a respirator if soldering or using cleaners—to prevent chemical exposure, burns, and metal shards.
Turn off water supply and relieve pressure by opening nearby faucets. Isolate electrical sources and guarantee dry conditions to reduce shock risk.
Ventilate enclosed spaces when using any chemical or heat. Protect surrounding surfaces and remove flammable materials before heating.
Work with a partner when possible and keep a fire extinguisher nearby. Inspect pipe for structural damage that could worsen during cleaning and plan safe disposal of waste.
Tools and Supplies for Cleaning Copper Pipe
Several essential tools and supplies are required to clean copper pipe effectively and safely: gloves, eye protection, and a soft cloth are basic personal and finishing items. A gentle abrasive (brass brush or non-scratch pad), mild acidic cleaner (vinegar or lemon juice), and baking soda for neutralizing are useful. A supply of clean water and a bucket for rinsing prevents residue. For tight areas, use cotton swabs or small nylon brushes. Disposable towels and a plastic tray protect surfaces. The table below summarizes typical items.
| Personal PPE | Cleaning Agents | Tools |
|---|---|---|
| Gloves | Vinegar | Brass brush |
| Safety glasses | Baking soda | Soft cloth |
Identify Copper Pipe Finish and Condition
Identifying the pipe’s finish and overall condition is the first practical step to determine the appropriate cleaning method.
The observer notes whether the copper is bright, lacquered, patinated, or heavily tarnished. Lacquered surfaces resist acids and require removal before abrasive or chemical cleaning; polished or bright copper needs gentle, nonabrasive care to avoid scratches.
Patina may be desirable and should be preserved unless restoration is meant. Inspect for pitting, green verdigris, corrosion around joints, and mechanical damage.
Document fragile areas and test a discreet spot with a mild cleaner to confirm compatibility before proceeding with stronger treatments.
Surface Rinse to Remove Loose Grime
A quick cold water rinse removes loose dirt and surface dust without spreading grime.
A soft cloth is then used to gently wipe the pipe, preventing scratches while lifting residue.
Finally, the area is inspected for any remaining debris before proceeding to deeper cleaning.
Quick Cold Water Rinse
Begin by running a steady stream of cold water over the copper pipe to dislodge loose dirt, dust, and surface oils; this simple rinse prevents grit from scratching the metal during deeper cleaning.
The flow should be gentle but continuous, covering all exposed sections for thirty to sixty seconds. Inspect the surface as water runs, noting stubborn spots that need targeted treatment later.
Avoid high-pressure jets that can force debris into joints or damage thin fittings. Allow excess water to drain away; if indoors, protect floors and nearby components.
This quick rinse prepares the pipe for subsequent, gentler cleaning steps.
Use A Soft Cloth
Wipe the pipe with a soft, lint-free cloth to lift remaining surface grime left after the rinse. A gentle, single-direction motion prevents scratches and preserves the copper’s natural sheen.
The cloth absorbs water, oil, and loosened particles without abrasive contact. Work along seams and curves, applying mild pressure where spots persist. Replace or refold the cloth as it becomes soiled to avoid redistribution.
- relief at visible brightness restored
- satisfaction in careful, quiet motion
- reassurance from smooth, unmarked metal
- pride in simple, effective maintenance
- calm in completing a small, restorative task
Check For Remaining Debris
Having removed surface grime with a soft cloth, the person inspects the pipe under running water to flush remaining loose particles. They direct a gentle stream along joints and curves, watching for dislodged flakes or residue.
A soft-bristled brush or cotton swab targets crevices where buildup persists, while clear water carries debris away. If water runs brownish, they repeat rinsing until clarity returns. They avoid high pressure that could force sediment into fittings.
After rinsing, they dry the pipe with a lint-free cloth and recheck connections for trapped material, ensuring surfaces are clean before any polishing or protective treatment.
Vinegar + Salt Method for Copper Pipe
A simple and effective household method for cleaning copper pipe uses white vinegar combined with table salt to dissolve verdigris and restore shine.
A cloth soaked in a 1:1 vinegar-salt solution is applied, rubbed gently, then rinsed and dried. Stubborn spots may require brief soaking; prolonged exposure is avoided to prevent etching. Protective gloves and ventilation are recommended.
After cleaning, a light oil or lacquer can slow re-tarnishing.
- Relief at seeing green corrosion vanish
- Satisfaction from bright, renewed metal
- Confidence in a safe, natural cleaner
- Pride in DIY upkeep
- Calm from quick, reliable results
Lemon and Baking‑Soda Brightening Method
Several fresh lemons combined with a small scoop of baking soda create a mild, chemical-free paste that brightens copper by gently lifting tarnish without harsh abrasives. The mixture is applied, left briefly, then rinsed and polished with a soft cloth. It suits small areas and decorative fittings, offering visible shine with minimal effort. Gloves protect skin from acidity; test on an inconspicuous spot first. Avoid prolonged soaking to prevent surface stress. Rinse thoroughly to remove residue, then dry to prevent water spots. Repeat as needed for light tarnish; persistent corrosion may require professional treatment.
| Ingredient | Action | Tip |
|---|---|---|
| Lemon | Acidic cleaner | Use fresh juice |
| Baking soda | Mild abrasive | Add gradually |
| Cloth | Polish & dry | Soft microfiber |
Flour, Salt, and Vinegar Cleaning Paste
A simple paste of flour, salt, and vinegar provides an abrasive yet gentle cleaner for copper pipe.
The article explains proportions and mixing to achieve a spreadable consistency, then describes applying the paste, scrubbing lightly, and allowing a short contact time.
Final rinse and drying tips are provided to remove residue and prevent streaks or water spots.
Making The Cleaning Paste
When preparing the flour, salt, and vinegar paste, combine equal parts all-purpose flour and table salt. Then slowly add distilled white vinegar until a thick, spreadable paste forms; this mixture creates a gentle abrasive and acid that loosens tarnish without damaging copper.
The maker measures carefully, selecting fresh ingredients and stirring to a smooth consistency. Small batches prevent waste. Stored briefly in a sealed container, the paste stays usable for a day.
Sensory notes — faint tang of vinegar, coarse texture, pale color — reassure the user of effectiveness and safety.
- Relief
- Confidence
- Satisfaction
- Anticipation
- Calm
Application And Rinse Tips
With the paste prepared, apply it to cool, dry copper in even strokes, covering tarnished areas with a thin, uniform layer that avoids buildup in seams or joints.
Allow the mixture to sit briefly—typically 5–10 minutes—monitoring progress; do not let it fully dry or remain for extended periods on delicate fittings.
Gently agitate stubborn spots with a soft brush or cloth, then rinse thoroughly with warm water to remove residue.
Dry immediately with a clean microfiber or lint-free towel to prevent water spots and oxidation.
Repeat sparingly if needed, and always inspect seals and soldered joints afterward for integrity.
Gentle Scrubbing: Brushes and Technique
Several small, firm brushes—nylon, brass, and toothbrush-sized—are most effective for removing grime without damaging copper. A gentle, consistent motion follows the grain of the pipe; pressure increases only where buildup resists.
Short sessions preserve patina and avoid abrasion. Rinse debris frequently and inspect work under good light. For joints, use narrow brushes; for bends, flexible picks.
Emotional cues encourage care and satisfaction as metal regains luster.
- Calm focus
- Quiet patience
- Small victories
- Restored pride
- Subtle joy
Removing Verdigris Without Harsh Chemicals
Although verdigris can look stubborn, it responds well to gentle, noncaustic treatments that preserve copper and patina.
A paste of baking soda and lemon juice applied briefly dissolves green deposits; rinse thoroughly and dry.
White vinegar diluted with water soaks stubborn spots for a few minutes, then is neutralized with a baking soda rinse.
Soft-bristled brushes and cotton swabs lift loosened particles without scratching.
For larger areas, a poultice of flour, salt, and vinegar holds contact for controlled cleaning.
Always test a hidden area first, work in small sections, and avoid abrasive pads or harsh acids that damage copper.
Cleaning Inside Pipe Openings and Fittings
Clean inside pipe openings and fittings by removing debris, corrosion, and remaining cleaning residue before reassembly or use. A small brush, compressed air, and a vinegar rinse clear deposits; flush thoroughly and inspect for pitting.
For threaded fittings, use a nylon brush and fresh water; for push-fit joints, avoid abrasive tools. Dry components completely to prevent new oxidation. If residues persist, repeat gentle cleaning rather than force. Recheck seals and alignment during reassembly.
- Relief at visible cleanliness
- Confidence in restored flow
- Satisfaction from careful work
- Calm knowing corrosion was addressed
- Pride in a job well done
Protect Soldered Joints and Valves While Cleaning
When protecting soldered joints and valves during cleaning, a technician should isolate heat-sensitive components, cover exposed fittings, and avoid abrasive contact that could damage seals or loosen joints.
Use lint-free cloths or silicone caps to shield valve stems and threaded connections from acidic or abrasive cleaners. Apply masking tape over nearby insulation and plastic parts.
Avoid wire brushes directly on solder seams; instead, gently wipe with a soft pad soaked in a mild vinegar solution. Check for weepage after cleaning and tighten accessible nuts lightly if necessary.
Work systematically to prevent solvent pooling around joints and to preserve joint integrity.
Rinse and Dry Copper Pipe to Prevent Spots
Rinse thoroughly with clean water to remove residual cleaners and dissolved salts that cause corrosive spotting, then remove moisture promptly to prevent mineral deposits and water stains.
After rinsing, a soft lint-free cloth or microfiber towel helps lift water without abrading the surface. Work quickly along the pipe’s length, paying attention to seams and joints.
Air-drying in a low-humidity area reduces lingering moisture risk. Immediate drying preserves appearance and slows oxidation.
- Relief: stains avoided, effort rewarded
- Confidence: pipes appear cared for
- Calm: no streaks mar the finish
- Pride: visible maintenance success
- Assurance: long-lasting protection
Polish Copper Pipe Naturally With Olive Oil
First, the surface and tools are prepared by removing residue and selecting a soft cloth.
Next, a small amount of olive oil is applied sparingly to avoid buildup.
Finally, the metal is buffed with a clean cloth until a high shine is achieved.
Prep Surface And Tools
Several simple items make the polishing process efficient and safe: a lint-free cloth, fine steel wool or a soft-bristle brush, a mild degreaser or dish soap, and a small amount of extra-virgin olive oil for finish polishing.
The surface should be cool, dry, and free of heavy debris; work in a well-lit area and protect nearby finishes with masking tape or cloth. Gloves protect skin from oils and grime.
Prepare tools laid out in order of use, inspecting for contaminants. Calm, deliberate preparation prevents scratches and uneven sheen.
- Anticipation
- Satisfaction
- Care
- Pride
- Calm
Apply Olive Oil Sparingly
With tools and surface prepared, the final cosmetic step is to apply olive oil sparingly as a natural polish. A few drops on a lint-free cloth prevent excess buildup; heavy application can attract dust and create sticky residue.
Work along the pipe’s length, applying light, even pressure to distribute a thin sheen that enhances color and provides brief protection. Avoid joints, fitted areas, and threaded connections where oil could contaminate seals.
Allow the oil to settle briefly, then inspect for streaks or pooled areas and remove them with a dry portion of the cloth. Reapply only when the surface appears dull.
Buff To High Shine
Buffing brings out copper’s natural luster by evenly spreading the thin olive oil layer and removing microscopic imperfections. Using a clean, soft cloth or a natural-bristle buffing brush, the cloth is moved along the pipe’s length with moderate, consistent pressure until a bright, uniform shine appears.
The method is deliberate and calm, avoiding harsh abrasives. Short, overlapping strokes prevent streaks. Excess oil is wiped away to stop dust attraction. Regular gentle buffing maintains finish and deters tarnish without chemical exposure.
- Satisfaction of a gleaming surface
- Warmth in restored metal tone
- Calm from rhythmic motion
- Pride in careful upkeep
- Joy in simple, natural care
Apply Natural Sealants to Slow Tarnish
Apply a thin natural sealant to copper pipe surfaces to slow tarnish and reduce the frequency of cleaning. A light coat of beeswax, mineral oil, or a plant-based lacquer forms a breathable barrier without trapping moisture. Reapply after thorough cleaning or yearly inspection. Test sealants on a hidden area for compatibility and appearance before treating visible runs. Avoid thick coatings that drip or attract dust.
| Sealant | Durability | Application |
|---|---|---|
| Beeswax | Moderate | Rub warm, buff |
| Mineral oil | Short | Wipe on, dry |
| Plant lacquer | Long | Spray or brush, thin coats |
Choose Patina or Shine: Plumbing vs. Display
A homeowner deciding between a lived-in patina and a bright polished finish should weigh function and visibility: pipes hidden behind walls or under sinks can be left to develop a natural darkening that conceals minor wear, while exposed runs in kitchens, bathrooms, or decorative installations benefit from regular polishing and sealant to maintain a showroom shine.
The choice signals intent — practical anonymity or intentional beauty. Consider maintenance, surrounding décor, budget, and longevity. Emotional responses matter: some prefer history and warmth, others crave crisp modernity.
- Comfort of aged character
- Pride in gleaming fixtures
- Ease of forgetfulness
- Fear of constant upkeep
- Satisfaction of intentional design
How Often to Clean Copper Pipe by Location
Once the finish choice is settled, maintenance frequency should be set according to where the copper sits.
Exterior piping exposed to weather and pollutants merits inspection and light cleaning every 3–6 months to prevent heavy grime and staining.
Indoor visible fixtures in kitchens, baths, or decorative installations require gentle cleaning quarterly to preserve appearance.
Concealed plumbing in walls or crawlspaces needs minimal attention; an annual check for leaks and surface changes suffices.
High-traffic or food-prep surfaces may be wiped weekly.
Adjust intervals for local conditions: coastal, industrial, or smoky environments shorten timelines, while controlled indoor climates allow longer gaps.
Preventing Corrosion From Hard Water
Because hard water accelerates mineral buildup and galvanic reactions on copper, preventive measures focus on controlling water chemistry and limiting contact with dissimilar metals.
Regular testing of hardness and pH, installation of water softeners or chelating filters, and dielectric unions at joints reduce corrosion risk.
Routine flushing removes sediments before they concentrate.
Visual inspections catch early discoloration or pitting; timely professional assessment preserves system integrity.
- Relief when stains fade after treatment
- Confidence from measurable water chemistry control
- Comfort knowing protective fittings are installed
- Satisfaction from consistent maintenance routines
- Assurance that proactive steps extend pipe life
Fixes for Common Cleaning Mistakes
Common cleaning mistakes can damage copper pipe appearance and performance if not addressed promptly.
Remedies include switching from harsh abrasives to non-scratch pads, neutralizing and rinsing away chemical residue, and restoring finish after over-polishing with proper buffing and protective coatings.
Each correction is straightforward when matched to the specific error.
Avoiding Harsh Abrasives
Avoid abrasive pads or wire brushes when cleaning copper pipe, as they can scratch the surface and remove protective patina. A gentler approach preserves function and appearance; harsh abrasion accelerates corrosion and creates uneven sheen.
One should choose soft cloths, mild abrasives like baking soda paste applied sparingly, or natural cleaners that lift tarnish without etching. After cleaning, rinsing and drying prevents moisture damage. If doubt remains, test a small hidden area first.
Emotional cues reinforce care:
- Relief at preserving aged character
- Pride in careful maintenance
- Frustration avoided by patience
- Confidence from safe methods
- Satisfaction in lasting results
Correcting Chemical Residue
Even with gentle methods, residues from cleaners can remain on copper pipe and later cause staining or accelerated corrosion if not removed. The piece explains neutralizing steps: rinse thoroughly with distilled water, blot dry with a soft cloth, then apply a mild vinegar rinse to dissolve salts or alkaline traces. For stubborn film, a paste of baking soda and water lifts remnants; rinse again. Afterward, inspect joints and crevices with a soft brush. A quick protective rub of light oil prevents water spots. Visualize the process:
| Rinse | Brush | Dry |
|---|---|---|
| Vinegar | Soft brush | Cloth |
| Baking soda | Crevice pick | Oil |
Preventing Over-Polishing
Several simple steps can prevent over-polishing and the damage it causes to copper pipe finishes. A measured approach protects patina and avoids thinning metal. Gentle materials, short sessions, and neutral cleaners limit abrasion.
If shine fades unevenly, stop and reassess technique. For persistent spots, seek professional advice rather than aggressive rubbing.
- Use a soft cloth, not steel wool, to avoid regret.
- Limit polishing time to preserve original finish.
- Test methods on an inconspicuous section first.
- Rinse thoroughly to remove residue and calm worry.
- When unsure, pause and consult a pro for reassurance.
When Cleaning Won’t Help: Signs of Damage
When discoloration, deep pitting, or soft spots appear on copper pipe, cleaning is no longer sufficient and the pipe requires repair or replacement.
Visible green or white crust, flaking metal, or persistent leaks after cleaning indicate corrosion has progressed beyond surface tarnish.
Bulging joints, weakened solder, or localized thinning reduce structural integrity and raise risk of failure.
Internal scale that resists descaling and causes flow restriction points to chronic corrosion or contamination.
In such cases, a qualified plumber should assess extent of damage; temporary patches may be used, but long-term safety demands proper repair or full pipe replacement.
Eco‑Friendly Disposal of Cleaning Residue
Any cleaning of copper pipe generates residues—spent solutions, verdigris flakes, and rinse water—that require careful disposal to prevent environmental harm.
The writer advises neutralizing mild acidic cleaners with baking soda, collecting solids with paper towels, and never pouring concentrated solutions down drains.
Local hazardous-waste guidelines determine whether diluted rinse water is acceptable; when in doubt, use a community disposal site.
Protective gloves and airtight containers minimize contamination during transport.
Small steps protect waterways and soil.
- Sorrow for polluted streams
- Frustration at careless dumping
- Relief when disposed properly
- Pride in responsible action
- Hope for cleaner neighborhoods
Cost and Time Estimate for DIY Copper Cleaning
A straightforward DIY copper‑pipe cleaning job typically requires under two hours of hands‑on work and costs between $10 and $60 depending on materials and scale.
Time varies with pipe length, access difficulty, and level of tarnish; allow extra time for drying.
Basic supplies—vinegar, baking soda, salt, soft brushes, cloths, and gloves—are low‑cost.
Moderate projects may add sandpaper, pipe fittings, or replacement sections.
Renting specialized tools raises expense.
Labor is homeowner time; professional service adds substantial hourly rates.
Budget for disposal supplies if needed.
Estimating materials and measuring pipe length yields a reliable short‑range cost and time projection.
Natural Methods vs. Commercial Cleaners: Pros/Cons
Choice between natural cleaners and commercial formulations hinges on priorities like effectiveness, safety, cost, and convenience.
Natural methods—vinegar, lemon, baking soda—appeal for low toxicity, low cost, and gentle results but may require more elbow grease and time.
Commercial cleaners deliver faster, stronger tarnish removal and residue-free finishes but can be harsher, more expensive, and require careful ventilation and protective gear.
Selection depends on surface condition, time available, and tolerance for chemicals.
Emotional factors—comfort, urgency, pride, worry, relief—often sway decisions.
- Comfort in using familiar kitchen ingredients
- Urgency demanding instant shine
- Pride in DIY care
- Worry about chemical exposure
- Relief when pipes gleam
When to Call a Plumber for Copper Pipe Issues
If leaks or bursts are visible, professional repair is recommended immediately to prevent water damage.
Persistent corrosion that returns after cleaning also warrants a plumber’s assessment to identify underlying causes.
Sudden changes in water quality or sustained drops in pressure should prompt a call to diagnose pipe integrity and system issues.
Visible Leaks Or Bursts
When a copper pipe shows an obvious leak or ruptures, prompt professional assessment is essential to prevent water damage and mold growth. A visible breach demands immediate attention: shut off water, contain runoff, and contact a licensed plumber.
Temporary tape or a clamp may reduce flow but is not a long-term fix. Safety concerns include electrical hazards and structural weakening.
The plumber will evaluate extent, replace or repair fittings, and test for pressure integrity. Homeowners should document damage for insurance and avoid DIY fixes that worsen the situation.
- Panic at discovery
- Frustration over disruption
- Relief when help arrives
- Anxiety about costs
- Confidence after repair
Persistent Corrosion Problems
Recognize that persistent corrosion on copper pipe—evidenced by green or white deposits, thinning walls, pitting, or recurring pinhole leaks—signals a systemic problem beyond routine maintenance and demands professional evaluation. A plumber can assess structural integrity, trace sources, and recommend repair or replacement to prevent failure. Immediate consultation is advised if corrosion recurs after cleaning, affects multiple sections, or coincides with staining, odors, or low flow. DIY fixes may mask underlying causes; documented inspection and corrective action guarantee safety and longevity.
| Indicator | Likely Concern | Recommended Action |
|---|---|---|
| Pitting | Localized weakness | Inspect, replace |
| Multiple sites | Systemic corrosion | Full assessment |
| Recurrent leaks | Active deterioration | Immediate repair |
Water Quality Or Pressure Issues
Although appearing as isolated symptoms, unusual water quality or fluctuating pressure often indicate problems that affect copper piping performance and longevity.
A homeowner may notice discoloration, metallic taste, banging pipes, or weak flow; these signs suggest scale, corrosion, or connector failures that natural cleaning cannot fix.
Prompt professional assessment prevents hidden leaks, pinhole perforations, and health risks from contaminated supply lines. A plumber can test water chemistry, inspect pipe integrity, and recommend filtration, pressure regulation, or targeted repairs.
Consider calling when:
- Fear of contamination
- Persistent brown or green water
- Sudden pressure loss
- Loud hammering noises
- Visible wet spots
Best Resources and Products for Ongoing Copper Care
A handful of reliable products and references can simplify routine copper care by preventing tarnish, removing build-up, and protecting finishes; these include pH-neutral cleaners, micro-abrasive polish, clear lacquers, and manufacturer maintenance guides. Practical resources list recommended cleaners, testing kits for water chemistry, and step-by-step polish techniques. Professionals suggest following label directions, testing inconspicuous areas, and using soft cloths. For ongoing care, keep records of treatments and water reports. Below is a concise comparison to guide purchases and references.
| Product/Resource | Purpose |
|---|---|
| pH-neutral cleaner | Gentle debris removal |
| Micro-abrasive polish | Restore shine |
| Clear lacquer | Long-term protection |
| Water test kit | Detect corrosive water |
| Manufacturer guide | Specific maintenance instructions |
Conclusion
Regular cleaning preserves both function and shine; the copper pipe, like an honest mirror, reflects care or neglect. Following safety steps, choosing simple tools, and preferring gentle, natural methods usually resolves tarnish, buildup, and minor clogs within minutes, while recognizing when corrosion or leaks demand professional help. Balancing time, cost, and ongoing maintenance keeps systems reliable; attentive routine care prevents small problems from becoming costly failures, honoring utility through diligence.