How to Cut PVC Pipe: Easy Steps & Tools for Clean Cuts
To cut PVC pipe quickly and effectively, follow these steps:
1. Measure and Mark: Carefully measure the length you need and mark it clearly on the pipe.
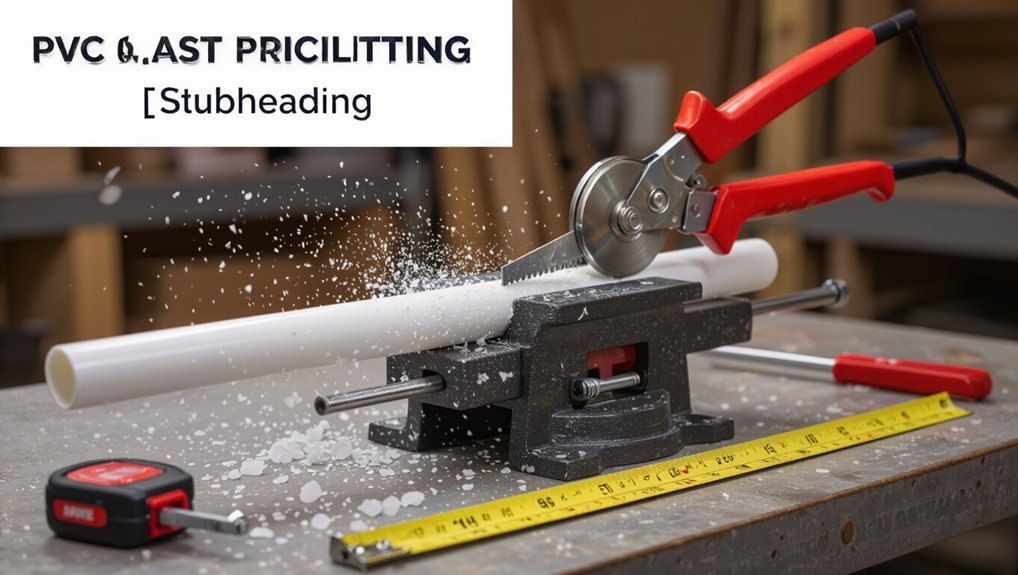
2. Secure the Pipe: Use clamps or a vise to hold the pipe steady while you cut.
3. Choose the Right Tool:
- For small diameters, use a ratchet PVC cutter.
- For medium sizes, opt for a fine-tooth hacksaw or a miter saw.
- For large or thick-walled sections, a circular or reciprocating saw works best.
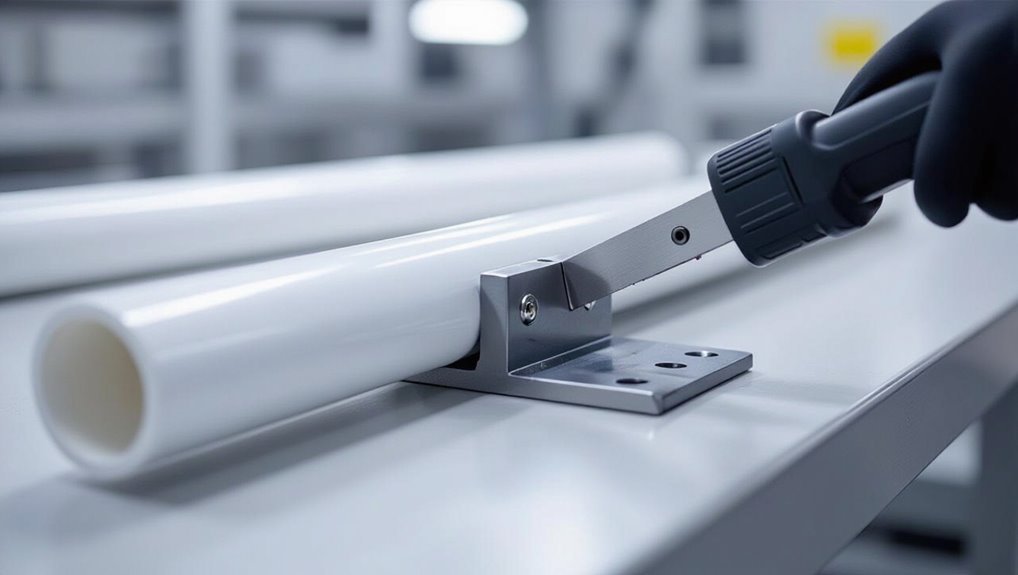
4. Cut the Pipe: Make a clean cut using your chosen tool.
5. Deburr and Sand: Smooth the cut edge to remove any roughness.
6. Clean the Surface: Wipe down the pipe to ensure a good seal when joining.
7. Dry-Fit: Assemble the pieces without adhesive to check the fit before final installation.
Key Takeaway: Proper measurement, tool selection based on pipe size, and smoothing the edges are crucial for clean cuts and successful PVC pipe assembly.
Quick Answer: Fastest Way to Cut PVC
Use a PVC pipe cutter or a sharp hacksaw for the fastest, cleanest cuts: a ratchet-style PVC cutter slices through Schedule 40 up to about 1¼” in one decisive squeeze, while a fine-toothed hacksaw works quickly on larger diameters when held steady and supported.
For straight, burr-free results, mark the cut, secure the pipe in a vise or clamp, and cut perpendicular to the axis. Score shallowly first with a utility knife on flexible pipe to guide the blade.
Deburr and square the end with a file or sandpaper. Wear eye protection and work on a stable surface for control.
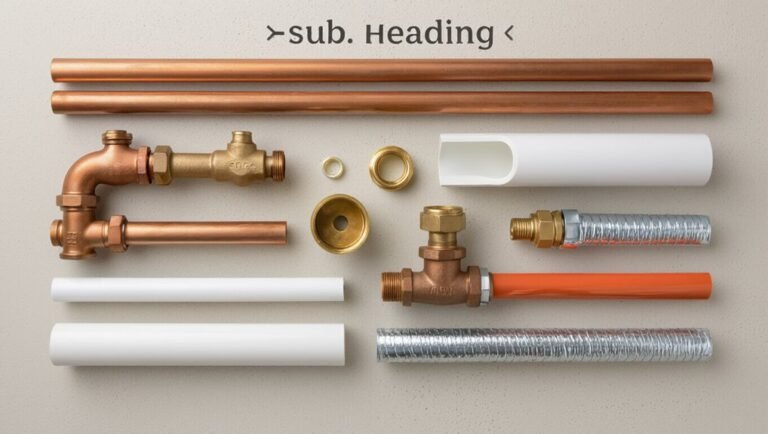
Which PVC Sizes and Types You’ll Meet
Pipes come in a handful of common diameters and several material grades that determine strength, flexibility, and purpose. Common diameters range from 1/2″ to 4″ for household use; larger sizes exist for mains. PVC types include Schedule 40 (general plumbing), Schedule 80 (thicker walls), CPVC (heat resistance), and flexible PVC (drain lines, conduit). Compatibility with fittings and pressure ratings matters. Below is a quick visual.
| Size / Type | Typical Use |
|---|---|
| 1/2″–1″ | Indoor water lines |
| 1-2″ | Drainage, sprinkler |
| 2-4″ | Main drains |
| Schedule 40 | Standard residential |
| Schedule 80/CPVC | High pressure/heat resistant |
Best Tools for Clean PVC Cuts : Quick Comparison
Select the right cutting tool based on diameter, wall thickness, and the finish required: small-diameter PVC is quickest and cleanest with a ratcheting PVC cutter.
Medium sizes suit a fine-toothed hacksaw or mitre saw for straight, controlled cuts.
Large or thick Schedule 80 sections often require a reciprocating saw or circular saw with a fine-tooth blade.
Each tool balances speed, control, and edge quality; power tools increase speed but need secure clamping and dust control, while hand tools offer tactile feedback and minimal setup.
Consider blade tooth count, clearance for the cutter, and whether a deburring step will be needed.
- Blade tooth count vs cut smoothness
- Clamping and workholding needs
- Deburring time and tooling
Cheap Home Cutters: Handsaw vs Hacksaw
A comparison of basic home cutters contrasts the handsaw’s speed and rough control with the hacksaw’s slower but more precise approach.
The handsaw often makes quick work of larger-diameter PVC but requires steadier guidance to avoid wobble.
The hacksaw, used with steady strokes and fine-tooth blades, yields a cleaner finish suitable for visible joints.
Handsaw: Speed Vs Control
When choosing between a handsaw and a hacksaw for cutting PVC, the key trade-off is speed versus control: a coarse-bladed handsaw removes material quickly and is suited for straight, quick cuts, while a finer-toothed hacksaw offers greater precision and cleaner edges but at a slower pace.
The handsaw excels on thicker pipe and rapid work, though it can produce rougher edges needing light sanding. It demands steady hands to maintain square cuts.
Selection depends on project pace, desired finish, and operator skill; safety and support remain essential for consistent results.
- Faster material removal with higher tooth clearances
- Easier on thicker diameters
- Requires stable clamping to avoid wandering
Hacksaw: Clean Finish Technique
Use steady, short strokes with a fine-toothed hacksaw to produce a clean, square PVC cut: the blade’s shallow teeth and tensioned frame minimize chipping and leave a smoother edge than a coarse handsaw.
The operator secures the pipe in a vise or with clamps, marks the cutline, and aligns the blade to avoid wobble. Moderate pressure prevents melting while maintaining control; frequent cooling breaks help on long cuts.
After sawing, a file or deburring tool removes burrs and sharp edges for snug fittings. This method balances affordability and finish quality, making the hacksaw a reliable budget cutter.
Ratchet PVC Cutters and Miter Saws : When to Use Them
Ratchet PVC cutters are recommended for quick, clean cuts on small-diameter pipe where portability and minimal effort matter.
Miter saws offer speed and repeatable precision for larger jobs or when many uniform cuts are required.
Users should follow safety protocols—secure the pipe, wear eye protection, and check blade condition—to guarantee accurate, hazard-free results.
When To Use Ratchet Cutters
Although both tools can make clean cuts, ratchet PVC cutters are best suited for small-diameter, quick cuts where portability and one-handed control matter.
They excel on 1/2″ to 1-1/4″ pipes in tight spaces, for repairs, and for repeatable cuts without setup. Users appreciate minimal cleanup and reduced splintering when blades are sharp.
- Ideal for fieldwork and plumbing repairs where carrying a saw is impractical.
- Favored when access prevents a straight-line setup or clamping of the pipe.
- Useful for cutting many short lengths quickly without producing sawdust or requiring power.
Advantages Of Miter Saws
While ratchet cutters shine for quick, small-diameter work, miter saws offer distinct advantages when precision, speed on larger diameters, and repeatability matter.
Miter saws produce straighter, cleaner cuts across various PVC thicknesses, reducing the need for extensive deburring. Their power handles thicker pipe and larger bundles more efficiently than manual tools.
Adjustable angle settings enable accurate miters and consistent repeat cuts for fittings and assemblies. When paired with appropriate blades, they minimize heat buildup and melting.
For projects demanding uniform lengths and multiple angled cuts, miter saws deliver faster throughput and professional, reliable results.
Safety And Accuracy Tips
When selecting between a ratchet PVC cutter and a miter saw, users should prioritize both safety and accuracy by matching tool choice to pipe size, cut type, and workspace conditions.
The ratchet cutter suits small-diameter, single-handed cuts with minimal debris; a miter saw fits larger diameters, repeatable miters, and faster straight cuts.
Proper PPE, stable clamping, and blade maintenance reduce risk and improve edge quality. Measure twice, mark clearly, and secure the pipe before any cut.
Choose slower feeds for thicker walls and allow tool cycles to complete to avoid binding or ragged ends.
- Use clamps and supports for long runs
- Wear eye and hand protection
- Inspect blades and cutters before use
Pipe Wheel Cutters vs Tubing Cutters: Pick the Right One
Choosing between pipe wheel cutters and tubing cutters depends on the material, diameter, and desired finish of the PVC pipe; each tool excels in specific situations.
Pipe wheel cutters grip and rotate around larger-diameter PVC, offering fast, straight cuts with minimal deformation when used correctly.
Tubing cutters suit smaller diameters and thin-wall tubing, providing controlled, incremental cuts that reduce burrs and create smoother edges ready for fitting.
Durability, blade quality, and access to tight spaces influence selection.
For occasional DIY work, a tubing cutter often suffices; for frequent or larger plumbing tasks, a robust pipe wheel cutter is preferable.
Choosing a Power Saw: Circular, Miter, Chop
The section compares circular, miter, and chop saws for PVC cutting, highlighting each tool’s strengths and limitations.
It then covers blade selection tips—blade tooth count and materials—to minimize melting and tearout.
Finally, it outlines essential safety and setup steps, including secure clamping, correct blade guards, and PPE.
Saw Type Comparison
Several factors guide the choice between a circular saw, miter saw, and chop saw for cutting PVC: cut accuracy, portability, blade size, and dust control.
Each saw type suits different tasks: a circular saw offers mobility for long runs and rough cuts; a miter saw delivers repeatable, angled precision for fittings; a chop saw gives fast, square cuts and handles larger diameters with stable fences.
Consider worksite constraints, clamp needs, and motor power. Noise and chip containment differ; PVC shavings can be managed with guards or vacuums.
Match saw selection to workflow, not just cost or familiarity.
- Mobility versus stationary setup
- Repeatability and angle control
- Dust and chip management
Blade Selection Tips
One important decision when cutting PVC with a power saw is selecting the right blade for the material and saw type.
Choose carbide-tipped blades with fine, evenly spaced teeth for clean cuts; 40–80 tooth blades suit circular and miter saws. For chop saws, prefer blades designed for plastics or non-ferrous materials to reduce chipping and melting.
Thin-kerf blades minimize heat and waste but require stable mounting. Avoid blades meant solely for wood with aggressive gullets.
Match blade diameter and arbor to the saw, and verify RPM limits. Proper blade choice reduces tear-out and produces smoother, truer cuts.
Safety And Setup
Choosing the appropriate power saw—circular, miter, or chop—depends on the cut type, pipe diameter, and workspace constraints, and must be paired with a safety-first setup.
The operator should evaluate stability, blade guard condition, and clamp options before cutting. PPE—eye, ear, and respiratory protection—reduces injury risk from chips and dust. Secure the pipe with a proper vise or strap clamp, avoid pinch points, and mark the cut line clearly.
Inspect the blade for sharpness and correct tooth count for PVC to prevent melting.
- Confirm work area clearance and firm support
- Use a fine-tooth blade and slow feed
- Keep hands outside the blade path
When to Use Cutter Pliers and Rotary Tools (Use Cases)
Use cutter pliers for short, thin-walled PVC runs and tight spaces where quick, straight snips are needed; switch to rotary tools when cutting larger diameters, making curved or detailed cuts, or smoothing and deburring edges after a rough cut.
Cutter pliers excel for clean, fast cuts on smaller schedules and stub-outs, minimizing chatter and cleanup.
Rotary tools suit heavier schedules, long runs where sawing is impractical, and tasks requiring shaping, slotting, or trimming fittings.
Rotary use also speeds removal of glued or uneven sections.
Choose based on pipe size, wall thickness, access, required finish, and the need for precise shaping.
Safety Gear You Must Wear When Cutting PVC
Several essential pieces of personal protective equipment should be worn when cutting PVC to guard against flying debris, dust, and chemical exposure.
The operator should use eye protection rated for impact and particles, respiratory protection for fine PVC dust and solvent fumes, and gloves that resist cuts and solvents.
Hearing protection is advised with power tools. Clothing should cover arms and avoid loose fabric. Footwear should be sturdy.
Work area ventilation and a clean, stable cutting surface reduce hazards. Inspect PPE before use and replace damaged items. Proper gear minimizes injury and long-term exposure risks.
- Safety glasses or face shield
- Respirator or dust mask
- Cut-resistant, solvent-resistant gloves
Measuring and Marking PVC for Square Cuts
Accurate measurements begin with the right tools, such as a steel tape or caliper, to guarantee consistent length.
Clear marking techniques—using a fine-tip marker and a square or miter guide—help produce true 90-degree lines for cutting.
The person should also account for pipe wall thickness when marking for fittings so the finished length and fit remain correct.
Choose Accurate Measuring Tools
Precise measurements start with the right tools: a rigid tape measure or steel rule for length, a square or combination square for perpendicularity, and a fine-tip marker or scribe for clear lines.
The practitioner selects tools calibrated for small tolerances and durable edges that resist nicks. Measuring should account for fitting allowances and cutter kerf while minimizing parallax. Tool condition—clean, straight, and readable—affects repeatability.
For repetitive cuts, stops or jigs paired with a reliable square reduce variance. Calibrated tools improve joint fit and reduce rework, especially in assemblies where cumulative error compromises alignment or function.
- Use a steel rule for short, exact runs.
- Prefer a metal combination square for right angles.
- Choose a fine scribe or 0.5 mm marker for visible, thin lines.
Marking Techniques For Precision
With measurement tools selected and calibrated, marking the PVC becomes a methodical step that translates numbers into visible guides for cutting. The technician measures twice, aligns a square or marking gauge, and scores a fine line around the circumference to guarantee a perpendicular cut. Visible marks reduce drift when sawing or using a pipe cutter. For repeat cuts, jigs or wraps provide consistent stops. Clean, contrasting markers improve visibility; avoid thick lines that hide the blade path. Verify marks against reference points before cutting to prevent rework.
| Tool | Mark | Tip |
|---|---|---|
| Pencil | Thin line | Rotate pipe |
| Marker | Bold line | Contrast |
| Gauge | Precise stop | Clamp tight |
Account For Pipe Wall Thickness
Wall thickness must be measured and accounted for before marking to ascertain the finished piece meets length and fit requirements; failing to include the wall in measurements leads to joints that are too short or fittings that sit proud.
The installer measures outside diameter and references pipe schedule to determine wall thickness, then subtracts the wall from overall run or fitting insertion depth. Marks are placed for the cut line on the pipe’s outside face, not the socket edge, to ascertain square cuts and correct final length after chamfering and deburring.
- Verify thickness with calipers or manufacturer tables
- Subtract insertion depth when marking
- Recheck marks before cutting
Holding PVC Steady While You Cut
Clamp the pipe firmly before cutting to prevent slipping or binding that can ruin the cut or cause injury. A vise with soft jaws or a pipe clamp secures the workpiece without crushing it.
Support longer lengths with rollers or a second clamp to prevent sagging and lateral movement. Mark the cut clearly and align the blade or saw kerf to the mark.
Hold tools steady; use both hands when possible and keep the free hand away from the cutting path. Recheck that the pipe cannot rotate, then proceed with smooth, controlled strokes to maintain a straight, even cut.
Cutting Thin‑Wall PVC (Schedule 40) : Step‑by‑Step
Before cutting thin‑wall Schedule 40 PVC, the technician measures and marks the pipe precisely to guarantee correct length and alignment.
They select an appropriate cutter—such as a PVC saw, tubing cutter, or miter box with a fine‑tooth blade—based on diameter and access.
After cutting, they deburr and smooth the edge with a file or sandpaper to remove roughness and ensure a clean fit.
Measure And Mark
When preparing to cut thin‑wall (Schedule 40) PVC, measure the required length twice and mark the pipe clearly at the cut line with a fine‑tip marker or a pencil to confirm accuracy.
The practitioner aligns measurements from fittings or end points, accounting for socket depth or overlap where applicable. Marks should be perpendicular to the pipe axis and visible after handling.
If multiple pipes require identical cuts, use a template or transfer mark to maintain consistency. Before cutting, inspect for burrs or imperfections near the mark and remeasure if the pipe has been reoriented.
- Use a square or combination square for true perpendicular lines
- Verify measurement from both ends when possible
- Mark allowance for insertion depth or fittings
Choose The Cutter
Several common cutters are suitable for thin‑wall (Schedule 40) PVC, and selecting the right one depends on pipe diameter, access, and desired cut quality.
For small diameters (½”–1½”), a ratcheting PVC cutter yields straight, fast cuts with minimal effort. A hacksaw works for any diameter and tight spots but requires steady support and a fine-toothed blade. A miter box improves sawing accuracy.
For larger pipes, a powered reciprocating saw with a fine-tooth blade speeds cutting but needs controlled motion. Tube cutters provide clean results on softer tubing.
Choose tools that match pipe size, workspace clearance, and user comfort.
Deburr And Smooth
Deburr and smooth the cut edges to guarantee a proper fit, prevent leaks, and remove sharp fragments that can damage seals or impede flow.
The technician inspects the rim for burrs, flash, and unevenness, then uses a deburring tool, utility knife, or fine file to pare away imperfections. Rotational strokes preserve roundness; light passes avoid gouging. A quick wipe removes dust before dry-fitting.
Final sanding with 120–220 grit refines the surface for solvent welding or gasket seating.
- Use a chamfering motion to ease insertion without reducing wall thickness.
- Test fit frequently to confirm alignment.
- Clean with a rag before bonding.
Cutting Thick‑Wall PVC (Schedule 80) : Step‑by‑Step
Cutting thick‑wall PVC (Schedule 80) requires slightly different technique and tools than cutting standard PVC due to its denser material and thicker walls; the following step‑by‑step guide outlines safe, accurate methods for measuring, securing, cutting, and finishing each pipe to guarantee proper fit and clean ends.
Measure twice and mark clearly with a fine permanent marker. Clamp the pipe in a vise or pipe clamp with protective jaws to prevent crushing.
Use a fine‑tooth hacksaw or a ratcheting PVC cutter rated for Schedule 80; cut slowly with steady pressure.
File or deburr the inside and outside, then test fit before final assembly.
How to Cut Large‑Diameter PVC (4+) Cleanly
Use a steady, controlled approach when working with PVC pipe 4 inches and larger, since the increased diameter and wall stiffness demand different handling and tools than smaller sizes. Support the pipe along its length, mark cut lines clearly, and select a saw that offers both reach and smooth, consistent cutting action.
Rotate the pipe slowly if using a handsaw or reciprocating saw to prevent binding; for power tools, use a guide or jig to maintain perpendicular cuts. Deburring and chamfering remain essential to guarantee proper seating and glue coverage after cutting.
- Use a pipe cradle or rollers for stability
- Choose a coarse-tooth blade rated for PVC
- Wear eye and hearing protection
Making Precise Angled Cuts and Miter Joints
Angles and miters require careful setup and measurement to guarantee joints align cleanly and hold under load. For angled cuts, mark the cut line with a protractor or angle guide, secure the pipe in a miter box or clamp, and cut slowly with a fine-tooth saw or powered rotary tool. Deburr and test-fit; adjust with a file or sanding drum. For miter joints, cut complementary angles, check square, and dry-fit before solvent welding. Proper relief or scarfing prevents stress concentration on glued seams.
| Step | Tip |
|---|---|
| Measure | Use a bevel protractor |
| Fit | Dry-fit before solvent |
Cutting PVC for Slip Fittings and Couplings
After verifying mitered pieces and dry-fitting angled joints, attention turns to preparing straight sections for slip fittings and couplings.
The pipe end must be square, deburred, and measured for proper socket depth to guarantee full insertion and solvent-weld contact. Cleanliness and correct chamfering prevent misalignment and excess adhesive squeeze-out.
For couplings, trim to length accounting for both sockets; for repair or extension, mark insertion depth on the pipe and test fit before cementing. Proper cuts reduce stress and leaks, and make assembly faster.
- Square, deburred ends for consistent bonding
- Measure and mark insertion depth
- Clean and chamfer before solvent application
How to Cut PVC for Threaded Ends Without Damage
Prepare threaded PVC ends by cutting carefully to preserve the factory threads and guarantee a clean base for tapping new threads; a square, burr-free cut prevents cross-threading and sealing issues.
Mark the cut line just beyond the molded thread, clamp the pipe in a padded vise or use a miter box for stability, and saw slowly with a fine-tooth hacksaw or PVC-rated saw.
Deburr the inside and outside edges with a utility knife or file, then lightly chamfer the outside to ease coupling. Avoid aggressive sanding that removes thread peaks.
Verify thread integrity by test-fitting the mating part before final assembly.
Cutting PVC Conduit in Tight Spaces
When access is restricted, cutting PVC conduit requires alternate techniques to work around obstructions and maintain straight, clean cuts.
Practitioners often rely on limited-access methods such as scoring and rotating or using compact cutting tools designed for tight quarters.
Choosing the right small-tool option—mini hacksaws, ratcheting PVC cutters, or oscillating multi-tools with a fine blade—keeps the job efficient and safe.
Limited Access Techniques
Maneuvering tight spaces requires compact tools and careful planning to cut PVC conduit without damaging surrounding structures or the conduit itself. Techniques focus on precise measurement, stable support, and protecting nearby surfaces. Access points are assessed; the conduit is marked and stabilized to prevent binding.
When full rotation or leverage is impossible, incremental cutting and frequent deburring maintain alignment and fit. Protective padding shields finishes, and temporary removal of nearby fixtures can simplify the task.
- Use clamps with low-profile jaws and padding to secure conduit without crushing.
- Create guide marks from multiple angles to confirm cut location.
- Employ incremental cuts, checking alignment and fit after each pass.
Small-Tool Options
Select compact, low-profile cutting tools designed for confined work areas to make reliable cuts on PVC conduit where full rotation or large leverage isn’t possible. The narrative describes ratcheting PVC cutters, mini hacksaws, rotary tools with cutting wheels, and tubing cutters with slim profiles. Each suits specific clearances and diameters; secure the conduit, mark cut, work slowly, and deburr. Safety glasses and gloves are recommended. Small tools reduce fatigue and prevent damage in tight runs. Choose based on bend radius, access angle, and required finish.
| Tool | Best for | Note |
|---|---|---|
| Ratcheting cutter | Clean cuts, small diameters | Requires slight clearance |
| Mini hacksaw | Restricted depth | Slower, versatile |
| Rotary tool | Tight corners | Control heat buildup |
| Slim tubing cutter | Long runs in narrow spaces | Smooth finish |
Fast Methods to Cut Many PVC Pieces (Batch Hacks)
Speed and consistency matter when dozens of PVC lengths are required, so batch-cutting techniques center on jigs, stops, and power tools that repeat the same cut quickly and accurately.
A repeatable setup minimizes measurement time: clamp a pipe stop to a miter saw fence or build a simple sled for a chop saw, mark one template, then feed each piece.
When many identical parts are needed, stack-cutting with a reinforced vise or using a tubing cutter on a guide rail increases throughput.
Safety and secure clamping remain essential to prevent shifting and poor edges.
- Use a fixed stop block on a miter saw
- Stack and clamp multiple pipes for a single cut
- Employ a chop-saw sled or guided tubing cutter
Deburring and Cleaning Cut Edges for Glue and Fittings
After cutting, the pipe ends are inspected and any burrs are removed with a deburring tool or a fine file to guarantee a smooth mating surface.
A clean, smooth edge prevents poor fit and uneven glue distribution.
Before applying cement, the joint surfaces are wiped with a solvent-based cleaner to remove dust, grease, and shavings.
Smooth Burr Removal
Trim away the jagged edge and loose shavings left by a saw to prepare the pipe for a secure glue joint or snug fitting. A chamfering tool, deburring knife, or file removes burrs and sharp edges, ensuring parts seat fully and adhesive spreads evenly.
Work around the circumference, checking for raised material and internal lips that impede insertion. Clean the surface of dust and particulate after deburring to prevent gaps. Inspect the cut with light; smooth connections indicate readiness for assembly.
Consistent technique preserves pipe roundness and prevents stress concentrations that can cause leaks or weak fittings.
- Use light, controlled strokes for uniform chamfering.
- Rotate the pipe while filing for even removal.
- Recheck and remove any remaining internal burrs.
Solvent-Wipe Prep
With burrs removed and surfaces inspected, the next step is to wipe the cut edges with a solvent to remove dust, oils, and microscopic plastics that can interfere with adhesion.
Using a lint-free cloth or paper towel dampened with PVC cleaner or primer, the technician quickly swipes both the pipe and fitting interiors.
Ascertain complete coverage of the mating surfaces and allow a few seconds for the solvent to evaporate.
Avoid touching cleaned areas afterward.
Proper solvent-wipe prep promotes chemical fusion, reduces joint failure, and yields cleaner glue lines.
Dispose of used rags safely and follow product ventilation and safety instructions.
Best Sanding Tools and Grit for Smooth PVC Edges
Choosing the right sanding tools and grit is essential for producing clean, burr-free PVC edges that fit and seal properly. A light, consistent finishing removes burrs without deforming the pipe or widening the cut.
Hand sanding with a small block or folded sandpaper gives control on short lengths; a medium-grit (120–180) removes burrs quickly, followed by fine (220–320) for a smooth finish.
Deburring tools and rotary files speed work on thicker walls but require gentle passes to avoid melting. Clean the dust before solvent application to guarantee proper bond.
- Hand sanding: control and precision
- Rotary tools: speed, use low RPM
- Grit progression: 120→220→320
Squaring Up a Cut That Went Off‑Center
When a cut lands off‑center, the first step is to assess the angle of deviation to determine how much material must be removed.
Next, a corrected cutting line is marked around the pipe to guide the adjustment.
Finally, the edge is filed and squared with a rasp or sanding block until it is true and even.
Assess The Off‑Center Angle
An off-center cut leaves an angled face that must be evaluated before any attempt to square it up. The worker examines the bevel, noting tilt direction, maximum departure from true perpendicular, and whether the cut is continuous or stepped.
Visual inspection and simple measuring determine how much material must be removed and from which side. Consideration of joint requirements and fitting clearances guides the chosen corrective method. Any damage near the edge is inspected to decide if trimming or replacement is preferable.
Plan the squaring approach to preserve length and alignment while removing the minimum necessary material.
- Measure tilt with a square or caliper.
- Inspect for stepped or jagged sections.
- Note required final perpendicular tolerance.
Mark Corrected Cutting Line
With the bevel assessed and the amount of material to remove established, the next step is to lay out a corrected cutting line that restores a true, perpendicular face.
Using a square or combination square, align the tool with the pipe axis and mark a reference line around the circumference at the desired stop. If the previous cut is visibly angled, measure the high point and transfer that offset around the pipe so the new line compensates uniformly.
For accuracy, rotate the pipe and recheck marks at several points. Dark, continuous marks improve saw guidance; avoid partial lines that invite wandering.
File And Square The Edge
Bring a flat file or deburring tool to the edge and begin removing the high spots identified by the corrected cutting line. The operator works steadily, using light, even strokes to shave plastic until the edge aligns with the mark.
Rotate the pipe frequently to maintain a true square and check alignment with a combination square. Finish by chamfering the inside and outside slightly to ease assembly and prevent stress risers.
- Use a firm, consistent angle and avoid digging to prevent gouges.
- Verify squareness at multiple points along the pipe circumference.
- Clean residual dust and inspect for thin areas before gluing.
Fixing Common Cutting Problems (Chatter, Melting, Rough)
Identify the specific defect before adjusting technique or tools: chatter shows as jagged, rhythmic gouges; melting appears as glossy, reformed edges; rough cuts display torn, fibrous surfaces.
For chatter, secure the pipe firmly, reduce feed pressure, and use a sharp blade with proper tooth geometry to prevent vibration.
For melting, slow the cutting speed, swap to a blade designed for plastics, and guarantee blade teeth are clean and sharp to reduce heat buildup.
For rough cuts, finish with a fine file or sandpaper, confirm blade alignment, and use steady, even strokes.
Inspect each correction and repeat as needed.
How Temperature Affects PVC Cutting and What to Do
Temperature has a direct impact on cutting performance: cold makes PVC brittle and prone to cracking while heat softens the material and increases melting or smear.
Operators should recognize these risks and adjust cutting speed, blade type, and support accordingly.
Working near room temperature (around 60–75°F / 15–24°C) generally yields the most reliable, clean cuts.
Cold Weather Effects
Cold weather makes PVC stiffer and more brittle, increasing the risk of cracking or splintering during sawing, scoring, or snapping.
In cold conditions, handlers should allow pipe to acclimate, use sharp blades or fine-tooth saws, and employ slower, controlled cuts to reduce impact stresses. Clamping reduces vibration and uneven loading.
If snapping is required, pre-warming methods at safe distances (briefly using body heat or warm air) can help without introducing heat-softening risks discussed later.
- Inspect for micro-cracks before cutting and discard compromised sections.
- Support long runs to prevent flex under cut forces.
- Wear gloves to maintain control and dexterity.
Heat Softening Risks
Heat exposure can soften PVC, reducing its rigidity and making cuts less clean while increasing the chance of deformation, melting, or adherence to blade teeth.
When PVC warms, saws and rotary tools can drag or snag, producing rough edges and heat-affected zones that require extra finishing. Excessive warmth also increases risk of dimensional change, causing joints to misalign.
To mitigate issues, allow material to cool, use sharp blades with fine teeth, reduce cutting speed, and apply steady support to prevent flexing.
For heat buildup, pause periodically and clear chips to maintain cutting efficiency and prevent localized melting.
Best Working Temperatures
A controlled ambient range around 50–80°F (10–27°C) generally yields the cleanest PVC cuts, because the material retains sufficient rigidity to resist flexing while remaining less brittle than at lower temperatures.
Outside this band, colder conditions increase the risk of cracking and chipping, while higher temperatures promote softening, melting, and poor edge quality. Practitioners should monitor conditions and adjust technique: slower feeds in cold, lighter pressure in heat, and allowing warmed pipe to return to stable temperature before final trimming.
Use appropriate PPE and test cuts to verify recommended settings for each resin formulation.
- Cold: preheat sparingly to reduce fractures.
- Hot: cool sections or shorten blade dwell.
- Moderate: ideal for standard saw speeds and clamps.
Cutting PVC Outdoors vs Indoors: Ventilation & Cleanup
When cutting PVC, location matters: outdoors offers natural airflow that disperses dust and solvent fumes, while indoor work requires planned ventilation to prevent accumulation and protect occupants.
Outdoors, choose a level, shaded area away from foot traffic; secure the pipe and control debris with a tarp or drop cloth.
Indoors, open windows and use a box or inline fan to exhaust air; isolate the workspace with plastic sheeting.
In both settings, wear a dust mask or respirator, eye protection, and gloves.
Sweep or vacuum up shavings promptly with a HEPA or shop vacuum, then dispose of waste per local guidelines.
How to Cut PVC Without Specialized Tools (DIY Hacks)
If access to a miter saw or PVC cutter is limited, simple household items can still produce clean, usable cuts with care and patience.
The detached observer notes that preparation, steady hands, and correct technique matter more than tool prestige. Mark the line, secure the pipe, and use progressive strokes to avoid binding.
File or sand the edge to remove burrs and check fit before solvent or primer application. Common DIY approaches work for small projects but require attention to safety: eye protection and controlled cutting pace minimize chips and irregularities.
- Use a hacksaw with a new blade and a miter box
- Rotate the pipe while cutting with a utility knife scoring first
- Finish edges with sandpaper or a deburring tool
When to Replace Dull Blades : Blade Type Guide
Several indicators signal that a cutting blade has dulled enough to warrant replacement, and recognizing them promptly preserves cut quality and safety. Dullness symptoms vary by blade type: saw blades bind, snips tear, and rotary wheels scratch. Replace blades when cuts require extra force, produce rough edges, or smoke appears. Frequency depends on PVC thickness and usage.
| Blade Type | Dullness Sign | Replacement Interval |
|---|---|---|
| Hacksaw | Binding, slow feed | After heavy job or teeth blunted |
| PVC saw | Chipping edges | Every few projects |
| Ratchet cutter | Tearing | When clean cuts stop |
| Rotary wheel | Melting | When scoring increases |
Tool Maintenance to Keep Cuts Consistent
Maintain tools regularly to confirm every PVC cut stays true and safe. Routine care extends blade life, prevents binding, and preserves alignment.
Inspect saw blades, ratcheting cutters, and deburring tools before use. Clean resin and dust buildup after each session to avoid abrasive wear. Lubricate moving parts lightly to confirm smooth action and consistent pressure.
Replace any warped or chipped components promptly to maintain square cuts and reduce kickback risk.
- Sharpen or replace blades when nicking increases or cut quality declines.
- Wipe and dry tools; remove solvent residues that corrode metal.
- Check and tighten fasteners, springs, and pivots periodically.
Cutting PVC for Press‑Fit and Solvent‑Weld Joints
Different joint types demand specific cutting and finishing techniques to guarantee leak‑free connections: press‑fit joints require square, burr‑free ends that match socket tolerances, while solvent‑weld joints need a slightly chamfered edge and clean surfaces to allow proper primer and cement contact. For press‑fit, cut with a fine-toothed saw, file perpendicular, and deburr internally. For solvent‑weld, remove burrs lightly, chamfer 15–30°, wipe dust, and apply primer then cement per manufacturer directions. Test fit before solvent. Handle pieces gently to avoid contamination or deformation that compromises seals.
| Joint Type | Finish Needed |
|---|---|
| Press‑fit | Square, burr‑free |
| Solvent‑weld | Slight chamfer, clean |
| Test | Dry fit first |
Cutting Out and Rejoining Damaged PVC Sections
Remove the damaged section by cutting back to sound pipe and leaving square, clean ends for reconnection. The remaining pipe is measured, deburred, and dried; replacement length is confirmed to maintain proper alignment and slope.
For solvent-weld repairs, chamfer and apply primer then cement evenly; for mechanical couplings, select appropriate size and torque fittings. Test fittings dry-fit before final assembly.
After joining, allow full cure time per manufacturer before pressurizing. Inspect joints for gaps, misalignment, or excess adhesive and correct immediately to prevent leaks.
- Verify matching material and diameter for replacement pieces
- Maintain original pipe slope and alignment
- Clean mating surfaces thoroughly before bonding
Quick Pre‑Cut Checklist
Preparation prevents mistakes: before cutting, the installer verifies pipe material and diameter, confirms required slope and alignment, and gathers the correct tools and safety gear.
A concise checklist follows: measure twice and mark cut lines with a fine, visible marker; note end orientation for fittings; inspect for internal obstructions and buried services; select blade or cutter sized to the pipe; set up a stable work surface and clamp points; guarantee adequate lighting and ventilation; wear gloves, eye protection, and a dust mask; have a deburring tool and primer/cement ready; clear excess personnel and flammable materials from the work area.
Simple Jigs and Fixtures You Can Build at Home
A handful of simple jigs and fixtures can greatly increase accuracy and safety when cutting PVC pipe at home.
A sturdy base with a clamping block holds pipe square; a sliding stop guarantees repeatable lengths; and a mitre guide yields consistent angle cuts.
Materials are basic: scrap plywood, screws, bolts, and a bench clamp.
Construction focuses on right angles, secure fastenings, and smooth surfaces to avoid pipe damage.
Proper marking and trial cuts verify alignment.
These jigs reduce movement, improve edge quality, and speed work without special tools.
Maintenance is minimal: tighten fasteners and replace worn pads.
- Clamping block jig
- Sliding stop fixture
- Mitre guide
Cost vs Convenience When Choosing a PVC Cutter
Choosing between different PVC cutters often comes down to balancing cost against convenience: cheap handheld saws and basic ratchet cutters minimize upfront expense but demand more time and effort, while higher-end battery-powered or compound-action tools increase comfort and speed at a higher price. Selection should reflect frequency of use, pipe diameter, and tolerance for physical effort. Occasional DIYers may prefer budget tools; professionals benefit from faster, ergonomic models that reduce fatigue. Consider blade replacement costs and maintenance.
| Type | Cost | Convenience |
|---|---|---|
| Hand saw | Low | Low |
| Ratchet cutter | Low-Med | Medium |
| Compound-action | Med | High |
| Battery-powered | High | Very High |
Project Examples and the Recommended Cutting Method
Several common PVC projects illustrate which cutting method is most efficient and why.
For short, precise fittings in plumbing, a ratcheting PVC cutter delivers clean, square cuts quickly.
Long runs for irrigation or conduit favor a fine-tooth handsaw or miter saw for straightness and speed.
Thin-walled decorative or craft tubing benefits from a utility knife or tubing cutter to avoid crushing.
- Plumbing fittings: ratcheting cutter for square, burr-free ends.
- Long lengths: miter saw or fine-tooth saw for uniform, straight cuts.
- Craft/thin tubing: tubing cutter or sharp knife to preserve shape and finish.
Troubleshooting Noisy, Rough, or Melted Cuts
When PVC cuts sound loud, feel rough, or show melted edges, the problem usually traces to tool speed, blade condition, or improper technique; diagnosing those three factors quickly isolates the cause and guides the fix.
Inspect the blade for dullness, missing teeth, or clogged plastic; replace or clean as needed.
Match tool speed—slower for handheld saws, moderate for circular saws with fine-tooth blades—and use steady feed pressure to prevent rubbing and heat buildup.
Confirm proper support and secure clamping to avoid vibration.
Finish edges with a file or deburring tool.
Test on scrap before proceeding.
Conclusion
Like a compass finishing a circle, the right cut brings PVC from raw stock to precise purpose. Choosing the correct blade or cutter—whether handsaw whispering through thin pipe or a ratchet’s decisive bite—turns rough edges into clean seams. Simple jigs steady hands, miter saws speed work, and patience prevents melting or chipping. With tools matched to size and task, even small projects snap together neatly, saving time, money, and headaches.