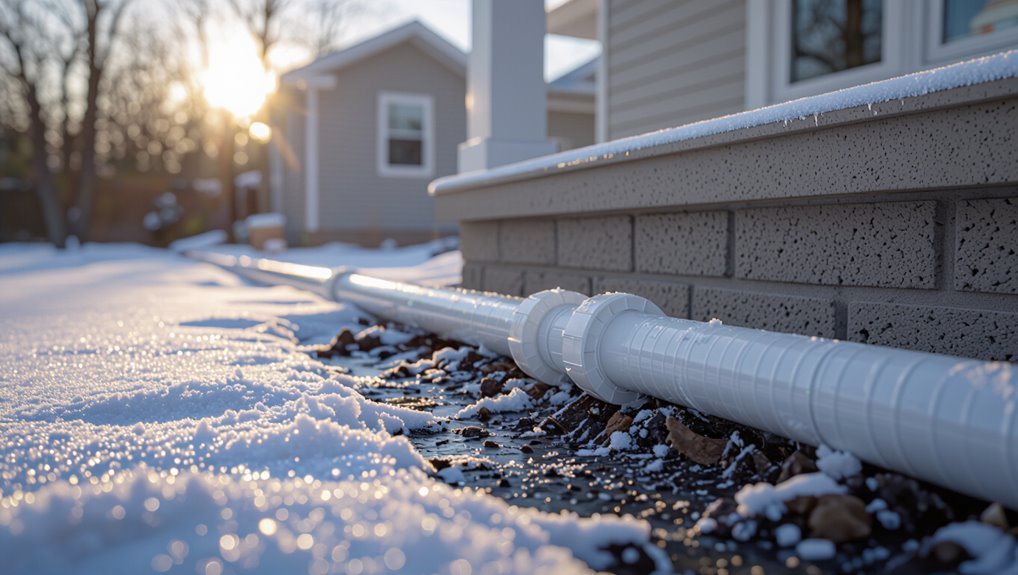
Do PVC Pipes Freeze? Cold-Weather Tips to Protect Your Pipes
Yes, PVC water pipes can freeze when temperatures drop to 32°F (0°C) or lower, particularly in areas where water remains stagnant. Here are key takeaways to help protect your pipes from freezing:
- Understand Vulnerable Areas: Pipes located in exterior walls, attics, crawlspaces, basements, and seldom-used fixtures are most at risk.
- Insulate Pipes: Use insulation on vulnerable pipes to help maintain a stable temperature.
- Drain Outdoor Lines: Ensure outdoor water lines are drained before cold weather hits.
- Open Faucets: Allow faucets to drip during cold snaps to keep water flowing, reducing the chance of freezing.
- Use Heat Tape: Consider applying heat tape to areas at risk of freezing.
- Consult a Plumber: If you have ongoing concerns, a plumber can provide further guidance on thawing, prevention, and inspection.
Taking these steps can help prevent your PVC pipes from freezing and suffering damage.
Do PVC Pipes Freeze? Quick Answer & First Steps?
Although PVC can tolerate low temperatures, it still freezes under typical winter conditions. When water inside a PVC pipe freezes, it expands and can crack or burst the pipe.
The quick answer: yes, PVC pipes can freeze if water inside turns to ice.
First steps after suspecting freezing: shut off water to the affected section if possible, open nearby faucets to relieve pressure, and locate exposed or uninsulated piping.
Apply gentle heat (hair dryer, heat lamp, or warm towels) moving from faucet toward the frozen area. Avoid open flames and excessive heat.
After thawing, inspect for leaks and consider insulating or relocating vulnerable pipes.
How Cold Before PVC Water Actually Freezes?
How cold does it need to be for water in PVC pipes to freeze? Water freezes at 32°F (0°C) under standard conditions, but several factors shift risk inside pipes.
Moving water resists freezing longer than standing water. Pipe diameter matters: narrow lines freeze faster.
Outdoor exposure, wind chill, and duration of cold spells lower internal temperature; insulation and surrounding soil or air temperature moderate it.
Salt or other dissolved substances depress freezing point slightly. Consequently, sustained ambient temperatures at or below 32°F, especially overnight and combined with poor insulation, create the highest likelihood that water inside PVC pipes will freeze.
Why Ice : Not PVC : Causes Pipe Bursts
Temperatures at or below freezing set the stage for problems in PVC plumbing, but the immediate cause of most ruptures is the expanding ice, not failure of the plastic itself.
When water freezes it increases in volume about 9%, generating internal pressure that exceeds the tensile strength of the pipe wall or joins. Expansion often forms ice plugs that trap liquid between frozen sections, concentrating pressure and forcing seams or thinner-walled areas to split.
PVC remains relatively flexible but cannot accommodate localized volumetric expansion. Consequently, burst locations correlate with trapped water and constrictions rather than intrinsic material breakdown, making prevention focused on avoiding ice formation.
Which Home PVC Pipes Are Most at Risk
Attention focuses on PVC lines that run through unheated interior spaces and those routed outdoors, as both face elevated freezing risk.
Indoor cold-prone lines include pipes in basements, crawlspaces, attics, and exterior walls where ambient temperatures can fall below freezing.
Outdoor exposed runs—especially those lacking insulation or buried shallowly—are similarly vulnerable and warrant preventive measures.
Indoor Cold-Prone Lines
When indoor PVC lines run through unheated or poorly insulated spaces—crawlspaces, basements against exterior walls, or attic eaves—they become the most vulnerable to freezing and cracking.
Cold-prone indoor runs include supply lines to seldom-used bathrooms, laundry hookups, and utility sinks tucked near exterior walls.
Long horizontal runs without insulation, lines in unconditioned closets, and pipes passing adjacent to drafty windows also face elevated risk.
Pipes feeding irrigation manifolds located inside garages or behind cabinets can freeze if ambient temperatures drop.
Identifying these locations enables targeted insulation, heat tape application, or rerouting to reduce freeze risk and prevent ruptures.
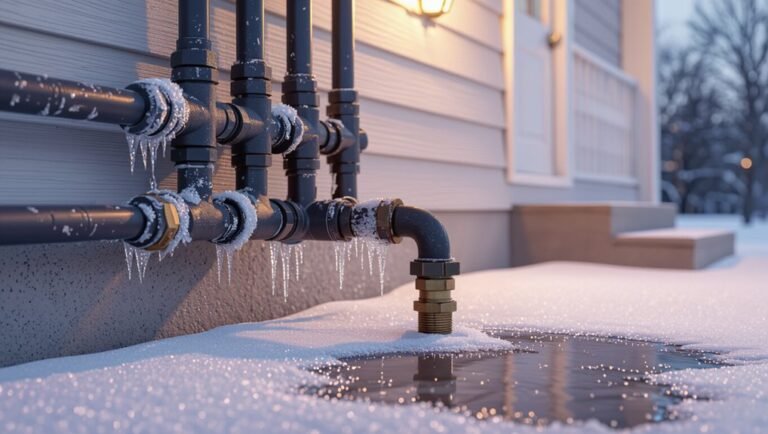
Outdoor Exposed Runs
Which outdoor PVC runs face the greatest threat from freezing? Exposed lines located along foundations, under decks, and in uninsulated crawlspaces are most vulnerable because they lack thermal buffering and are directly exposed to cold air.
Wind-driven chill and radiational cooling accelerate heat loss, increasing freeze risk and potential pipe damage.
- Pipes along exterior walls and shallow trenches, where soil cover is minimal.
- Runs beneath porches, under eaves, or attached to unheated outbuildings without insulation.
- Aboveground lines crossing yards or connecting to irrigation systems, exposed to wind and night-time temperature drops.
Target these areas first for insulation and protection.
Signs a PVC Pipe Is Frozen
How can one tell if a PVC pipe has frozen? Indicators include lack of water flow at faucets served by the pipe, unusually cold or frost-covered pipe surfaces, and bulging or distorted pipe sections visible in accessible areas.
Increased pressure upstream may cause intermittent trickles or sputtering when openings are used. Unusual sounds — creaks or thumps — can signal ice movement or thermal stress.
Nearby valves or fittings may feel extremely cold to the touch.
In severe cases, localized water stains or small wet spots appear when ice begins to crack, indicating a developing leak or rupture needing prompt inspection.
Immediate Steps If a PVC Pipe Freezes
If a PVC pipe is suspected to have frozen, the first action is to shut off the main water supply to prevent pressure buildup and potential bursting.
Once the supply is off, gentle, consistent heat should be applied to the affected section using a hair dryer, heat lamp, or warm towels — avoiding open flames or high-temperature sources.
These immediate steps reduce the risk of rupture and prepare the pipe for gradual thawing.
Turn Off Water Supply
Shut off the main water supply immediately to limit pressure buildup and prevent further expansion in the frozen section of PVC pipe. This action reduces risk of bursts and confines the problem while assessment proceeds.
After shutoff, drain accessible faucets and open outdoor spigots to relieve residual pressure. Notify household members and avoid using appliances that draw water until the issue is resolved.
- Confirm the valve is fully closed and label it if needed for others.
- Drain interior lines by opening sinks and flushing toilets to clear remaining water.
- Contact a plumber promptly if pipes show cracks, bulging, or if freezing recurs.
Apply Gentle Heat
Begin applying gentle heat to the frozen section as soon as it is safe to do so, concentrating on steady, moderate warming rather than rapid temperature changes.
Use a hair dryer, heat gun on low, or electric heating pad and move along the pipe to distribute warmth evenly. Wrap towels soaked in warm water if tools are unavailable.
Maintain a safe distance from fittings and insulation to prevent damage. Monitor for leaks as ice melts; stop heating immediately if cracking sounds occur.
Continue until flow resumes, then inspect pipe integrity. If thawing fails or damage appears, contact a professional plumber.
Safe Ways to Thaw PVC Pipes at Home
When PVC pipes freeze, safely restoring flow requires controlled, gradual warming to prevent cracking from sudden temperature changes or excessive internal pressure.
The homeowner should locate the frozen section, open nearby faucets to relieve pressure, and apply gentle heat along the pipe length. Portable space heaters, heat tape, or warm towels encourage even thawing while monitoring for leaks.
Work steadily and check joints frequently; once water flows freely, maintain warmth to prevent refreeze. If thawing seems slow or fittings are stressed, contact a professional to avoid damage.
- Apply heat evenly, moving along the pipe
- Keep faucets open to vent pressure
- Monitor for leaks and stress
What Not to Do When Thawing Pipes
Avoid using extreme or improvised methods that can damage PVC or create hazards; certain common reactions—like applying open flames, using boiling water, or striking frozen sections—significantly increase the risk of cracking pipes, bursting fittings, or causing burns and fires.
Do not pour boiling water directly onto pipes or joints; sudden thermal shock can fracture plastic.
Avoid torches, candles, or other open flames near plumbing or insulation.
Refrain from using chemical deicers not rated for potable systems.
Do not attempt heavy mechanical force such as hammering or chiseling to break ice.
Never ignore small leaks; delayed response worsens damage.
How to Find Hidden Frozen PVC Lines
The inspector looks for frost patterns on exposed surfaces as a visual clue to hidden frozen PVC lines.
From known access points, they trace pipe routes toward colder areas where freezing is most likely.
Combining surface frost observations with logical tracing narrows the search quickly.
Look For Frost Patterns
How can frost patterns reveal concealed frozen PVC lines? Observers note that surface frost often maps cold transfer from buried or enclosed pipes; linear, repeating, or branched frost on soil, insulation, or siding can indicate underlying frozen runs.
Patterns differ by flow direction, pipe depth, and surrounding materials. Visual inspection focuses on subtle contrasts and repetition rather than singular patches.
- Look for straight, linear frost streaks aligned with expected pipe routes.
- Note repeated alternating frost and clear bands suggesting joints or fittings.
- Compare adjacent surfaces: a colder, frostier strip beside warmer areas likely marks a hidden frozen line.
Trace From Access Points
Start at any obvious access point—outdoor spigots, service valves, crawlspace entries, or meter boxes—and move methodically along the plumbing path while feeling and looking for temperature changes and visual cues.
Note sudden cold spots on insulation, frost accumulation, or condensation lines that trace toward concealed runs. Tap fittings and joints for distinct sound changes: solid ice yields a duller response.
Use a noncontact infrared thermometer to map temperature gradients without disturbance. Follow drops in pipe temperature toward wall cavities, attic penetrations, or underfloor tunnels.
Mark suspected sections, then open access or consult a pro for targeted thawing and repairs.
How Ice Pressure Causes Pipe Bursts
When water inside a pipe freezes and expands, it exerts pressure against the pipe walls and any unfrozen water sections, creating stress concentrations at weak points such as joints or thin-walled fittings.
Ice formation increases internal pressure as expansion forces trapped liquid and creates longitudinal tensile stress in the pipe material.
PVC resists some deformation but can crack where stress exceeds material toughness.
Repeated freeze–thaw cycles worsen microfractures, and pressure spikes travel along liquid columns to burst at the weakest location.
Risk rises with long frozen runs, constricted flow, and preexisting damage.
- Localized stress at fittings
- Propagating pressure waves
- Cumulative material fatigue
How to Shut Off Water to Limit Damage
To limit damage from freezing, the homeowner should first locate and close the main water shutoff.
Outdoor spigots and hose bibs should be turned off and drained to prevent trapped water from freezing.
Finally, interior pipes and fixtures should be opened and drained or bled to remove remaining water and relieve pressure.
Locate Main Water Valve
A quick identification of the main water shutoff can prevent extensive damage when pipes freeze or burst. Knowing its location and operation enables rapid response, minimizing flooding and repair costs.
The valve is often near the water meter, where the supply enters the building, or in a utility area, basement, or crawlspace. Regular checks guarantee it turns freely and is labeled for household use.
If the valve is buried or corroded, arrange professional servicing to replace it with an accessible ball valve. Practice shutting it off so the household can act immediately during an emergency.
- Locate where the service line enters
- Verify valve type and condition
- Label and test periodically
Turn Off Outdoor Spigots
If outdoor spigots are shut off before freezing weather arrives, the risk of burst pipes and exterior water damage drops considerably.
Homeowners should locate the indoor shutoff valves that supply exterior faucets, typically in basements or crawl spaces, and turn them off fully. After closing the valve, opening the outdoor faucet relieves trapped water and pressure; a brief drip confirms drainage.
Where present, insulated frost-free spigots reduce risk but still benefit from shutoff. Inspect valves for leaks and replace corroded shutoffs.
Labeling the shutoff valves simplifies future winterization. Periodic checks guarantee readiness before each freeze cycle.
Drain Interior Pipes
Shut off the main water supply and drain interior pipes to remove standing water that can freeze and expand. After shutting the valve, open all faucets and flush toilets to relieve pressure and empty lines.
A small air inlet speeds drainage; open a high and a low faucet. Once drained, close faucets and leave a trickle in systems needing constant flow.
- Open faucets and flush toilets to clear water from fixtures.
- Use air inlet techniques: open both highest and lowest points to promote complete drainage.
- Insulate accessible pipes and keep the main valve labeled for quick winter access.
Insulation Options for PVC Pipes
When temperatures approach freezing, homeowners and professionals must evaluate several insulation options for PVC pipes to prevent ice formation and potential cracking.
Foam pipe sleeves fit snugly around straight runs and joints, offering R-value without bulk; closed-cell foam resists moisture and compresses for tight spaces.
Fiberglass wrap is suitable for unheated basements where higher temperature tolerance is needed, but requires a vapor barrier to avoid condensation.
Rubber foam provides flexibility for irregular layouts and outdoor exposed runs.
For buried PVC, use rigid foam board or soil insulation blankets to reduce frost penetration depth and protect against seasonal freeze–thaw cycles.
Use Heat Tape and Cables the Right Way
Although heat tape and self-regulating cables provide reliable freeze protection for PVC lines, correct selection, installation, and power management are essential to prevent hazards and guarantee effectiveness.
Choose products rated for PVC and appropriate pipe diameter; avoid constant-watt cable unless manufacturer permits direct pipe contact.
Follow manufacturer routing: run tape/cable along the pipe, not spiraled too tightly, secure with approved fasteners, and keep heating elements away from fittings that trap heat.
Connect to a GFCI-protected circuit and follow load limits; inspect for damage before energizing.
Regularly test operation during cold snaps and replace any compromised sections.
- Select PVC-compatible, rated heat tape
- Install per manufacturer routing and fastening
- Use GFCI protection and inspect before use
Choose Pipe Wrap and Foam Sleeves
Several types of pipe wrap and foam sleeves are effective for insulating PVC lines, but selection should be based on pipe diameter, exposure, and temperature range.
Closed-cell foam sleeves resist moisture and provide R-value for sheltered indoor runs. Split tubular foam with adhesive seams is quick for retrofit and common diameters.
Fiberglass wrap with vapor barrier suits long exterior walls where higher R-value is needed; secure seams against wind. For outdoor exposed sections, choose UV-resistant, thicker insulation or combine wrap with protective conduit.
Proper fit and continuous coverage are essential; gaps at joints and fittings undermine performance and invite freezing.
Winterize Outdoor Spigots and PVC Lines
To prevent freeze damage, outdoor spigots and exposed PVC lines should be shut off at the interior valve and fully drained.
Remaining sections merit fitted insulation or foam covers to reduce heat loss.
A secure weatherproof cover over the spigot completes the winterizing step.
Drain And Shut Off
Shut off the outdoor water supply at the interior shutoff valve, then open all exterior spigots to relieve pressure and allow trapped water to escape; this prevents freezing and reduces the risk of burst PVC lines.
After valves are closed and spigots opened, drain connected hoses and store them; standing water in hoses can refreeze and backflow into fittings.
Any inline vacuum breakers or sillcocks should be drained per manufacturer’s guidance. Remaining moisture in low spots can be removed by gravity and a brief air blow if accessible.
Close spigots only after confirming pipes are emptied and no further drainage occurs.
- Drain hoses and fittings
- Open spigots fully
- Verify no remaining water
Insulate And Cover
Typically, insulating and covering outdoor spigots and exposed PVC lines prevents heat loss, reduces freeze risk, and protects fittings from wind-driven cold.
Homeowners should use foam pipe sleeves for straight runs and neoprene or foam covers for faucets, securing materials with tape or zip ties.
Heat tape with thermostat control suits vulnerable sections but requires manufacturer guidelines and GFCI protection.
For long runs, add R-value with closed-cell foam or wrap with insulation and weatherproof tape.
Seal gaps where pipes exit walls and consider insulated boxes for spigots.
Regular inspections guarantee insulation remains dry, intact, and properly positioned before cold spells.
Protecting Crawlspace and Basement PVC
Basement and crawlspace PVC requires targeted protection because these confined, often damp spaces are prone to temperature swings and physical damage that can lead to cracking or freezing.
The homeowner should assess exposure points, support pipes off the ground, and shield them from condensation and debris. Address vents and insulation gaps to maintain a stable microclimate. Use materials compatible with PVC and avoid heat sources that over-stress joints.
- Raise and secure pipes on hangers or supports to prevent contact with cold surfaces.
- Wrap with closed-cell foam or insulation sleeves rated for damp environments.
- Install simple vapor barriers and clear drainage paths to reduce moisture.
Prevent Freezing in Seasonal or Unheated Homes
After securing and insulating pipes in crawlspaces and basements, attention should turn to seasonal or unheated homes where intermittent occupancy and wide temperature swings present a higher freeze risk.
Owners should winterize plumbing by draining lines, shutting off and isolating outdoor and nonessential indoor water supplies, and removing or disconnecting hoses.
Maintain minimal heat where feasible or install programmable thermostats to prevent prolonged drops below freezing.
Insulate exposed pipes and service entry points, seal drafts around foundation and utility penetrations, and consider remote temperature monitors with alerts.
Regular checks during cold spells reduce unnoticed failures and costly repairs.
Cheap Temporary Fixes Before Extreme Cold
Before a cold snap, inexpensive measures can reduce the risk of PVC pipe freezing.
Short-term insulation wraps, such as foam sleeves or even tightly secured towels, help retain heat around vulnerable runs.
Where safe and practical, a temporary heat source—like a low-wattage space heater or heat tape rated for PVC—provides additional protection.
Short-Term Insulation Wraps
When an unexpected cold snap approaches and permanent fixes aren’t feasible, short-term insulation wraps provide a quick, inexpensive way to reduce the risk of PVC pipes freezing.
These wraps—foam sleeves, fiberglass tape, or even layered bubble wrap—add immediate thermal resistance and slow heat loss long enough to ride out the chill. They are applied rapidly, require minimal tools, and can be secured with tape or zip ties.
Proper overlap and covering exposed joints matter. Remove wraps once temperatures recover to inspect for moisture. Consider these as temporary measures, not substitutes for proper insulation or professional repairs.
- Use foam sleeves for straight runs
- Wrap joints with fiberglass tape
- Layer bubble wrap where other materials lack
Temporary Heat Source
If short-term insulation wraps are not enough to slow freezing, a temporary heat source can provide targeted warmth to vulnerable PVC runs and fittings until warmer weather returns or permanent solutions are installed.
Small electric heat tape, low-wattage space heaters placed safely near exposed lines, or incandescent bulbs in enclosed fixtures offer quick, inexpensive warming.
Heat sources should be UL-rated for pipe use, installed per instructions, and kept clear of combustibles.
Monitor regularly, use GFCI protection, and avoid open flames.
These measures bridge the gap during cold snaps but are not substitutes for professional insulation, rerouting, or long-term heating solutions.
When to Replace PVC Because of Freeze Risk
Because repeated freezing and thawing can weaken PVC over time, homeowners and maintenance professionals should consider replacement when pipe integrity is compromised or the risk of future freezes is high.
Signs warranting replacement include visible cracking, softening, bulging joints, or persistent small leaks after thawing. If pipes are in uninsulated, exposed locations where repeated cold exposure is likely, proactive replacement reduces emergency repairs and water damage.
Evaluate age, repair history, and accessibility: older lines or those with multiple patched sections are less reliable. Decision-making should weigh immediate cost versus long-term risk and frequency of freeze events.
- Visible damage or recurring leaks
- Chronic exposure to freezing conditions
- Advanced age or multiple repairs
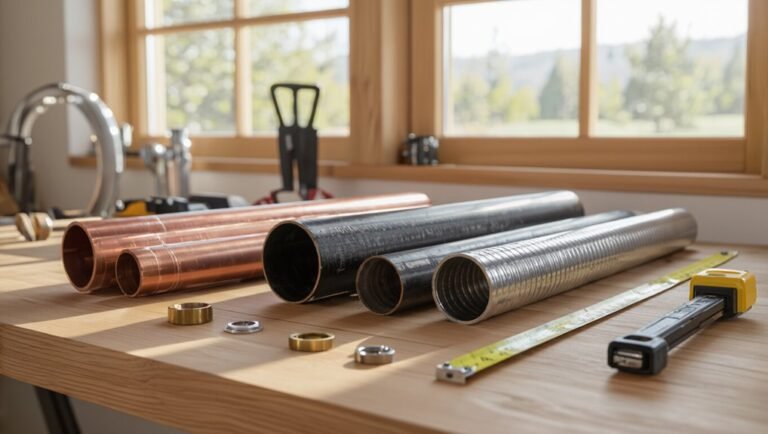
Pros and Cons: CPVC or PEX vs. PVC
Although similar in appearance and use, CPVC and PEX offer different trade-offs compared with standard PVC for cold-prone installations:
CPVC tolerates higher temperatures and joins with solvent cement like PVC but is more brittle in extreme cold, while PEX remains flexible when frozen and resists burst failures yet can be more costly and requires specific fittings.
CPVC suits mixed-temperature systems and uses familiar adhesives but may crack under severe freeze–thaw cycles.
PEX offers resilience against freezing, easier routing, and fewer joints, though UV sensitivity, specialized connectors, and higher material or installation costs can be drawbacks compared with PVC.
Spot and Repair a Burst PVC Pipe
When a PVC water line freezes and cracks despite material choice, locating and repairing the burst promptly minimizes water damage and restores system integrity.
First, isolate the supply and drain remaining water; then dry the area and examine the fracture length and fittings to decide between temporary clamping and permanent replacement.
Clean and chamfer pipe ends before joining. Use appropriate solvent cement or a mechanical coupling rated for potable water.
Test under low pressure, then restore normal supply slowly and recheck for leaks. Record the repair location and inspect adjacent sections for cold-related stress to prevent recurrence.
- Isolate and dry
- Assess and clean
- Join, test, monitor
Estimate Repair Costs After a Freeze
After a freeze, estimating repair costs requires evaluating the extent of damage, accessibility of the affected pipe, and local labor and material rates.
A visual inspection distinguishes minor cracks from full ruptures; confined-space or ceiling work increases labor time and cost. Replacement of short PVC sections is cheaper than extensive rerouting or insulation upgrades.
Additional expenses may include water damage remediation, drywall repair, and permit fees. Seasonal demand can raise rates.
Homeowners should obtain multiple written estimates, compare parts and labor breakdowns, and factor in warranty terms. A clear scope prevents surprises and helps prioritize repairs within a budget.
What to Tell Your Plumber After a Freeze
Homeowners should give the plumber a concise account of what occurred, where freezing was observed, and what immediate actions were taken.
The report should note visible damage, any unusual noises, loss of pressure, and whether water was shut off.
Include recent temperature extremes and duration, prior repairs, and whether pipes were insulated.
Photographs and timestamps help accuracy.
Be specific about access points and which fixtures are affected to speed diagnosis.
Share concerns about hidden cavities or exterior lines.
- Location of freeze and visible signs
- Immediate remedies applied and results
- Relevant history and supporting photos
Annual Winterization Checklist for PVC Pipes
A concise annual winterization checklist helps protect PVC pipes from freeze damage and simplifies pre-winter preparations.
Inspect exposed runs, joints, and fittings for cracks, sagging, or loose supports; replace degraded insulation and secure hangers.
Locate and label shutoff valves and test operation.
Drain and blow out irrigation lines and seasonal systems according to manufacturer guidance.
Seal gaps where cold air enters walls, crawlspaces, and basements.
Verify heat tape condition and thermostat settings in unheated areas.
Document actions, dates, and materials used for future reference.
Schedule a professional inspection if damage, recurring freezes, or complex systems are present.
Quick Do’s and Don’ts for Winter Pipe Protection
With the checklist complete, homeowners can move on to simple, high-impact actions that prevent pipe freezes. The guidance emphasizes practical, prioritized steps: maintain gentle heat, allow faucets to drip during extreme cold, and insulate vulnerable runs.
Equally important are actions to avoid that increase rupture risk or waste energy. Consistent monitoring and timely corrective measures minimize damage and repair costs. The tone remains pragmatic: small routines yield big protection.
Follow clear do’s and don’ts to reduce emergency calls and preserve plumbing integrity through winter.
- Do keep cabinet doors open and maintain steady indoor heat.
- Do insulate and seal gaps around pipes.
- Don’t leave outdoor spigots or hoses connected.
Conclusion
When winter tightens its fist, PVC pipes do not shatter from cold alone—ice is the true saboteur, expanding like a hidden glacier inside the line. Homeowners should treat plumbing like a vigilant gardener: insulate vulnerable runs, drain outdoor faucets, and thaw gently when needed. Thoughtful winterization trims risk and expense, turning brittle winter threats into manageable chores, so pipes endure the season’s breath and spring returns with flow intact.