Do Frozen Pipes Always Burst? Winter Plumbing Prevention Tips
Frozen pipes do not always burst, but they can crack or leak if ice, pressure, or corrosion weaken them. Key takeaways for homeowners include:
- Older galvanized or poorly insulated pipes are at higher risk for damage.
- If you suspect freezing, locate the affected areas and shut off the water supply.
- Open faucets to relieve pressure, and thaw pipes gently from the faucet toward the ice using low heat—avoid open flames.
- For brittle or corroded pipes, it’s best to call a licensed plumber.
Taking these preventive measures and conducting regular inspections can help protect your plumbing system during winter.
What to Do Immediately If a Frozen Pipe Is Found
Locate the frozen section and shut off the water supply to that area or the main valve if the exact spot is uncertain to prevent pressure buildup and burst pipes.
Then open nearby faucets to relieve trapped pressure and document visible ice or bulging pipe segments.
Inspect accessible pipe runs for frost and check adjacent fixtures for signs of leakage.
Notify occupants and restrict water use to isolated unaffected lines.
Arrange professional assessment if damage, discoloration, or corrosion appears.
If a leak is detected, drain affected systems and prepare buckets or towels to contain water.
Record actions and contact insurance if necessary.
How to Thaw a Frozen Pipe Safely
The homeowner should first locate the freeze by inspecting exposed pipes for cold spots and bulging.
Gentle heat, such as a hair dryer or heating pad, should be applied evenly working from the faucet toward the blockage.
After flow resumes, the plumbing should be checked for leaks or damage before restoring normal use.
Locate The Freeze
When temperatures drop and water flow slows, homeowners should first identify where a pipe has frozen before attempting any thawing.
Inspect visible piping in unheated areas—basements, crawlspaces, attics, exterior walls—and feel along runs for cold sections or frost.
Check faucets: open one and test successive fixtures to narrow the affected branch.
Look for bulging drywall, frost on the pipe, or unusually cold spots on interior walls.
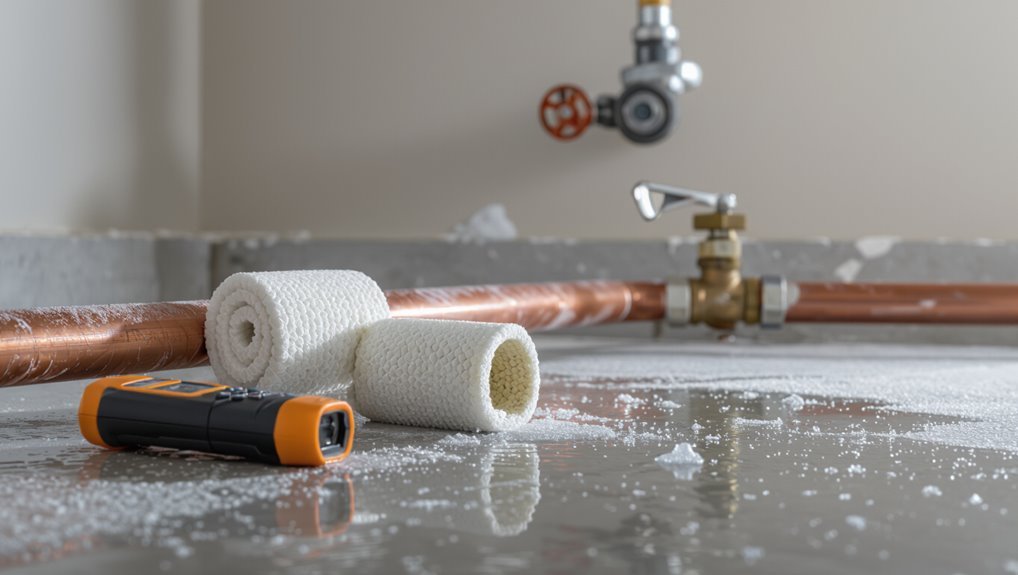
Use a hairdryer-lengthwise or a noncontact infrared thermometer to confirm temperature differences without applying heat directly.
Document the location for professionals if damage or uncertainty exists.
Apply Gentle Heat
Any thawing attempt should use gentle, controlled heat applied gradually along the frozen section to avoid pipe stress or sudden pressure changes.
Small portable heaters, heat lamps, or hair dryers directed along accessible lengths work well; wrap towels warmed with hot water for short intervals where appropriate.
Start nearest the faucet and move toward the blockage so melting ice can flow outward.
Avoid open flames, torches, or intense localized heat.
Monitor pipe temperature and surroundings to prevent damage to insulation or finishes.
If thawing does not progress within a reasonable time, or if joints feel brittle, consult a licensed plumber for safe resolution.
Check For Leaks
Once thawing begins, inspect accessible pipes, fittings, and nearby fixtures for leaks before restoring full water pressure.
The observer should look for drips, wet insulation, stains, or pooling water and feel joints for dampness. If a leak is detected, shut off the main valve, drain the system, and contain water to prevent damage.
Small hairline cracks may worsen under pressure; document location and photograph for repair.
After repairs or if no leak is present, reopen valves slowly while watching for new signs of leakage.
Reinsulate and monitor the area for several hours to confirm dryness and integrity.
What NOT to Do When a Pipe Is Frozen
Avoiding common mistakes is as important as taking the right steps when a pipe freezes; a single wrong action can cause a burst or worsen existing damage.
One should not apply open flames or high-heat devices, which can scorch pipes or nearby materials.
Do not attempt aggressive force to clear ice, such as hammering or drilling, which risks punctures.
Avoid closing all valves without relieving pressure elsewhere; some flow helps prevent pressure build-up.
Do not ignore small leaks or assume ice will melt safely without intervention.
Finally, avoid delaying professional help when uncertainty or visible damage exists.
Signs a Frozen Pipe Is About to Burst
A sudden bulge or visible crack in a pipe often signals that ice expansion has stressed the material and a rupture may be imminent.
Likewise, unusual changes in water pressure—either weak trickles or abrupt surges—can indicate blockages or partial failures upstream.
Prompt inspection and shutoff are recommended when these signs appear.
Visible Cracks Or Bulging
Cracks, bulges, and discoloration on exposed pipes are clear visual warnings that ice expansion has stressed the metal or plastic; these changes often precede a rupture.
Observers should scan accessible runs—under sinks, in crawl spaces, along exterior walls—for hairline fractures, raised seams, or areas where insulation separates from a swollen section.
Any deformation indicates weakened structural integrity and elevated leak risk once thawing begins.
Photograph and mark affected spots, shut off related valves if practical, and contact a plumber promptly.
Temporary measures—gentle warming with a hair dryer and added insulation—can reduce immediate danger but do not replace professional repair.
Unusual Water Pressure
How can pressure behavior reveal an imminent pipe failure? Sudden spikes or drops in water pressure often signal ice blockages creating stress points. A steady trickle turned forceful gush or a faucet that pulses indicates shifting ice or partial thawing. Observing meters, faucets, and appliance flows gives early warning; prompt isolation and thawing reduce rupture risk. Emotional stakes—rust, flood, frozen silence—underscore urgency.
| Symptom | Feeling |
|---|---|
| Pulsing flow | Unease |
| Sudden surge | Alarm |
| Weak trickle | Frustration |
| Meter fluctuation | Dread |
How Cold and Time Raise Burst Risk
When temperatures drop and freezing persists, water inside pipes contracts and exerts less pressure against the pipe walls while ice formation creates localized blockages. Over time these stresses concentrate at weak points—joints, fittings, or existing hairline flaws—increasing the likelihood of a sudden rupture.
Repeated freeze–thaw cycles widen microscopic cracks as ice expands and melts, progressively reducing structural integrity. Extended exposure allows corrosion and thermal fatigue to advance unnoticed. Slow temperature decline deepens penetration into poorly insulated sections.
Delayed detection compounds damage because pressure rises behind obstructions during thaw, producing forceful surges that exploit weakened areas and precipitate bursts.
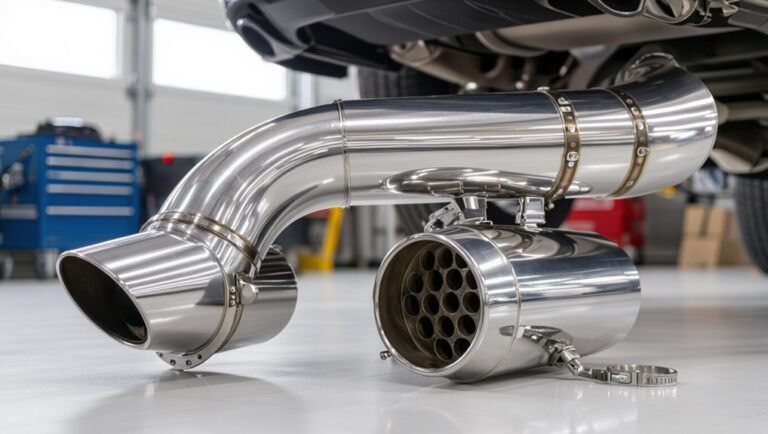
Which Pipe Materials Burst Most Often
Materials influence burst risk in cold weather, with copper and various plastics showing different strengths and weaknesses.
Copper resists some stresses but can fracture under repeated freeze–thaw cycles, while plastic pipes (like PEX) flex more and better tolerate expansion.
Galvanized steel presents additional concerns due to internal corrosion and reduced diameter, increasing pressure and likelihood of failure.
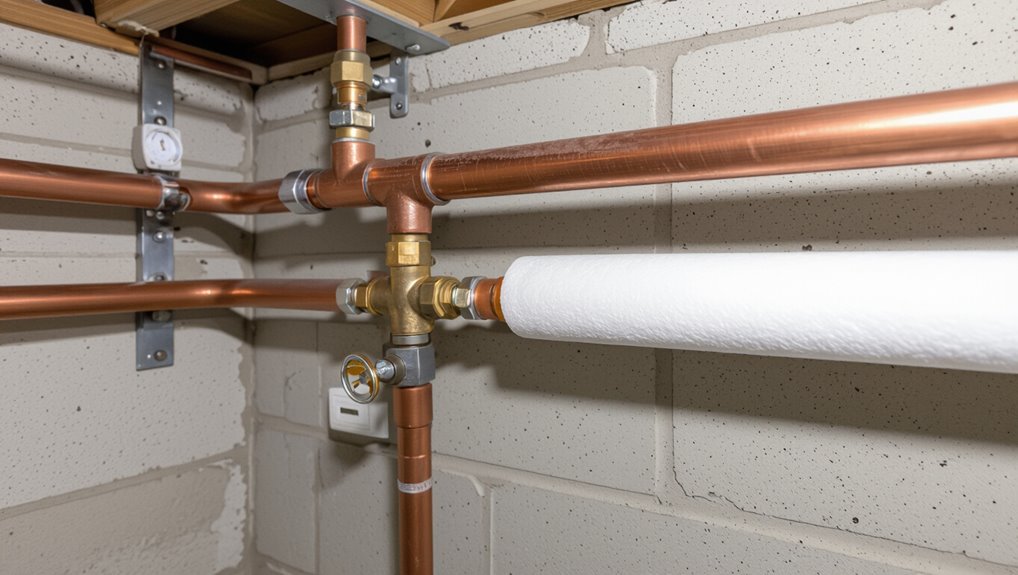
Copper Vs. Plastic Pipes
Although both copper and plastic pipes are common in residential plumbing, their failure modes differ markedly: copper tends to fail from corrosion, freezing expansion at weak joints, or pinhole leaks developing over decades, while plastic (PEX, CPVC, PVC) is more vulnerable to brittle cracking from UV exposure, chemical degradation, or damage from freezing when constrained.
Material choice influences freeze resilience: copper conducts cold faster, increasing freeze risk without insulation; PEX flexes to resist bursting but can kink or degrade.
Consider installation quality, exposure, and maintenance when evaluating risk.
- Copper: corrosion, joint weakness, pinholes
- PEX: flexes, resists bursting, vulnerable to UV
- PVC/CPVC: rigid, crack-prone under freeze or chemicals
Galvanized Steel Risks
How does galvanized steel compare for winter burst risk?
Galvanized steel corrodes internally over decades, developing pits and reduced wall thickness that weaken structural integrity. When water freezes, weakened sections are more prone to crack or split under ice expansion than intact modern materials.
Threaded joints and fittings also seize from rust, increasing leak likelihood during temperature cycling. Galvanized piping’s limited flexibility amplifies stress from ice pressure.
Maintenance history, age, and water chemistry influence failure probability; older galvanized systems pose higher risk.
Replacement with corrosion-resistant materials or lining mitigates concerns and reduces winter burst incidents.
Identify High‑Risk Spots in Your Home
Identifying high-risk spots requires a systematic room-by-room check of plumbing locations most exposed to cold, drafts, or poor insulation.
The assessment notes pipe runs along exterior walls, uninsulated basements, attics, crawl spaces, and near drafty windows or doors.
Attention focuses on older materials, low-clearance routes, and fixtures rarely used.
Documentation of locations and vulnerability informs prioritization for insulation, heat tape, or increased thermostat settings.
Safety and access considerations guide remediation planning without performing invasive work during cold snaps.
- Exterior-wall bathrooms and kitchens
- Unheated basements, crawl spaces, attics
- Isolated or infrequently used supply lines
How to Inspect Pipes Safely During a Freeze
When temperatures drop below freezing, a careful, noninvasive inspection of visible pipes and fittings can reveal early signs of stress—frosted surfaces, bulging sections, or unusual condensation—that signal increased risk of cracking or bursting.
The inspector should wear insulated gloves, use a flashlight, and avoid touching iced areas directly. Check joints, valves, and exposed runs in basements, crawl spaces, attics, and exterior walls for discoloration, frost lines, or hairline gaps.
Listen for unexpected sounds when faucets are briefly opened. Document findings and photograph problems for reference.
If signs of imminent failure appear, consult a licensed plumber rather than attempting risky repairs.
When to Shut Off the Water to Limit Damage
After noting signs of pipe stress during a freeze—frosted surfaces, bulging, hairline gaps—homeowners should understand the specific circumstances that warrant shutting off the water to minimize damage.
Immediate shutoff is advised when visible leaks or steady dripping appear, when pressure loss suggests a rupture, or when multiple fixtures fail simultaneously.
Shutoff limits flooding, reduces corrosion, and preserves structural elements until assessment or repair.
Locate main valve and shut off clockwise; drain lines by opening taps and flushing toilets.
Notify occupants and isolate electricity near flooded areas.
Keep records: valve position, time, observed damage for responders and insurers.
- Visible leaks or steady dripping
- Rapid pressure loss or lack of flow
- Multiple affected fixtures or widespread dampness
When to Call a Plumber vs. DIY
Because frozen-pipe risks range from minor condensation to full ruptures, homeowners should weigh the scope, complexity, and safety implications before attempting repairs themselves.
Simple situations—isolated exterior faucets, accessible exposed pipes, or a single slow drip—may be handled with basic tools, heat sources, and caution.
Call a licensed plumber when pipes are inaccessible, multiple fixtures are affected, there is visible cracking, significant leaks, or risk to structural elements and electrical systems.
Also engage professionals for sewer backups, gas-related appliances, or when shutoff location is unclear.
Timely professional assessment reduces repair costs and prevents missed damage.
Quick Temporary Fixes to Prevent Bursting
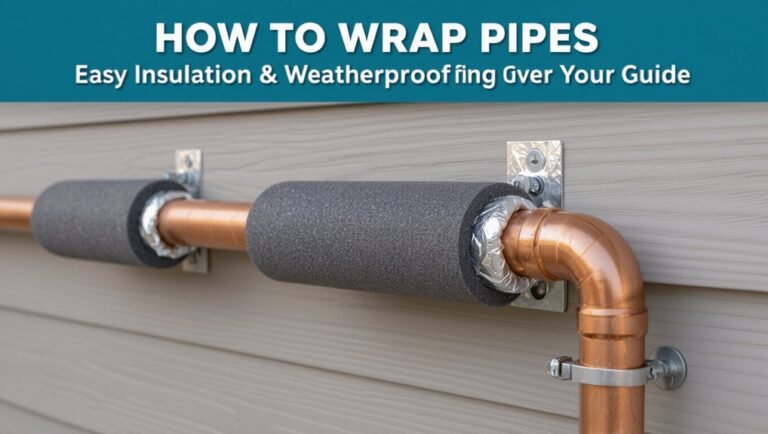
To reduce the risk of burst pipes during cold snaps, one practical approach is to insulate exposed pipes with foam sleeves or wrap.
Keeping a slow drip at faucets can prevent pressure buildup in vulnerable lines.
For added protection in very cold spots, applying approved heat tape provides targeted warmth until permanent fixes are arranged.
Insulate Exposed Pipes
A few simple materials can sharply reduce the risk of exposed pipes freezing and bursting during cold spells. One recommendation is to apply foam pipe insulation sleeves to exposed runs in unheated areas, ensuring snug seams and taped joints.
For irregular shapes or gaps, wrapping with fiberglass insulation or rags followed by plastic sheeting secures warmth. Heat tape or thermostatically controlled cable offers temporary active protection where allowed. Visible signs of frost formation indicate insufficient coverage and prompt immediate reinforcement.
- Foam sleeves for straight runs
- Fiberglass/plastic wrap for irregular sections
- Heat tape for active protection
Keep Water Dripping
After insulating exposed runs, maintaining a slow, steady drip from faucets can reduce the risk of pipes freezing by keeping water moving and preventing pressure build-up.
This temporary measure is especially useful during severe cold snaps or when travel prevents regular monitoring. Target faucets served by vulnerable supply lines, prioritizing those on exterior walls and in unheated spaces.
Use both hot and cold taps briefly where fixtures combine supplies to relieve pressure across the line. Drips need not be heavy; a trickle that produces intermittent droplets suffices.
Once temperatures stabilize, restore normal use and inspect for insulation or permanent repairs.
Apply Heat Tape
Install heat tape along exposed pipe runs as a targeted temporary defense against freezing. It provides localized warmth, plugs into standard outlets, and can prevent ice formation when applied correctly.
Users should select the appropriate tape type for metal or plastic pipes and follow manufacturer instructions to avoid overheating or fire risk.
- Run tape straight along the pipe, overlapping per instructions.
- Secure with approved clips, not with insulating tape that traps heat improperly.
- Test the system and combine with pipe insulation for best results; treat heat tape as temporary and inspect frequently for wear.
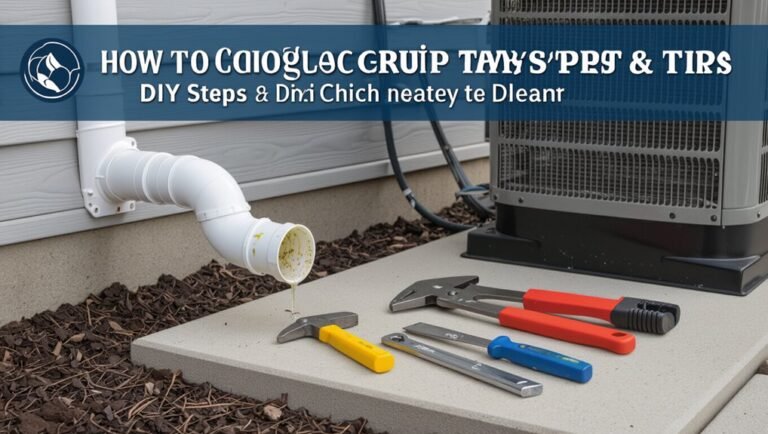
Affordable Insulation and DIY Pipe Protection
While homeowners often assume professional work is the only reliable option, affordable insulation and simple DIY pipe protection can greatly reduce freeze risk and heat loss without large expense.
Using foam pipe sleeves, heat tape, and sealing gaps around exterior walls are cost-effective measures that require minimal tools and time.
Homeowners can insulate exposed pipes in basements, crawlspaces, and attics with foam sleeves or fiberglass wrap, secure joints with tape, and install simple thermostatic heat cables where needed.
Weatherstripping and caulking around penetrations prevent cold drafts.
Regular inspection and modest materials yield measurable protection at low cost and effort.
When and How Much to Let Faucets Drip
If temperatures approach freezing and pipes run through unheated areas, homeowners should consider allowing a slow drip to keep water moving and relieve pressure from ice blockages.
A steady, pencil-thin stream from the coldest faucet on the affected side of the house often suffices; prioritize interior faucets linked to vulnerable runs. Run hot and cold slightly to guarantee both lines move.
Monitor overnight and during wind chills; adjust if flow stops or increases freezing risk elsewhere.
- Choose the faucet nearest the exposed pipe.
- Aim for a thin, continuous stream.
- Check flow and surrounding temperatures frequently.
Protecting Outdoor Faucets, Hoses, and Irrigation
After addressing indoor dripping to protect vulnerable interior runs, attention should shift to outdoor plumbing components that are directly exposed to cold.
Exterior faucets should be shut off from interior shutoffs and drained. Install insulated faucet covers over spigots to block wind chill and reduce freezing risk. Disconnect and store hoses; even short lengths left attached can trap water and freeze.
For irrigation systems, blow out lines or follow manufacturer’s winterization procedures to remove standing water from valves and sprinkler heads. Exposed backflow preventers require insulated enclosures or heat tape.
Regular inspection guarantees seals and insulation remain intact before hard freezes.
Seasonal Checklist Before Winter Arrives
Because proactive preparation reduces emergency calls and costly repairs, a concise seasonal checklist guides homeowners through essential winter plumbing tasks.
A focused walkthrough helps identify vulnerabilities, confirm insulation, and guarantee water can be shut off quickly if temperatures plummet. Routine steps minimize freeze risk without major investment.
- Inspect and add insulation to accessible pipes, attics, crawlspaces, and basements; seal gaps where cold air intrudes.
- Drain and store outdoor hoses; shut off exterior valves and open spigots to drain remaining water.
- Test and label main shutoff and individual valves; verify heat sources in unheated areas and schedule minor repairs.
Affordable Long‑Term Upgrades for Homeowners
When homeowners prioritize a few strategic, low-cost upgrades—such as pipe insulation, frost-proof exterior faucets, and upgraded shutoff valves—they considerably lower the long-term risk of freeze damage and costly emergency repairs.
Adding attic and crawlspace insulation, sealing drafts around plumbing penetrations, and installing pipe heating tape in vulnerable areas provide durable protection.
Replacing old shutoff valves with ball valves improves reliability and speeds responses during cold snaps.
Installing a programmable thermostat and smart leak detectors offers prevention and early warning without large upfront costs.
These measures balance affordability with longevity, reducing maintenance needs and minimizing the chance of winter plumbing failures.
Common Questions: Frozen Pipes, Thawing, and Insurance
How can homeowners spot the earliest signs of a frozen pipe and know whether to attempt thawing themselves or call a professional?
Visible symptoms include reduced or no flow, frost on exposed pipes, and unusual odors from plumbing.
Small, accessible sections may be safely thawed with hair dryers or heat lamps; never use open flames.
If pipes are hidden, bulging, or near joints, a professional should intervene to avoid rupture.
Regarding insurance, coverage varies: document damage promptly, keep receipts for repairs, and check policy exclusions for neglect.
Regular maintenance and timely reporting improve claim outcomes.
- Reduced or no flow
- Frost or bulging pipes
- Policy exclusions and documentation
Conclusion
Frozen pipes do not always burst, but prolonged cold and pressure spikes make it likely. One homeowner in Minnesota avoided disaster by catching early bulging at a kitchen line, shutting off the supply, and calling a plumber; thawing and a targeted replacement prevented flooding. Regular winter prep, quick action on signs of freezing, and simple insulating or heating measures greatly reduce risk, keeping homes safe and avoiding costly emergency repairs.