Can PEX Pipe Freeze? What Homeowners Need to Know About PEX Freezing
Yes, PEX pipe can freeze if exposed to prolonged subfreezing temperatures. However, it is more resilient to ice expansion compared to copper or PVC, often surviving freezes that would crack rigid pipes.
Key Takeaways:
- PEX can freeze, especially in exposed areas, poorly insulated sections, or during extended cold spells.
- While PEX can flex and withstand some freezing, ice buildup can still cause pressure, damage joints, or lead to leaks when thawing.
- To minimize the risk of freezing, homeowners should insulate pipes, allow a slight flow of water during extreme cold, and seal any drafts.
The following sections will provide detailed protection methods and solutions for dealing with frozen PEX pipes.
Quick Answer: Will PEX Freeze?
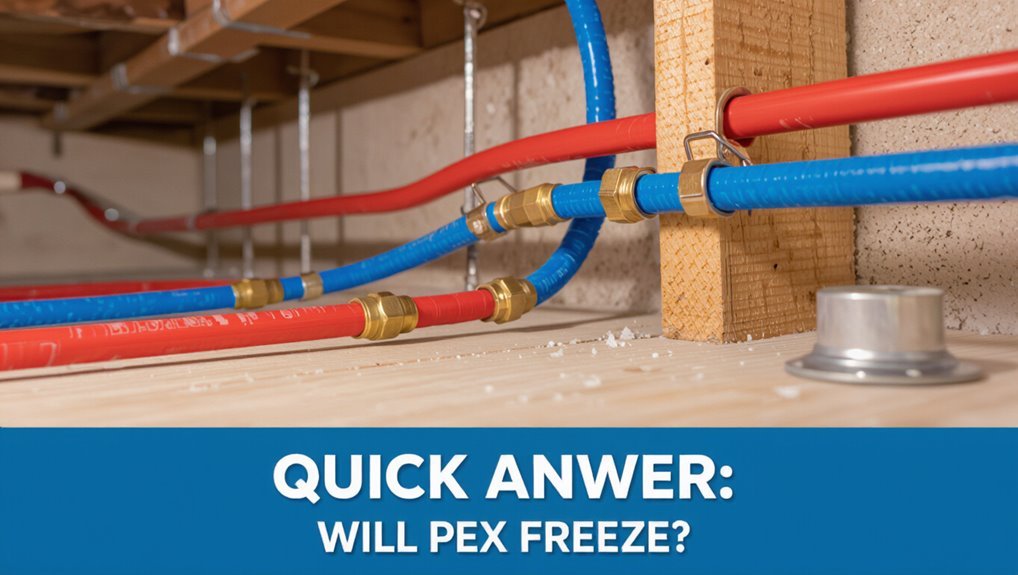
Will PEX freeze? PEX can freeze under sustained subfreezing temperatures, but it resists bursting better than rigid pipes due to flexibility and expansion capacity.
Freezing risk depends on exposure, insulation, water movement, and duration of cold. Interior or buried PEX in insulated spaces rarely freezes; outdoor, uninsulated, or poorly heated runs are vulnerable.
While ice formation can block flow and stress fittings, PEX’s tolerance often prevents catastrophic rupture that occurs with copper or PVC.
Evaluating placement, ambient temperature, and protective measures determines likelihood; homeowners in cold climates should consider these factors to assess freeze risk accurately.
Tonight: 6 Steps to Protect PEX From an Imminent Freeze
When a hard freeze is forecast for the night, prompt targeted steps can greatly reduce the risk of PEX lines freezing and causing leaks; the following six actions focus on preserving heat, keeping water moving, and protecting exposed runs until warmer conditions return.
Locate and open cabinet doors to let warm indoor air reach plumbing.
Allow a slow drip from faucets served by vulnerable PEX.
Set thermostat no lower than normal daytime temperature overnight.
Insulate exposed PEX with foam sleeves or pipe wrap.
Seal gaps where cold air enters walls or crawlspaces.
If available, apply a safe low-wattage heat tape per manufacturer instructions.
How PEX Differs From Copper and PVC in Cold Weather
After outlining immediate steps to protect PEX during a freezing night, attention turns to how PEX performs compared with copper and PVC in cold conditions. PEX remains flexible at low temperatures, resisting sudden cracking; copper is rigid and conducts cold into fixtures faster; PVC can become brittle and crack if brittleness thresholds are crossed. Each material shows different failure modes, installation considerations, and insulation needs.
| Property | PEX | Copper |
|---|---|---|
| Flexibility at low temp | High | Low |
| Thermal conductivity | Low | High |
| Brittleness risk | Low | Moderate |
| Property | PVC | Notes |
| Brittleness at cold | High | Depends on formulation |
Why PEX Is More Freeze‑Resistant Than Copper
Several physical properties make PEX inherently more freeze-resistant than copper: its polymeric flexibility allows expansion without fracturing, its lower thermal conductivity reduces the speed at which cold penetrates into water-filled sections, and its jointing methods tolerate slight movement without creating stress concentrations.
Additionally, PEX has higher strain capacity, permitting ice-induced expansion to deform the tube rather than crack it. Its seamless construction eliminates weak spots common at soldered copper fittings.
PEX also resists fatigue from cyclical freezing and thawing better than rigid metal. These factors combine to reduce the incidence of sudden rupture under freeze conditions compared with copper systems.
How and Why PEX Can Still Fail When It Freezes
PEX can still fail under freezing conditions despite its resilience because ice formation and thermal stresses create failure modes the material and system details cannot fully eliminate. Expansion of freezing water can stress fittings, crimps, or stiff sections, causing leaks. Repeated freeze–thaw cycles likewise fatigue joints. Poor installation—sharp bends, unsupported runs, or mixing metals—creates weak points. Localized ice plugs raise pressure upstream, forcing seals to deform or burst. Rapid thawing can dislodge debris that abrades linings. Detection is delayed in hidden runs, increasing damage. Preventive design, insulation, and controlled warming reduce but do not wholly remove these risks.
| Mode | Cause | Effect |
|---|---|---|
| Joint failure | Ice expansion | Leak/burst |
| Fatigue | Freeze–thaw cycles | Crack formation |
| Pressure spike | Ice plug | Seal deformation |
At What Temperature Does PEX Freeze?
Water in PEX pipes begins to freeze at 0°C (32°F), but the risk to the tubing depends on how the polymer behaves as ice expands.
PEX’s flexibility and tensile strength can tolerate some expansion, yet prolonged exposure to subfreezing ambient temperatures or inadequate insulation increases the chance of deformation or rupture.
Consequently, both the freezing point of water and the pipe’s material properties, plus insulation and local temperature conditions, determine freeze-related outcomes.
Freezing Point Of Water
Ice forms in plumbing when the liquid inside reaches its freezing point, which for pure H2O at standard atmospheric pressure is 32°F (0°C).
Water in pipes begins to form ice crystals at or near this temperature; dissolved minerals and pressure slightly alter freeze behavior but not the baseline.
Homeowners should expect freezing to initiate around 32°F in stagnant sections.
Flowing water resists freezing longer due to heat transfer and movement.
Thermal conditions, insulation, and exposure determine when pockets freeze, not the pipe material alone.
- Freezing begins near 32°F (0°C) for pure water.
- Impurities slightly shift freezing behavior.
- Flow delays ice formation.
PEX Material Performance
A flexible polymer like cross-linked polyethylene (PEX) does not ‘freeze’ in the same sense as water; instead, the concern is when temperatures cause the liquid inside the tube to freeze and how the material responds to the resulting expansion and brittleness.
PEX remains pliable at temperatures well below water’s freezing point, typically down to -40°F (-40°C) before the polymer itself becomes considerably brittle.
Performance varies by type and manufacturing process; cross-link density and additives influence low-temperature toughness.
Under freeze conditions, PEX can elongate to accommodate ice expansion, reducing burst risk compared with rigid pipes, though connectors remain vulnerable.
Insulation And Ambient Temps
Determining the temperature at which PEX pipes are likely to fail from freezing depends less on the polymer’s own cold tolerance and more on the ambient conditions, pipe insulation, and the presence of liquid inside.
PEX can remain flexible below 0°C, but trapped water expands and exerts pressure, so failure temperature varies. Insulation quality, duration of exposure, and airflow affect internal freezing.
Properly insulated lines in heated spaces resist freezing far below 0°C, while uninsulated runs in unheated attics or exterior walls can freeze near or just below 0°C.
- Insulation R-value and coverage
- Ambient temperature and wind chill
- Water stagnation and exposure time
How Long Does Water Take to Freeze Inside PEX?
How quickly water inside PEX freezes depends primarily on water temperature, pipe diameter, ambient temperature, and exposure time; under typical residential conditions (0°C/32°F ambient) thin sections of stagnant water in a 1/2-inch PEX line can begin to form ice within one to three hours, while complete solidification of a longer, continuous column may take six hours or more. Freezing onset accelerates with lower ambient temperatures and larger surface-area-to-volume ratios. Flowing water resists freezing. Typical times vary by scenario and should guide prevention tactics.
| Condition | Rough freeze time |
|---|---|
| Thin stagnant section | 1–3 hours |
| Continuous column | 6+ hours |
Which PEX Type (A, B, C) Resists Freezing Best?
Because the three PEX types differ in material composition and manufacturing, their freeze-resistance also varies:
PEX-A, made by the Engel method, is the most flexible and can expand more to accommodate ice without cracking;
PEX-B and PEX-C are stiffer and more prone to brittle failure when frozen, though proper installation, pipe diameter, and insulation often matter more than type alone.
PEX-A typically tolerates freeze-thaw cycles better, reducing rupture risk.
Selection should weigh cost, fittings, and system layout.
Homeowners benefit more from correct routing and heat protection than from type alone.
- PEX-A: best flexibility and expansion
- PEX-B: cost-effective but stiffer
- PEX-C: least common, more brittle
How Pipe Diameter Affects Freezing Risk
Pipe diameter influences freezing risk by changing the volume of water that must cool and the surface-area-to-volume ratio through which heat is lost.
Larger-diameter pipes contain more water and require more heat extraction to reach freezing, slowing ice formation relative to small-diameter lines. Smaller pipes have higher surface-area-to-volume ratios, so they lose heat faster per unit volume and freeze sooner under identical conditions.
Additionally, ice blockage behavior differs: narrow pipes can become obstructed with less ice growth, while wider pipes may tolerate partial freezing before full blockage.
Insulation decisions and placement should account for these diameter-dependent effects.
How Water Flow and Pressure Influence Freeze Likelihood
Following the discussion of diameter effects, flow velocity and system pressure further determine how readily water in a line will freeze.
Lower velocities allow standing water to cool to freezing; moving water requires colder temperatures and longer exposure to form ice. Higher system pressure slightly raises the freezing point through compression and can slow ice expansion effects, while low pressure permits quicker localized cooling.
Pressure fluctuations influence flow patterns, creating pockets where ice can initiate.
- Continuous flow reduces freeze risk by transporting heat.
- Intermittent flow encourages thermal stratification and ice formation.
- Stable high pressure supports consistent flow and heat transfer.
Where in the Home PEX Is Most Likely to Freeze
Where in a home PEX is most vulnerable to freezing depends on exposure, insulation, and airflow. Areas with poor heat, sudden drafts, or thin insulation elevate risk. Mechanical rooms and attics differ in temperature stability; interior runs fare better than perimeter ones. Hidden bends and long uninterrupted stretches allow cold pockets. Monitoring and targeted insulation reduce incidents.
| Location type | Risk factor |
|---|---|
| Unheated voids | Low ambient heat |
| Exterior-adjacent runs | Thermal bridging |
| Near vents/drafts | Airflow cooling |
| Long continuous runs | Cold accumulation |
Common Vulnerable Locations: Exterior Walls and Crawl Spaces
Exterior wall runs place PEX close to cold exterior temperatures, increasing the risk of localized freezing where insulation or sheathing is inadequate.
Similarly, PEX routed through crawl spaces can be exposed to unconditioned air and drafts that promote heat loss along long pipe stretches.
Both locations require targeted protection and inspection to reduce freeze risk.
Exterior Wall Runs
Pipes routed through exterior wall cavities are particularly susceptible to freezing because they sit between the conditioned interior and the cold outside, often with minimal insulation and little heat migration from the living space.
In such runs, PEX may still resist bursting but can ice over, interrupting flow and stressing fittings. Risk increases where sheathing gaps, thin insulation, or recessed fixtures reduce thermal protection.
Regular inspection and targeted mitigation reduce incidents.
- Locate runs near windows, corners, or uninsulated chases.
- Add insulation, foam seals, or heat tape where access allows.
- Maintain modest interior temperatures during cold spells.
Crawl Space Routing
Because crawl spaces are often unheated, damp, and subject to rapid temperature swings, routing PEX through them creates a high risk of freezing, condensation, and mechanical damage.
Pipes laid along low, uninsulated joists face cold pooling and may freeze during prolonged low temperatures. Moisture encourages corrosion of metal fittings and degrades insulation, reducing thermal protection.
Rodents and debris can puncture or abrade exposed tubing. Proper strategies include elevating lines, using closed-cell foam or pipe sleeves, applying heat trace where warranted, and sealing crawl space vents or improving insulation to stabilize temperatures.
Regular inspections catch damage and minimize freeze-related failures.
Whole‑House PEX Risk Zones: Attics, Basements, and Garages
Whole-house PEX systems face distinct freeze and rupture risks concentrated in attics, basements, and garages, where temperature extremes, poor insulation, and intermittent heating combine to increase vulnerability.
These zones often host long runs, exposed fittings, and infrequent heat, raising freeze probability. Condensation, drifting cold, and episodic drafts compound stress on pipes, while access difficulties delay detection. Regular inspection and targeted protections reduce incidents, and routing choices influence exposure. Attention to pressure relief and isolation valves helps limit damage if freezing occurs.
- Attics: long horizontal runs and attic vents increase exposure.
- Basements: cold perimeter walls and sump proximity pose risks.
- Garages: unheated bays and exterior doors cause rapid temperature swings.
How Insulation Level Changes Freeze Risk
Insulation thickness directly influences how long PEX pipes resist freezing by slowing heat loss from the water inside.
Location matters because pipes in exterior walls, crawlspaces, or unheated attics experience different ambient temperatures and airflow that interact with the insulation level.
Rapid drops in ambient temperature can overcome insulation defenses, so both thickness and placement determine freeze risk during sudden cold snaps.
Insulation Thickness Matters
When wall and crawlspace coverings are thin or absent, heat loss from PEX piping accelerates and the risk of freezing rises sharply; increasing insulation thickness slows conductive and convective heat transfer, extending the time a pipe can withstand subfreezing ambient temperatures.
Thicker insulation raises the thermal resistance (R-value) around the pipe, reducing temperature gradients and delaying ice formation. Practical gains are nonlinear: doubling thickness does not halve freeze risk but provides measurable protection.
Selection should balance space, cost, and targeted protection period. Consider material compression and installation gaps, which can erode expected performance.
- Improved R-value extends safe exposure time
- Diminishing returns with extreme thickness
- Fit and continuity matter as much as thickness
Pipe Location Effects
Pipe placement greatly alters how a given insulation thickness performs against freezing: pipes routed along exterior walls, unheated crawlspaces, or poorly sealed attics experience greater convective and radiant heat losses than those buried in interior floor cavities or run through conditioned zones.
Location dictates exposure to wind-driven air, cold surfaces, and thermal bridging, so identical insulation yields different protection. Placing PEX alongside heated ducts or inside insulated chases reduces freeze risk, while mounting on cold studs or near vents increases it.
Installation planning should prioritize routing through conditioned space, adding targeted insulation or air-sealing where unavoidable to maintain the desired thermal barrier.
Temperature Drop Rate
Because heat loss through a conduit depends on the thermal resistance between the water and the surrounding air, increasing insulation thickness slows the rate at which the internal temperature falls once supply flow stops.
The temperature drop rate determines how long liquid remains above freezing and varies with insulation R-value, pipe diameter, and ambient cold. Thicker insulation extends the safe interval before freezing, reducing stress on PEX but not eliminating freeze risk during prolonged exposure.
Homeowners should consider both insulation and exposure duration when evaluating vulnerability.
- Higher R-value delays freezing onset.
- Larger diameter retains heat longer.
- Sustained subfreezing air overcomes insulation.
Best Insulation Types for PEX Lines
Which insulation best protects PEX lines depends on location, exposure, and temperature risk. Closed-cell foam sleeves offer high R-value and moisture resistance for indoor and exterior runs. Fiberglass with vapor barrier suits crawlspaces where heat loss matters. Rubber insulation remains flexible for tight bends and outdoor exposed lines. Reflective foil wraps add radiant heat protection in attic or ceiling cavities.
| Type | Strength | Typical Use |
|---|---|---|
| Closed-cell foam | Moisture resistant, high R-value | Exterior, unheated spaces |
| Fiberglass w/ barrier | High temp stability | Crawlspaces, basements |
| Rubber | Flexible, durable | Tight bends, exposed runs |
How to Check PEX Runs for Proper Insulation
After selecting an appropriate insulation type, inspection of PEX runs guarantees the chosen material is installed and performing correctly. A systematic check begins at visible lengths and continues into accessible cavities, confirming continuous coverage, snug fittings at joints, and correct thickness relative to local codes.
Look for compression, gaps, or displaced sections where thermal bridging could occur. Verify vapor barrier integrity in foam or closed-cell applications. Ascertain insulation is secured without crushing PEX and that fittings and valves receive equivalent protection.
Document locations needing repair and prioritize exposed runs in unconditioned spaces for immediate attention.
- Confirm continuous coverage along entire run
- Inspect joints, clamps, and terminations
- Check for compression, gaps, and damaged vapor barriers
How Routing PEX Inside Conditioned Space Prevents Freezes
When routed within conditioned space, PEX benefits from the ambient heat that keeps water temperatures above freezing, reducing reliance on added insulation or heat tracing.
Locating runs in basements, utility rooms, interior walls, or heated crawlspaces maintains a stable environment that limits exposure to cold drafts and thermal bridges.
Reduced temperature differential lowers ice formation risk and decreases stress on fittings during rare freezes.
Placing PEX away from unheated exterior walls and vents simplifies installation and maintenance while preserving system reliability.
Designers and installers should plan layouts to maximize conditioned coverage, coordinate with HVAC zoning, and document locations for future access.
How to Reroute or Shorten Exposed PEX Runs
Reconfigure exposed PEX runs to reduce their length and relocate them into conditioned spaces whenever practical, because shorter, interior routes lower freeze risk and simplify insulation.
Homeowners should map current runs, identify protruding segments in unheated areas, and plan alternate paths that follow interior framing or crawlspace voids.
Where rerouting isn’t feasible, shorten exposed lengths and consolidate multiple lines into a single protected chase.
Any changes must respect bend radius and avoid kinking; secure with appropriate clamps and allow access for maintenance.
When in doubt, consult a licensed plumber to maintain code compliance and avoid compromising system performance.
- Map and mark exposed segments
- Use interior framing cavities
- Maintain bend radius and secure runs
Weatherization Tips for Exterior‑Wall PEX
When PEX runs are located in exterior walls, attention to cavity insulation is essential to reduce heat loss and the risk of freezing.
Properly fitting batt or foam insulation around the pipe minimizes cold pockets while maintaining clearance for thermal expansion.
Sealing gaps and penetrations to prevent air infiltration further reduces freeze risk and improves overall system reliability.
Insulate Exterior Wall Cavities
Although PEX is more flexible than rigid piping, insulating exterior wall cavities is essential to reduce heat loss and prevent freeze damage where lines run near cold walls. The practice maintains surrounding air temperature, minimizes conduction through studs, and supports continuous thermal protection along runs.
Proper insulation selection and installation around PEX avoids compression that could impede expansion. Attention to gaps at top and bottom plates prevents cold pockets. Consider cavity-filling techniques and vapor-control needs for the climate.
- Use unfaced fiberglass or closed-cell spray foam to match gap geometry.
- Maintain a continuous layer without compressing PEX.
- Seal around penetrations with compatible foam.
Protect Against Air Infiltration
Because air movement drives heat loss and can carry moisture to cold surfaces, sealing gaps and leaks around exterior‑wall PEX is a primary weatherization step.
Inspect where PEX penetrates sill plates, rim joists, service entries and access panels. Use low‑expansion spray foam for irregular voids and backer rod plus silicone or polyurethane caulk for smaller gaps.
Seal around electrical boxes and flanges. Install airtight boxes or gaskets where practical.
Guarantee vapor‑permeable but air‑resistant techniques to avoid trapping moisture.
Combine air sealing with insulation and continuous thermal barriers to maintain warmer pipe temperatures and reduce freeze risk.
Tonight: Temporary Measures for Freezing Nights
How should occupants respond tonight to prevent PEX pipe damage during a sudden freeze?
Occupants should take quick, temporary steps to reduce freeze risk while awaiting permanent fixes. Prioritize accessible lines and vulnerable locations, balancing safety and speed.
- Open cabinet doors under sinks and near internal walls to allow warmer house air to circulate around PEX runs.
- Let a slow trickle of water run from faucets served by exposed PEX to keep flow and reduce freezing likelihood.
- Increase thermostat several degrees overnight and close garage doors to protect any pipes routed through unheated spaces.
These measures minimize immediate risk without specialized equipment.
Using Heat Tape or Cable Safely on PEX
After taking short-term steps to keep water moving and warm air circulating, occupants may consider heat tape or electrical heating cable for longer overnight protection on exposed PEX.
Approved self-regulating or constant-watt cables can prevent freezing when installed per manufacturer instructions. Only use products rated for plastic tubing and keep cables straight, not overlapping, to avoid hot spots.
Secure with approved clips or tape, maintain distance from combustible materials, and plug into a GFCI-protected outlet. Inspect periodically for wear, replace damaged sections, and follow local electrical codes.
When in doubt, consult a licensed electrician or plumber for correct selection and installation.
When to Use Pipe Insulation Sleeves Versus Heat Cable
Selection between insulation sleeves and heat cable depends largely on pipe location and exposure, with exterior or unheated spaces often needing active heating while sheltered areas may be protected by insulation alone.
The required heat output and temperature control needs determine whether passive thermal resistance suffices or if a powered solution is necessary.
Installation complexity and access constraints further influence the choice, since cable requires careful routing and power while sleeves are quicker to fit and replace.
Location And Exposure
When determining whether to rely on pipe insulation sleeves or electric heat cable, the pipe’s location and degree of exposure to cold are the primary factors guiding the decision.
Pipes within insulated walls or heated interiors typically do well with foam sleeves; those in unheated attics, crawl spaces, or exterior walls may need heat cable.
Wind, direct exposure to outdoor temperatures, and proximity to vents or windows increase freeze risk and favor active heating.
Choose solutions based on accessibility for installation and maintenance, and local climate severity.
- Indoor, protected runs: insulation sleeves
- Drafty, semi-exposed runs: insulated plus monitoring
- Fully exposed runs: heat cable
Heat Requirements
If ambient temperatures and expected heat loss are low enough that pipe fluid remains above freezing with passive protection, foam insulation sleeves are sufficient; otherwise, electric heat cable is required.
Decision factors include minimum expected temperature, pipe diameter, length, flow frequency, and exposure to wind or drafts.
Insulation reduces conductive and convective losses but cannot add heat. Heat cable actively maintains temperature and is appropriate for intermittent flow, long runs, or consistently subfreezing conditions.
Power availability, thermostat control, and safety listings (e.g., UL) influence selection.
Combine both where insulation lowers heat cable energy use and prevents nuisance cycling.
Installation Complexity
Having chosen between passive insulation and active heat cable based on thermal needs and power availability, the next consideration is installation complexity and practical trade-offs.
The choice hinges on skill level, accessibility, and long-term maintenance. Insulation sleeves are quick to fit, require no power, and are ideal for exposed, reachable runs.
Heat cable demands careful routing, electrical access, and adherence to manufacturer spacing and thermostat instructions; it suits intermittent freezing risk or buried/hidden pipes.
Cost, repair difficulty, and local code also influence the decision. Homeowners should weigh upfront effort against reliability and ongoing energy use.
- Ease of DIY versus professional help
- Accessibility of pipe runs
- Long-term maintenance and energy costs
Controlled Drip: When and How to Leave Faucets Running
A controlled drip—letting faucets run at a slow, steady trickle—helps relieve pressure and keep water moving through PEX lines during extreme cold.
Homeowners should target faucets farthest from the main supply and those serving exterior walls. Drips need not waste water: one small stream per fixture is sufficient; measure roughly one cup every 10–15 minutes in severe freeze.
Use cold-water taps to avoid heating load. Dripping is recommended when temperatures dip below local freeze thresholds or when forecasts predict prolonged subfreezing conditions.
Monitor municipal restrictions and collect runoff if necessary. Turn off drips once temperatures reliably rise above freezing.
Maintaining House Temperature to Protect PEX
When indoor temperatures are kept consistently above freezing, the risk of PEX pipe damage from ice expansion and pressure drops is greatly reduced.
Maintaining steady heat in vulnerable areas prevents localized freezing and reduces thermal cycling that stresses fittings. Homeowners should monitor thermostat setbacks and guarantee heat reaches basements, crawlspaces, and exterior wall cavities where PEX runs.
Insulation complements steady heating but cannot replace it. Routine checks during cold snaps identify trouble before ice forms.
- Verify consistent thermostat settings during cold periods.
- Seal drafts and insulate spaces around PEX runs.
- Inspect exposed piping for cold spots and corrective action.
Safely Thaw Frozen PEX
Thaw frozen PEX carefully to avoid stressing the pipe or fittings: apply gradual, even heat to the affected section, prioritize safe methods such as space heaters, heat lamps, or warm towels, and never use open flames or high-temperature devices that can damage PEX or surrounding materials.
Inspect visible pipe runs and fittings for bulges, cracks or moisture before warming. Open nearby faucets to relieve pressure as ice melts. Warm outward from access points toward the frozen area.
Monitor temperature and progress to avoid overheating. After thawing, check for leaks and restore insulation or reroute heat to prevent recurrence.
Tools and Methods to Avoid When Thawing PEX
The discussion turns to tools and methods that should be avoided when thawing PEX.
Open flames, such as torches, and high-temperature heat guns can damage the pipe material or fittings.
Chemical ice melts are also discouraged because they can corrode metal components and contaminate systems.
Avoid Open Flames
Any use of open flames or high-temperature torches near frozen PEX should be strictly avoided, as intense heat can melt, deform, or compromise the pipe’s polymer structure and fittings.
Homeowners should recognize that localized burning or overheating weakens joints and can release hazardous fumes. Instead, safer thawing emphasizes indirect, controlled warmth and professional assessment when damage is suspected.
Visual inspection after thawing is critical to detect soft spots or distorted fittings. If any doubt exists, shut off water and call a licensed plumber to prevent leaks or contamination.
- Never use blowtorches or candles near PEX
- Avoid brazing or soldering adjacent to tubing
- Do not expose fittings to open flame
Skip High-Heat Guns
After warning against open flames, attention should also shift to heat guns and similar high-temperature tools, which concentrate heat in small areas and can easily overheat PEX tubing or fittings.
These devices reach temperatures far above what PEX tolerates, risking melting, deformation, or damage to polymer integrity and connection joints. Localized scorching may be invisible until leaks occur later.
Instead, recommend gradual, evenly distributed warming methods and temperature-controlled devices designed for plumbing. If professional intervention is required, a licensed plumber should select appropriate equipment.
Prioritizing gentle, uniform heat preserves PEX performance and reduces the likelihood of costly repairs.
Don’t Use Chemical Ice Melt
Why would someone reach for chemical ice melt when thawing PEX tubing? A detached review discourages that choice: many ice melts contain corrosive salts or chlorides that can degrade pipe fittings, harm nearby metals, and leave residues that permeate insulation.
Chemical agents offer no controlled warming and can create uneven thawing stresses. Safer approaches use gentle heat and proper insulation techniques.
- Corrosion risk: salts attack brass, copper, and solder joints.
- Residue and contamination: chemicals soak insulation and surfaces.
- Uneven thawing: rapid surface melt can trap ice pockets, increasing rupture risk.
How to Detect a Frozen PEX Section Quickly
How can a homeowner quickly determine whether a PEX pipe section has frozen? A detached check involves visual, tactile, and flow tests: inspect exposed runs for frost, squeeze accessible sections for rigidity, and open a nearby faucet to assess reduced or absent flow. If accessible, trace colder-than-usual sections from fixtures toward the main line.
| Quick Check | What to Look For |
|---|---|
| Visual | Frost, condensation, or discoloration |
| Tactile | Hardened, brittle feel compared with warm sections |
| Flow | Little or no water when tap is opened |
Document findings and proceed to safe thawing steps.
Signs of a Burst PEX Pipe After a Freeze
Detecting a frozen section is only the first step; when thawing fails or the freeze was prolonged, the risk shifts to a burst PEX pipe. A burst often presents as unexpected water flow, sudden pressure loss, or visible pooling where none existed before.
Discoloration, damp insulation, or warped surrounding materials indicate prolonged leakage. Unusual sounds—hissing or steady dripping—may come from within walls or ceilings.
- Sudden drop in hot or cold water pressure without appliance cause
- New stains, soft spots, or musty odors near pipe runs
- Continuous sounds of running water when fixtures are off
Emergency Shut‑Off and Immediate Steps After a Burst
Shut off the main water supply immediately to limit damage and stop active leaking; then cut power to nearby electrical circuits if water is pooling near outlets, appliances, or the breaker panel.
After utilities are secured, open faucets to drain remaining water and relieve pressure. Document damage with photos for insurance.
Contain spreading water using towels, buckets, and a wet/dry vacuum if available. Move valuables and electronics to a dry area.
Ventilate the space to reduce humidity and prevent mold — use fans and dehumidifiers.
Contact the water utility and a licensed plumber promptly, and notify the homeowner’s insurance company about the incident.
Temporary Repairs for Burst PEX Until a Plumber Arrives
When a PEX line has burst and the main shutoff is already closed, homeowners can apply short-term measures to limit water loss and protect property until professional help arrives.
Temporary containment focuses on stopping drips, preventing spread, and protecting finishes without attempting permanent fixes. Clean and dry the area, apply compression with a rubber patch and hose clamp, and use absorbent towels or a wet/dry vacuum to remove standing water.
Avoid heat or adhesives that could worsen the pipe.
- Wrap a rubber piece (from a glove or inner tube) over the split and secure with a hose clamp.
- Use pipe repair tape designed for wet conditions.
- Contain water with buckets and towels.
Permanent Repair Options for PEX That Split From Freezing
The extent of the split must be inspected first to determine whether a section can be repaired or requires replacement.
After assessment, appropriate permanent methods—crimped or clamp fittings, heat fusion, or cutting out and replacing a damaged run—should be selected based on pipe type and access.
Finally, measures to prevent future freezing, such as improved insulation, heat tracing, or relocating pipes away from cold zones, should be implemented.
Inspecting The Damage
A careful inspection identifies the extent and location of splitting in PEX pipes after a freeze, guiding selection of a permanent repair method. The inspector documents visible splits, adjacent damage, and signs of corrosion or fittings stress.
Assessment includes checking for hidden leaks in insulation cavities, verifying water pressure changes, and confirming system isolation points. Photographs and measurements record split length and proximity to joints.
Pressure testing after temporary fixes reveals remaining weaknesses. Findings inform whether sections must be replaced, fittings relocated, or supports added, but do not predetermine specific repair techniques.
- Note split length and orientation
- Check nearby fittings and straps
- Record pressure-test results
Choosing Repair Methods
Having documented split length, location, and pressure-test outcomes, the next step is selecting a permanent repair approach that matches the damage profile and system constraints.
Small, accessible splits often suit section replacement with new PEX and appropriate fittings; crimp, clamp, or expansion connections chosen to match existing pipe type and local code.
Longer or awkward runs may require rerouting or replacing entire segments. For concealed or multiple splits, conversion to copper or CPVC can be considered for durability.
All repairs must include proper support, isolation valves, and pressure testing after installation.
Professional assessment is advisable for complex or concealed failures.
Preventing Future Splits
When PEX splits from freezing, selecting a permanent repair should prioritize preventing recurrence by addressing both the immediate breach and its underlying causes. Repairs must therefore combine durable materials, proper installation, and system-level safeguards.
A permanent approach replaces damaged sections with new PEX or copper, uses manufacturer-approved fittings, and restores proper pipe slope and support. Insulation and relocation remove exposure to cold.
System changes—loop reconfiguration, added heat tracing, or improved pressure regulation—reduce stress during freeze/thaw. Homeowners should document repairs and consider professional inspection to verify code compliance and long-term resilience.
- Replace with continuous PEX runs and crimped fittings
- Add insulation and heat trace where vulnerable
- Correct routing, supports, and pressure management
When to Replace Versus Repair Freeze‑Damaged PEX
Deciding whether to replace or repair freeze-damaged PEX hinges on the extent of deformation, the presence of microcracks, and the pipe’s location and accessibility.
Minor bulging without leaks often allows localized cutting and replacement of that segment, restoring integrity with compatible couplings.
Visible splits, persistent hairline leaks, or brittle sections warrant full replacement of the affected run to avoid recurrence.
Accessibility affects cost and practicality: exposed runs are easier to repair, embedded or long continuous runs may require replacement.
Age, water quality, and warranty status also influence decisions; when in doubt, prioritize replacement for reliability and safety.
How PEX Fittings Behave in Freezing Conditions
Different fitting materials (plastic, brass, stainless) respond differently to cold, with varying thermal expansion and brittleness that affect performance.
Compression and crimped connections can tolerate some movement but are vulnerable where sealing surfaces or O‑rings are exposed to ice pressure.
Freeze‑induced joint stress concentrates at junctions between rigid fittings and flexible PEX, increasing the risk of leaks or failures at those points.
Fitting Material Differences
Although PEX pipe itself tolerates freezing better than rigid materials, the fittings attached to it—brass, plastic, stainless, or crimped sleeves—behave differently under ice pressure and thermal cycling.
Metal fittings resist deformation but can stiffen joints, increasing shear stress where expansion occurs. Plastic fittings flex more with the pipe, lowering crack risk but can become brittle in extreme cold.
Corrosion and galvanic reactions affect long-term seal integrity between dissimilar metals. Properly matched materials and attention to thermal movement reduce failure likelihood, yet selection trades off strength, flexibility, and durability depending on expected freeze exposure.
- Brass: strong, less flexible
- Plastic: flexible, cold-brittle risk
- Stainless: corrosion-resistant
Compression And Crimping
Having considered how fitting materials respond to ice pressure and thermal cycling, attention turns to the mechanical joining methods—compression and crimping—and their performance when PEX systems freeze.
Compression fittings rely on a ferrule compressed against pipe by a nut; crimp rings deform plastically around PEX and a fitting barb. When ice forms, localized expansion transmits force to joints.
Properly installed compression and crimp connections typically tolerate modest movement without immediate leakage, thanks to metal reinforcements and elastomeric seals.
However, malinstallation, corrosion, or degraded seals reduce resilience. Regular inspection and adherence to manufacturer torque and ring specifications minimize freeze-related failures.
Freeze-Induced Joint Stress
Freeze-induced joint stress concentrates where ice expansion transmits axial and radial loads into fittings, challenging seals, ferrules, and barbs.
PEX joints tolerate some movement, but trapped ice creates displacement and bending that can deform compression rings, loosen crimps, or pull barbed fittings from soft tubing.
Elastomeric seals may extrude or shear under sustained pressure spikes. Stress concentrates at material junctions and assembly imperfections; corrosion or improper installation lowers resistance.
After thawing, leaks often appear at these points rather than in the pipe body.
- Reduced tolerance: crimps and ferrules deform under axial force
- Seal failure: elastomer extrusion and shear
- Mechanical pull-off: barbs loosen with bending
Minimizing Stress on Fittings During Freeze/Thaw Cycles
Minimizing stress on fittings during freeze/thaw cycles requires controlling the forces transmitted through joints and connectors so that the more rigid fittings do not bear disproportionate loads as ice forms and melts.
Strategies include providing short, flexible PEX runs near fittings to absorb axial expansion, using expansion loops or gentle bends to reduce direct load transfer, and selecting fittings with some compliance or swivel capability.
Supporting saddles and clamps should permit slight movement rather than rigid restraint. Proper alignment and avoiding over-tightening during installation reduce stress concentration.
Routine inspection for misalignment or corrosion helps catch developing problems before joint failure occurs.
Winter Maintenance Checklist for PEX Systems
A concise winter maintenance checklist guides attention to three essentials for PEX systems.
First, exposed pipes should receive appropriate insulation to reduce freezing risk.
Second, maintaining adequate indoor heat and planning for power outages (backup heat or temporary circulation) preserves system integrity.
Insulate Exposed Pipes
When outdoor temperatures drop, exposed PEX runs become the most vulnerable parts of a plumbing system and should be insulated promptly.
The homeowner should select foam sleeves or rubber insulation sized for PEX, secure joints and bends, and protect exterior runs from wind chill and drafts. Insulation reduces heat loss and delays freezing without altering pipe flexibility.
Attention to fittings, crimps, and areas near vents is essential. Inspect coverings annually and replace degraded material. Properly installed insulation is a simple, cost‑effective preventive measure.
- Choose close‑fitting foam or rubber insulation
- Seal seams and fittings with tape or clamps
- Shield insulated runs from direct drafts
Maintain Proper Heat
Because PEX retains heat differently than metal, maintaining a consistent ambient temperature around runs and fittings is essential to prevent freezing and pressure stress.
Homeowners should keep indoor spaces above local recommended minimums, especially in basements, crawlspaces, attics and unheated garages. Use programmable thermostats to avoid wide temperature swings overnight. Seal drafts and close foundation vents to reduce cold air intrusion.
Ascertain heating registers and radiators deliver warmth near plumbing routes. Monitor thermostat setbacks cautiously and check vulnerable areas regularly during cold snaps.
Consistent, moderate heat minimizes freeze risk and reduces cyclic thermal stress that can compromise PEX joints and fittings.
Prepare For Power Outages
If power failure occurs during freezing weather, homeowners should have a clear plan to protect PEX lines and fittings from prolonged exposure to cold and pressure buildup.
They should locate shutoff valves, identify vulnerable runs in unheated spaces, and prepare temporary heating or insulation measures. A small generator or battery-powered backup can maintain circulation or heat tape on critical segments.
Communication with occupants about conserving water and avoiding heavy draw reduces pressure stress. After power is restored, lines should be checked for slow leaks or bulging.
- Keep portable heaters and fuel safe and accessible.
- Pre-cut insulation and heat tape ready.
- Know where main water shutoffs are.
How to Winterize Seasonal or Vacant Homes With PEX
Although PEX’s flexibility and freeze-resistance reduce burst risks compared with rigid pipe, properly winterizing seasonal or vacant homes still requires deliberate steps to protect the entire plumbing system: drain exposed lines, insulate vulnerable sections and fixtures, shut off and relieve water from the main supply where possible, and consider targeted heat or monitored anti-freeze solutions for unheated areas.
Inspect and seal gaps where cold air contacts plumbing; add pipe insulation, heat tape, or thermostatically controlled cable where practical.
Empty and protect appliances (water heaters, ice makers), label shutoffs, and verify sump and pump protection.
Arrange periodic checks or remote monitoring to detect failures before damage occurs.
Pros and Cons of Draining PEX Lines for Winter
Draining PEX lines for winter offers clear advantages—reducing freeze pressure, preventing localized ice damage in exposed sections, and simplifying insurance claims documentation—but also carries drawbacks such as trapped residual water in low spots, difficulty fully evacuating long or complex runs, and the potential for desiccation or corrosion in connected metal fixtures and appliances.
The method suits short, simple systems or seasonal properties but requires careful planning: isolation of appliances, opening low points, and verifying complete drainage. Improper draining can leave pockets that freeze or allow contaminants.
Professional inspection is advisable for complicated layouts.
- Isolates simple systems effectively
- Risks trapped pockets in long runs
- May affect metal components
Using Antifreeze in PEX: Safe Methods and Caveats
After considering the merits and limits of draining PEX for winter, attention often turns to antifreeze as an alternative or supplement for freeze protection.
When used, only potable-grade propylene glycol antifreeze should be introduced into potable PEX systems; automotive ethylene glycol is toxic and unacceptable.
Systems must be flushed thoroughly before returning to drinking-water service. Antifreeze lowers freeze point but does not eliminate risk if water remains trapped and expands.
Concentration, compatibility with seals and metals, and local code requirements govern safe use.
Professional assessment is recommended for closed-loop or complex residential systems to guarantee proper mixture, circulation, and future removal.
Insurance and Warranty Considerations After PEX Freeze Damage
When PEX piping freezes, owners should first determine whether their homeowner’s or commercial insurance policy covers freeze-related pipe damage and resulting water loss.
The claims process typically requires prompt notification, documentation of damage, and evidence that reasonable preventive measures were taken.
Manufacturers’ warranties may limit or exclude coverage for freeze damage, so warranty terms and any required maintenance records must be reviewed before pursuing repair or replacement.
Coverage For Freeze Damage
Although PEX is more freeze-resistant than rigid piping, homeowners and contractors should still confirm whether freeze-related burst or leak damage is covered by property insurance and manufacturer warranties.
Coverage varies: standard homeowners policies often cover sudden, accidental bursts but may exclude damage from negligence or lack of maintenance; manufacturer warranties may cover material defects but typically exclude freeze damage caused by improper installation or exposure.
Documenting installation dates, model numbers, and maintenance helps. Consult policy terms and warranty documents before repairs.
Key considerations include:
- Policy exclusions and required proof of maintenance
- Warranty scope, claim windows, and registration requirements
- Deductibles and depreciation calculations
Filing An Insurance Claim
Filing an insurance claim for PEX freeze damage requires prompt, organized action to maximize the chance of coverage and a swift payout.
The homeowner should immediately document damage with photos, videos, and timestamps, then mitigate further loss by shutting off water and arranging temporary repairs.
Contacting the insurer promptly and providing the policy number, incident details, and mitigation steps speeds processing.
Retain receipts for emergency repairs, contractor estimates, and any temporary housing costs.
Keep written records of communications with adjusters.
If coverage is denied or disputed, request a detailed explanation and consider appraisal, mediation, or consulting a public adjuster or attorney.
Warranty Limitations And Exclusions
If a PEX system freezes and fails, homeowners must review both product warranties and insurance policies carefully. This is important because coverage often hinges on specific exclusions, maintenance requirements, and proof of proper installation.
Warranties commonly exclude damage from freezing when pipes were exposed, improperly supported, or installed outside temperature guidelines. Insurers may deny claims if the homeowner neglected winterization or left heat off.
Documentation — purchase receipts, installation records, photos, and service logs — can determine whether repairs are covered. Parties should notify manufacturers and insurers promptly and follow claim procedures to preserve rights.
- Check exclusion clauses and time limits
- Gather installation and maintenance records
- Follow prescribed claim steps
Cost Estimate Ranges for Freeze‑Related PEX Repairs
When evaluating freeze-related PEX repairs, cost ranges typically reflect the damage extent, accessibility, and required labor or parts; minor pinhole leaks or isolated joint replacements often run from $100–$400, while sectional replacements or pipe re-routing can range $400–$1,500, and extensive system repairs or repiping projects may exceed $1,500. Estimates vary by region, emergency response, and material choice. Homeowners should expect higher charges for concealed lines or fast winter service. Clear documentation and photos can reduce guesswork. Below is a simple emotional prompt to underscore stakes:
| Calm | Concern | Urgency |
|---|---|---|
| $100–$400 | $400–$1,500 | $1,500+ |
When to Call a Licensed Plumber Versus DIY Fixes
A clear distinction guides whether a homeowner should attempt a repair or summon a professional.
Simple, observable issues—such as a visibly frozen exposed PEX section or temporary thawing with a hair dryer—can often be handled safely by an experienced DIYer.
Complex problems, signs of hidden damage, persistent leaks, or lack of confidence warrant calling a licensed plumber.
When To Call
How should a homeowner decide between attempting a PEX pipe freeze fix and calling a licensed plumber? A homeowner should assess risk, skill, and consequences.
If water is visible, multiple fixtures are affected, pressure loss occurs, or signs of cracking appear, professional help is wise. When time-sensitive structural damage, insurance claims, or complex buried or concealed plumbing are involved, a licensed plumber guarantees proper diagnosis and repair.
- Visible leaks, burst pipes, or rising water indicate calling a professional.
- Lack of plumbing experience or necessary tools favors hiring a licensed plumber.
- Insurance or code compliance concerns require documented professional intervention.
DIY Safe Fixes
Decide whether to attempt a PEX pipe freeze repair by weighing observable damage, available tools, and personal experience against the risks of making the situation worse or voiding insurance coverage.
For minor, accessible freezes—visible frost, a single exposed run, no leaks—safe DIY steps include gently thawing with a hair dryer or heat gun on low, wrapping pipes with thermostatic heat tape, and insulating afterward.
Avoid open flames, high heat, or aggressive pressure testing.
Call a licensed plumber when leaks appear, multiple lines freeze, drywall must be opened, or insurance requires a professional record.
Documentation and photos aid claims and diagnosis.
Questions to Ask a Plumber About PEX Freeze Prevention
Which specific preventive steps should homeowners verify with a plumber to protect PEX piping from freezing? A concise checklist helps guarantee practical, immediate action without overlapping with longer-term upgrades.
The plumber should state which measures apply given local climate, pipe location, and system layout, and provide clear installation or service timelines. Homeowners should request written recommendations, cost estimates, and follow-up procedures for winter readiness.
- Verify recommended short-term protections (drip strategies, shutoffs, heat source checks)
- Confirm accessible inspection points and emergency shutoff locations
- Ask about routine winter maintenance and response time for freeze events
Long‑Term Upgrades to Prevent PEX Freezing: Insulation, Rerouting, and Heated Blankets
After confirming immediate protections and receiving a plumber’s short-term recommendations, homeowners should consider long-term upgrades that reduce freeze risk at the source.
Evaluate thermal insulation: closed-cell foam or specialized pipe sleeves minimize conductive heat loss in unconditioned spaces.
Rerouting moves vulnerable runs away from exterior walls or through conditioned areas, shortening exposed lengths and simplifying access.
Install electric heat tape or self-regulating heating cables where routing cannot avoid cold zones; follow manufacturer specs and install GFCI protection.
For larger or irregularly exposed sections, consider factory-made heated pipe blankets with integrated thermostats.
Combine measures for redundancy and consult a professional for proper sizing and placement.
Compare PEX Brands and Specifications for Cold Climates
When selecting PEX for cold climates, homeowners and contractors should compare material type (PEX-A, -B, -C), wall thickness, minimum bend radius, and published cold‑temperature flexibility ratings, because those specifications determine resistance to kinking, freeze expansion, and ease of installation in unconditioned spaces.
Manufacturers publish pressure ratings at low temperatures, oxygen permeability, and impact resistance; certified listings (ASTM, CSA) and warranty terms vary. Brand testing for freeze–thaw cycles and availability of thicker walled or oxygen-barrier options matter.
Evaluate cost versus proven cold‑weather performance and local installer experience before specifying material.
- Check certified temperature/pressure curves
- Compare bend radius and wall gauge
- Review freeze–thaw test data
Practical Seasonal Action Plan to Keep PEX From Freezing
If temperatures are expected to drop below freezing, a clear seasonal action plan helps prevent PEX lines from freezing and bursting by combining preparation, insulation, and targeted heat maintenance.
Homeowners should inspect exposed runs, seal drafts around crawlspaces and basements, and relocate vulnerable piping where feasible.
Install pipe insulation, heat tape on critical sections, and guarantee attic and wall insulation meets local R-values.
During cold spells, maintain steady low heat, open cabinet doors to circulate warmth, and let faucets drip slightly on the coldest lines.
Schedule annual checks before winter and keep emergency contact information for a licensed plumber and utility services.
Conclusion
In the chill of winter, homeowners can take heart: PEX bends to adversity better than rigid rivals, yet it is not immune to mischief. With simple precautions—insulation, attentive routing, and a dash of warmth—pipes are gently persuaded to behave. For those seeking peace of mind, professional advice and modest upgrades whisper reassurance. In short, a little foresight softens the bite of cold and keeps household waters flowing with quiet dignity.