Are Lead Pipes Dangerous? What Homeowners Must Know About Lead Water Risks
Lead pipes and older plumbing can contaminate your household water with harmful lead. This typically occurs due to corrosion, low pH levels, or changes in water treatment processes. Vulnerable populations, including infants, pregnant individuals, and those with health issues, are at the highest risk from even minimal lead exposure.
To assess your water quality, consider these steps:
- Testing: Use home test kits or get samples analyzed by certified labs to check for lead levels.
- Immediate Solutions: If lead is detected, using water filters or bottled water can provide short-term safety.
- Long-term Solution: Replacing lead service lines completely eliminates the source of contamination. Look into grants or utility programs that may assist with replacement costs.
For further details on testing methods, practical steps, and funding options, continue reading.
Is My Tap Water Dangerous? Quick Answer and First Steps
How can homeowners quickly assess if their tap water is safe? Start by checking for sensory signs such as cloudiness, a metallic taste, discoloration, or visible particles, which indicate possible contamination.
If you have older plumbing, recent pipe repairs, or changes in water chemistry, these factors heighten the risk. To ensure safety, obtain a certified lab test for lead and other common contaminants; municipal water reports can help identify what to test for.
While waiting for results, consider using bottled water or certified filters designed to remove lead, especially for pregnant individuals, infants, and those with weakened immune systems.
Keeping a record of any concerns, dates, and symptoms can aid in discussions with water authorities or licensed plumbers. Taking these immediate, informed steps can help clarify potential risks and guide necessary actions.
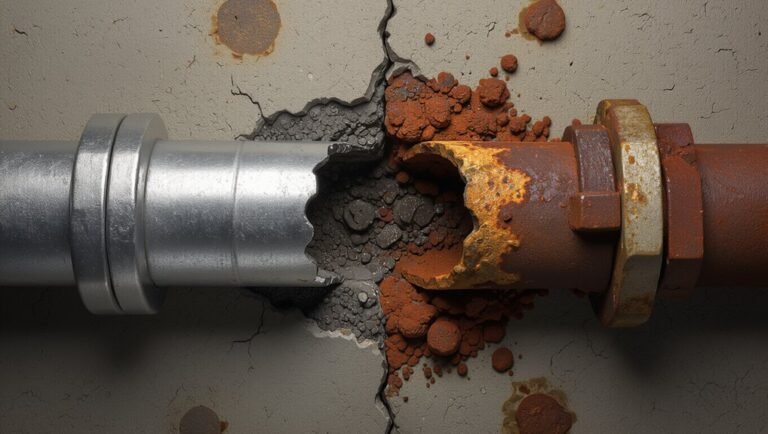
How Does Lead Get Into Household Water?
Lead commonly enters household water primarily through plumbing materials and corrosion. Here are the main sources:
- Lead Service Lines: These are pipes that bring water from the main supply into your home and can leach lead into the water.
- Lead Solder Joints: If lead solder was used in pipe joints, it can corrode and release lead into the water.
- Brass Fixtures: Many brass fixtures contain lead, which can leach into the water, particularly in older installations.
- Galvanized Pipe Remnants: Older galvanized pipes may have absorbed lead from previous connections, contributing to lead contamination.
To identify potential sources of lead in your water, inspect service lines, fittings, and the manufacture dates of your plumbing fixtures.
Simple steps to reduce lead exposure include:
- Flushing Stagnant Water: Run your tap for several minutes before use to clear out any lead that may have leached into the water while sitting.
- Using Certified Filters: Install water filters that are certified to remove lead.
- Testing Water: Conduct a water test to determine the presence and levels of lead.
For a long-term solution, consider replacing lead-bearing plumbing components and coordinating with your utility company for lead service line removal.
When and Why Corrosion Makes Lead Worse
Corrosion significantly increases lead release into drinking water when protective scales inside pipes fail or break down. Factors like low pH, low mineral content, and high levels of chloride or sulfate accelerate pipe corrosion and dissolve lead-containing materials.
Changes in water source or treatment can disrupt stable scales, leading to sudden spikes in lead levels. Additionally, physical factors such as turbulence, pressure changes, and aging fixtures can expose fresh metal surfaces, further increasing lead risk. Biological activity and temperature fluctuations also affect scale integrity.
To combat this, corrosion control programs that involve methods like carbonate dosing or orthophosphate application aim to stabilize protective scales and limit lead solubility.
However, inconsistent treatment can leave systems vulnerable to lead contamination. Regular monitoring and focused mitigation strategies are crucial for detecting and managing corrosion-related lead issues in drinking water.
Who Is Most at Risk From Lead Exposure?
Who is most at risk from lead exposure in drinking water? Here are the groups that need priority attention:
- Infants and Young Children: Their developing nervous systems absorb more lead, often through formula mixed with tap water or hand-to-mouth behaviors.
- Pregnant Individuals: Lead can cross the placenta, affecting fetal development even at low levels.
- People with Chronic Health Conditions: Conditions like kidney disease or nutritional deficiencies (e.g., iron, calcium) increase lead absorption and worsen health outcomes.
- Residents in Low-Income and Older Housing: Homes with outdated plumbing or limited resources for repairs can lead to ongoing exposure.
Testing and remediation efforts are essential to reduce risk for these vulnerable groups.
What Low‑Level Lead Does to Health
Low-level lead exposure can significantly impact health, even with minimal amounts. For children, it can hinder neurodevelopment, leading to reduced attention, learning abilities, and IQ, alongside behavioral issues.
In adults, it may raise blood pressure and increase the risk of cardiovascular diseases. Additionally, lead can disrupt kidney function, leading to decreased filtration and protein in urine. It also affects blood production, causing mild anemia.
Reproductive health can suffer, with declines in sperm quality and fertility, as well as poorer pregnancy outcomes. Common symptoms across all ages include cognitive changes, fatigue, and headaches.
Because these effects can develop without clear symptoms, regular testing and reducing lead sources, especially in homes with potential lead plumbing, are essential preventive measures.
How Much Lead in Water Is Unsafe?
When it comes to lead in drinking water, the federal Lead Action Level is set at 15 parts per billion (ppb). Levels above this threshold may indicate unsafe drinking water.
However, public health agencies recommend even lower levels, often suggesting that no amount of lead in water is safe, especially for vulnerable populations like children and pregnant women.
To measure lead concentration, common methods include laboratory testing of water samples, and results are interpreted based on these established standards.
Always consider getting your water tested if you suspect lead contamination, as protecting your health is paramount.
Federal Lead Action Level
The federal Lead and Copper Rule sets an action level for lead in drinking water at 15 parts per billion (ppb) at customer taps. If more than 10% of sampled homes exceed this level, utilities are required to take action, which includes implementing corrosion control measures and informing the public.
It’s important to note that this action level is a regulatory benchmark, not a safe exposure limit. While compliance can lead to infrastructure improvements and testing, it does not guarantee that any specific home has zero lead in its water.
Homeowners should be aware of these regulations to understand the potential risks associated with lead in drinking water.
Health-Based Thresholds
No level of lead exposure in drinking water is safe, especially for infants and pregnant women. Health authorities recommend minimizing lead to the lowest possible levels.
Even low levels of lead can lead to developmental delays, reduced IQ, and behavioral issues in children, as well as cardiovascular and kidney problems in adults. Vulnerable populations, such as children and pregnant women, absorb lead more easily and experience more severe effects at lower doses.
Risk assessments use toxicological data and population sensitivity to establish conservative guidance values. Public health policy focuses on prevention through source removal, corrosion control, and targeted interventions to protect sensitive groups from exposure.
Measuring Lead Concentration
Measuring lead in drinking water is crucial for health and safety. Here’s what you need to know:
1. Action Levels: Health agencies set action levels at 15 parts per billion (ppb), while a zero ppb goal is ideal for safety.
2. Sampling Methods: First-draw samples (water collected after sitting in pipes) often show higher lead concentrations than flushed samples (water that has run for a period).
Understanding this difference is key to accurate results.
3. Lab Testing: Use certified laboratories for analysis, specifically those approved by the EPA, to ensure reliable results.
4. Follow-Up Testing: If initial tests show high lead levels, repeat testing and targeted remediation are essential to address the issue effectively.
For homeowners, if in-home test kits indicate elevated lead levels, prioritize confirming results with a certified lab.
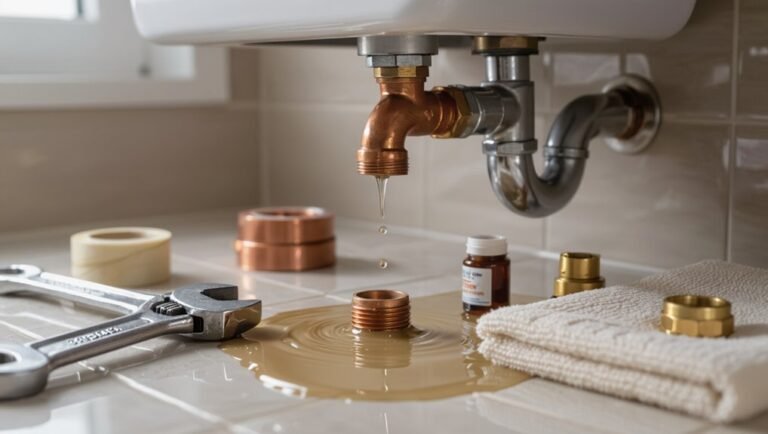
Which Pipes and Fixtures Often Contain Lead?
Which household plumbing components are most likely to contain lead?
- Older Service Lines: Lead service lines connecting homes to the main water supply, especially those installed before the 1980s.
- Interior Supply Lines: Older interior plumbing lines, particularly those installed before the 1980s.
- Copper Pipe Joints: Solder used in copper piping contained lead until it was banned in the late 1980s, making older joints potential sources.
- Brass or Bronze Fixtures: Faucets, valves, and fixtures made from brass or bronze manufactured before the 2010s may leach lead.
- Pipe Fittings and Valves: Certain couplings and stop valves from earlier decades can also pose risks.
- Water Meters and Legacy Components: Older water meters, saddle taps, and components from renovations may still contain lead parts.
While modern plumbing codes have reduced lead prevalence, older installations remain a significant concern.
How Can You Tell If Your Home Has Lead Pipes?
How can you tell if your plumbing contains lead? Here are some straightforward steps to help you determine if your home has lead pipes:
- Visual Inspection: Look for dull, soft pipe surfaces and joints marked “LPB” or without any markings, which can indicate lead.
- Hire a Professional: A licensed plumber can inspect your service lines and solder joints to identify lead by their appearance and historical context.
- Water Testing: Collect a water sample and send it to a certified laboratory for lead testing to confirm contamination levels.
- DIY Testing Kits: Use a DIY lead test kit for a preliminary check. Be aware that the reliability of these kits can vary, and further testing may be needed.
- Municipal Records: Check with your water utility or municipal records to see if the service line material is documented as lead.
Do Old Homes Always Have Lead Plumbing?
Older homes are more likely to have lead plumbing, but not all do. The presence of lead depends on the home’s construction era and local building practices.
Homes built before the 1950s often used lead pipes or lead-soldered joints, while those from the 1950s to 1980s may have lead solder or brass fixtures with lead.
Renovations and repairs can eliminate lead components, but undocumented work might mix materials. To assess your risk, check the pipe material, service line connections, and fixture composition.
A professional inspection or material testing is the best way to confirm the presence of lead. Don’t rely solely on the age of the home for assumptions about lead plumbing.
Simple Checks to Reduce Short‑Term Lead Risk
If you’re concerned about lead in your drinking water, here are some practical steps you can take to reduce exposure while you plan for a more permanent solution:
1. Flush Your Taps: Run your taps for 30–60 seconds each morning before using water for cooking or drinking to clear out any lead that may have leached into the water overnight.
2. Use Cold Water: Always use cold water for drinking and food preparation, as hot water can dissolve lead more easily.
3. Install a Lead Filter: Consider installing an NSF-certified point-of-use filter that is specifically rated for lead.
Be sure to follow the manufacturer’s guidelines for maintenance and replacement.
4. Choose Safe Storage: Avoid using metal containers that may contain lead solder for storing water.
Opt for glass or BPA-free plastic containers labeled for drinking water only.
These steps can help you minimize short-term lead exposure while you work on a comprehensive solution.
How to Collect a Proper Water Sample for Lead Testing
To collect a proper water sample for lead testing, follow these steps:
- Prepare Sampling Materials: Use clean, unused containers specifically designed for water sampling.
- Label Containers: Clearly label each container with the date, time, and location of the sample collection.
- Wear Gloves: Always wear gloves to prevent any contamination of the sample.
- Flushing Procedures: Depending on your testing scenario, follow either the flush method (running the tap for 5-10 minutes before sampling) or the stagnant-first method (collecting the first draw of water after it has sat for at least 6 hours).
Prepare Sampling Materials
To ensure accurate and reliable lead test results, it’s crucial to gather the right sampling materials.
Here’s a concise checklist to help you prepare:
- Certified Sample Bottles: Use bottles with the appropriate preservative as specified by the laboratory (e.g., nitric acid).
- Permanent Labels: Have waterproof labels ready for marking the site, date, time, and sampler’s initials.
- Clean Disposable Gloves: Wear gloves to prevent contamination, and consider single-use sampling funnels or syringes if needed.
- Transport Cooler: Use a cooler with ice packs to maintain sample temperature, and include a chain-of-custody form in a sealed transport bag.
Following these steps will help ensure your samples are uncontaminated and legally defensible for analysis.
Follow Proper Flushing
To obtain a representative water sample, follow these key steps:
- Control Water Flow: Document the tap position and open it fully. Let the water run for 30 seconds to 2 minutes to ensure proper flushing, unless a stagnant sample is needed.
- Remove Aerators and Filters: Ensure a steady flow rate by removing any aerators and filters from the tap.
- First-Draw Samples: For first-draw samples, ensure the tap has not been used for at least six hours before collecting the sample without flushing.
- Sequential or Profile Samples: If collecting sequential samples, gather defined volumes in order and record the time and volume for each bottle.
- Finalize Sampling: After sampling, secure the caps, cool the containers, and complete chain-of-custody records before shipping to the laboratory.
Following these steps ensures accurate and reliable water sampling.
Which Lead Water Tests Matter and What They Show
If you’re a homeowner concerned about lead in your water, the most important test to prioritize is a certified laboratory corrosion test on first-draw tap water. This test measures lead levels after water has sat in your plumbing, highlighting immediate exposure risks.
Here are the key tests to consider:
- First-draw tap test: Captures lead levels after stagnation, indicating immediate risk.
- Three-tap or sequential sampling: Identifies contributions from service lines, household plumbing, and fixtures.
- Flushed sample: Reflects typical water quality after the system has been running, useful for understanding drinking water practices.
- Point-of-use device test: Confirms the effectiveness of filters or treatment devices in removing lead.
For accurate and actionable results, use an accredited lab and follow EPA or state-recommended testing protocols.
How to Interpret Your Lead Test Results
To interpret your lead test results effectively, compare the measured lead concentrations to established health benchmarks. Results are reported in parts per billion (ppb) or micrograms per liter (µg/L), which are equivalent.
Key benchmarks include the EPA action level of 15 ppb for lead in drinking water and public health guidelines that state any detectable lead is undesirable, particularly for children and pregnant individuals.
Understanding the context of your sample is crucial:
- First-draw samples often show higher lead levels due to household plumbing.
- Flushed samples indicate water quality after the system has been cleared.
- Sequential samples help identify specific fixtures or lines contributing to lead presence.
- Point-of-use results reflect the lead levels from a tap during regular use.
Always consider the sampling method, date, and your household’s susceptibility to lead exposure to accurately assess risk and determine if follow-up actions are necessary.
If Results Are High: Immediate Actions to Take Now
If lead test results exceed safe levels, take immediate action to minimize exposure.
Stop using tap water for drinking and cooking, and switch to bottled water or certified filters.
Avoid giving tap water to infants and pregnant individuals.
Report the issue to local health departments or water authorities for guidance.
Stop Using Tap Water
If you’ve received test results indicating elevated lead levels in your tap water, it’s crucial to stop using it for drinking, cooking, or food preparation immediately.
Here’s what you need to do:
- Isolate: Turn off water dispensers and clearly label taps to prevent any accidental use.
- Notify: Inform all residents and frequent visitors about the contamination and its associated risks.
- Secure: Avoid using plumbing fixtures and refrain from activities that could aerosolize the water, such as taking showers if lead levels are particularly high.
- Document: Keep a record of test results, dates, and contact details for health or plumbing professionals for any necessary follow-up.
Switch to a safe water alternative until the issue is resolved, and take these steps seriously to protect everyone in your household.
Use Bottled Or Filtered
When test results indicate elevated lead levels in tap water, residents should immediately switch to bottled water or use certified point-of-use filters for drinking, cooking, and food preparation. This ensures safety until plumbing issues are resolved or water quality is confirmed as safe.
Why Switch?
- Bottled Water: Provides instant protection from lead exposure. Always check the source and expiry date.
- Certified Filters: Look for NSF/ANSI 53 or 58 certifications. They effectively reduce lead when installed and maintained as per the manufacturer’s instructions.
Best Practices:
- Bottled Water: Store safely and rotate supplies regularly.
- Filters: Replace cartridges according to the schedule and flush the unit after periods of nonuse.
- Storage: Keep cold water designated for consumption and label safe containers to prevent cross-contamination.
Monitor Usage: Keep track of household water usage patterns and document actions taken to ensure safety.
Contact Local Authorities
If tests indicate high lead levels in your water, take the following actions:
- Contact the local water utility immediately to report your findings. Request confirmatory testing and recent system reports.
- Notify the local health department for assessment of exposure, medical guidance, and information regarding at-risk populations.
- Reach out to municipal public works or code enforcement to inquire about lead service line inventories and any replacement programs available.
- Ask about emergency assistance options, including filtration subsidies, bottled water distribution, and timelines for necessary remediation.
Make sure to document all communications and adhere to any official instructions provided to safeguard your household’s health while authorities respond.
Point‑of‑Use Filters: Which Remove Lead and Which Don’t
When looking for point-of-use filters that effectively remove lead, it’s crucial to choose those certified to NSF/ANSI Standard 53 for lead reduction or equivalent standards.
These filters reliably eliminate dissolved and particulate lead. Avoid basic carbon filters, many pitcher filters, and untested faucet attachments, as they may not provide adequate protection.
Opt for certified under-sink, countertop, or faucet-mounted units that specify lead reduction capacity and follow installation instructions carefully, using certified replacement cartridges.
Always verify certification claims through NSF or equivalent databases, check flow rates and capacity for expected performance, and remember that expired or improperly stored filters can still allow lead to pass through.
Plumbing Repairs or Full Lead‑Service‑Line Replacement : Which to Choose?
When deciding between plumbing repairs and full lead-service-line replacement, consider the following key factors to ensure you make the best choice for your situation:
- Extent of Lead Presence: Assess how much lead is present in your plumbing system and identify who owns each segment of the line.
- Lead Levels: Measure lead levels after any temporary fixes to determine the effectiveness of your current solution.
- Funding Options: Explore available funding, subsidies, and budgets for long-term maintenance.
- Household Vulnerability: Consider the presence of vulnerable individuals in your home, such as children or pregnant occupants, and the urgency for permanent lead removal.
Consulting with certified plumbers and local authorities will help you make an informed decision that prioritizes long-term health and safety.
Utility Corrosion Control : What It Means for Your Tap Water
Utility corrosion control is essential for ensuring the safety of your tap water. It works by modifying water chemistry and adding protective inhibitors to prevent pipes from releasing harmful metals.
The process includes assessing the source water, adjusting pH levels, and conditioning the distribution system. Regular monitoring and adherence to regulations ensure these methods remain effective, providing safe drinking water for consumers.
Corrosion Control Basics
Corrosion control is essential for maintaining safe drinking water by preventing pipe deterioration and limiting the entry of lead and other metals into tap water. Here’s how water systems achieve this:
- Adjust Water Chemistry: Water systems adjust the chemistry to create protective scales inside pipes, which helps prevent corrosion.
- Stabilize Disinfectants and Alkalinity: By maintaining consistent levels of disinfectants and alkalinity, systems avoid shifts that could increase corrosivity.
- Regular Monitoring: Utilities routinely monitor water at distribution points and customer taps for lead, copper, and other indicators of corrosion.
- Documentation and Communication: Actions taken for corrosion control are documented, and findings are communicated to regulators and the public to ensure transparency.
These practices are crucial for protecting public health and ensuring the safety of drinking water.
Treatment Process Steps
To minimize pipe corrosion and protect tap water quality, water systems implement several key treatment steps:
- Chemical Adjustment: Water utilities adjust the chemistry of source water, specifically controlling pH and alkalinity to reduce corrosivity.
- Corrosion Inhibitors: They add corrosion inhibitors like orthophosphate or silicates. These substances create thin protective films on the interior of pipes, limiting the release of metals.
- Coagulation and Filtration: These processes are used to remove particulates and potential corrosion catalysts from the water.
- Disinfection: Using chlorine or chloramine, disinfection maintains a residual effect that suppresses microbial activity, which can contribute to corrosion.
- Finished Water Stabilization: This ensures consistent water chemistry throughout distribution and storage.
- Adaptation to Source Changes: If there are changes in the water source, treatment methods are adjusted to maintain protective films.
- Flushing and Pipe Replacement: Regular distribution flushing and targeted replacement of high-risk pipes work alongside chemical treatments to eliminate sediments and enhance system integrity.
This coordinated approach helps ensure safe, high-quality tap water while minimizing corrosion risks.
Monitoring And Compliance
When implementing corrosion control, water systems must prioritize rigorous monitoring and compliance to ensure effectiveness and adherence to regulatory limits. Here’s how they achieve this:
- Routine Sampling: Utilities regularly sample water from high-risk sites to catch elevated lead levels early.
- Laboratory Analyses: Tests measure lead, pH, alkalinity, and inhibitor residuals to ensure compliance with regulatory standards.
- Data Reporting: Requirements for public notification ensure transparency and prompt corrective actions if lead levels exceed safe limits.
- Program Integrity: Regular audits, calibration checks, and operator certifications maintain program effectiveness and promote continuous improvement.
This structured approach helps protect public health and ensures safe drinking water.
Cost Ranges to Replace Lead Service Lines
The cost to replace a lead service line can vary significantly, typically ranging from a few hundred to several thousand dollars for the portion on private property.
Full replacements, including the utility-owned section, can often double or triple those amounts.
Key factors influencing the price include the length of the pipe, access to materials, excavation needs, contractor rates in your area, and any necessary permits or inspections.
Complex sites, such as those with landscaping or tree roots, can increase costs, while simpler, easily accessible locations may lower them.
To get an accurate estimate, it’s best to have an on-site inspection and obtain written bids.
Be sure to budget for potential unexpected costs, like additional repairs or upgrades required by local codes.
Grants, Rebates, and Programs for Replacing Lead Lines
Homeowners and municipalities can afford the replacement of lead service lines through various funding programs that alleviate costs. Here’s how:
- Federal Grants: These grants help utilities or municipalities cover the costs of identifying and replacing lead lines.
- State Rebates: Many states provide homeowners with rebates or matching funds to reduce out-of-pocket expenses for replacement.
- Utility Programs: Some utility companies offer subsidized replacement options, payment plans, or even full coverage for customers needing line replacement.
- Community Partnerships: Nonprofits and public-private partnerships can offer additional technical support, outreach, and funding.
To take advantage of these opportunities, homeowners should check eligibility criteria, application procedures, and timelines on official program websites and local utility announcements.
How to Hire a Qualified Plumber or Certified Lead Tester
Homeowners looking for reliable professionals to test or replace lead service lines can start by contacting local health departments or state-certified lead programs, which provide lists of certified testers and licensed plumbers.
Make sure to verify credentials, including EPA or state lead certification for testing and plumbing licenses with lead-abatement training for replacements. It’s essential to check for insurance and bonding, and to request written estimates that outline the project scope, materials, timelines, and disposal methods.
Always ask for references and documentation from recent full service-line replacements. Confirm that the professional uses lead-free fittings and follows local permitting and inspection requirements.
Additionally, request a sampling plan that details sampling locations and laboratory accreditation. When comparing bids, prioritize documented certification and compliance over the lowest price.
Ongoing Maintenance to Keep Lead Out of Your Water
Regular plumbing inspections can help you identify issues like worn joints and scale buildup that may lead to increased lead release in your water.
To effectively manage lead levels, implement consistent corrosion control measures, such as adjusting water chemistry and replacing sacrificial anodes or damaged pipe sections.
Establishing a scheduled maintenance plan with documented checks and timely repairs can significantly reduce your long-term exposure to lead in drinking water.
Regular Pipe Inspections
Routine inspections of household plumbing are crucial for identifying early signs of pipe issues that can affect water safety. Key areas of focus include visible joints, soldered connections, service lines, and fixtures where lead may be present.
A qualified inspector will assess materials, evaluate the age of pipes, and note any discoloration or deposits that may indicate metal leaching.
To ensure water safety, follow these steps:
- Identify suspect materials.
- Check joints and solder for integrity.
- Record any visual signs of corrosion.
- Schedule follow-up inspections as needed.
Regular inspections, ideally once a year or after renovations, help homeowners stay informed about their plumbing’s condition and prioritize necessary repairs.
Clear reports with photographic evidence and actionable recommendations enable informed decision-making. Collaboration with certified plumbers and water quality labs ensures compliance with regulations, effectively reducing the risk of lead exposure.
Corrosion Control Maintenance
To maintain water quality and prevent lead from leaching into your plumbing system, ongoing corrosion control is essential.
After yearly inspections, it’s crucial to monitor water chemistry, including pH, alkalinity, and orthophosphate levels. This helps in making necessary adjustments to stabilize pipe surfaces.
Utilities or certified contractors typically apply corrosion inhibitors and optimize disinfection strategies. Homeowners should keep records of service actions and request treatment reports for accountability.
Implementing routine flushing protocols will also help eliminate stagnant water where corrosion can accumulate.
If you plan to replace pipes, consider using temporary inhibitors to mitigate risks during the process. Regular sampling ensures that the corrosion control measures are effective and allows for prompt detection of any changes.
Keeping thorough maintenance records and seeking professional evaluations can help ensure regulatory compliance and guide decisions regarding full service line replacement, thereby protecting against lead exposure.
Find Local Rules, Certified Labs, and Replacement Programs
When assessing lead risks in your home, it’s essential to follow these steps to ensure compliance and access necessary resources:
1. Know Local Regulations: Check your municipal and state lead service line inventories and ordinances for specific rules on lead safety.
2. Find Certified Labs: Locate state-certified drinking water laboratories that meet state or EPA standards for reliable testing results.
3. Explore Replacement Programs: Review available utility-funded, state-run, or nonprofit-assisted pipe replacement programs.
Eligibility often depends on service line ownership and household income.
4. Document Everything: Keep records of all communications and receipts to qualify for potential reimbursement or assistance.
Conclusion
In summary, homeowners should be aware that aging plumbing can affect water quality, potentially introducing lead contamination. To safeguard against these risks, it’s essential to take proactive steps: test your water for lead, conduct necessary repairs, and hire licensed professionals for plumbing work. Vulnerable populations, such as children and pregnant women, require special attention, and there are financial assistance programs available to help replace lead service lines. By staying informed and taking these precautions, families can ensure a safe and clean water supply in their homes.