
How to Replace Pool Vacuum Hose Connector: Step-by-Step Fix for a Leak-Free Clean
To replace a pool vacuum hose connector and ensure a leak-free clean, start by shutting off the pump and draining the skimmer or vacuum line. Measure the hose’s inner and outer diameter to select the correct connector type (barb, slip, threaded, or quick-connect). Cut and clean the end of the hose, softening it with warm water or a heat gun if necessary. Fit the new connector securely, using clamps or O-rings to hold it in place. Finally, test the setup for steady suction and check for leaks. Regular inspections and proper winterizing will help maintain your pool equipment. Consider upgrading to ideal fittings for enhanced performance.
How to Replace a Pool Vacuum Hose Connector for a Leak-Free Clean
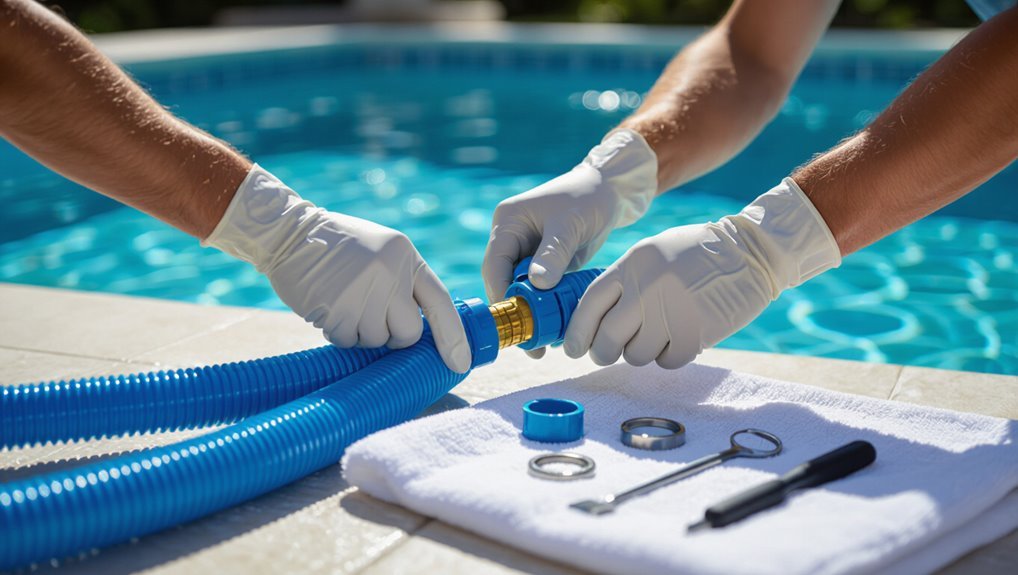
The procedure replaces a worn or cracked connector with a properly sized, sealed fitting to stop water loss and maintain suction.
Expected outcome is a snug, leak-free joint that restores vacuum performance and reduces pump strain.
Minimal tools and basic replacement steps typically complete the repair in under 30 minutes.
Quick summary of the fix and expected outcome
Begin by removing the damaged connector and any debris from the hose ends.
Then fit the replacement connector snugly and secure it with hose clamps or a push-lock system.
This straightforward repair restores a tight seal, prevents suction loss, and allows the vacuum to run efficiently for a consistently clean pool.
The guide on how to replace pool vacuum hose connector guarantees reliable performance and minimal downtime.
Why the Hose Connector Matters for Pool Cleaning
The hose connector is critical for maintaining proper suction and ensuring debris reaches the filtration system rather than leaking back into the pool.
A worn or cracked connector reduces cleaning efficiency and can overload the filter. Visible leaks, loss of suction, and frequent clogging are common signs that the connector needs replacement.
Role of the connector in suction and filtration
Connectors serve as the critical link between a pool vacuum and the filtration system, controlling flow, preventing leaks, and ensuring peak suction for debris removal.
Properly fitted connectors maintain head pressure, direct water through skimmer or dedicated ports, and protect the pump from air ingestion.
Reliable seals optimize filtration efficiency by delivering consistent throughput and preventing cavitation or reduced particulate capture.
Common signs of a failing connector
A failing hose connector often reveals itself through a handful of clear, measurable symptoms: reduced suction at the vacuum head, persistent leaks where the hose meets fittings, and intermittent air entering the system that causes the pump to cavitate.
Additional indicators include visible cracks or brittle plastic, frequent loss of prime, poor debris pickup, and unexplained pressure drops in the filtration gauge.
Tools and Materials You’ll Need
A concise list of parts and tools guarantees the connector replacement proceeds smoothly: replacement connectors, adapters, O-rings, hose clamps, a utility knife, screwdriver, pliers, and a heat gun or warm water for softening the hose.
Additional items such as lubricant, tape measure, and appropriate adapters help verify fit and seal.
The installer should also identify the correct connector type for the pool’s hose and vacuum head before starting.
Parts: replacement connectors, adapters, O-rings, hose clamps
Essential components for replacing a pool vacuum hose connector include replacement connectors sized to the hose, compatible adapters for different fittings, O-rings to guarantee a watertight seal, and hose clamps to secure joints.
The parts selection should match hose diameter and material to prevent leaks and wear.
- Connector
- Adapter
- O-ring
- Hose clamp
Tools: utility knife, screwdriver, pliers, heat gun or warm water, lubricant, tape measure
Gather the right tools before beginning the connector replacement to guarantee a smooth, leak-free repair.
Essential items include a utility knife for clean cuts, screwdriver and pliers for clamps and fittings, heat gun or warm water to soften hose ends, lubricant for O-rings, and a tape measure for correct lengths.
- Utility knife
- Screwdriver
- Heat gun or warm water
- Tape measure
Choosing the right connector type for your system
When selecting a replacement connector, the technician should match the connector type to the pool system’s hose diameter, tailpiece style, and planned connection method to secure a watertight fit and proper flow.
Inspect existing fittings for barb, slip, or threaded ends; measure inner and outer diameters.
Choose materials—PVC, polypropylene, or brass—based on chemical resistance, durability, and budget.
Confirm compatible clamps and seals.
Identifying the Exact Connector Type and Size
Before replacing a pool vacuum hose connector, the exact hose diameter and thread type should be measured with calipers or a ruler to guarantee a proper fit.
Visual inspection will help distinguish barb, slip, quick‑connect, and threaded styles by their shapes and attachment methods.
The chosen connector must match the skimmer, cleaner head, and pump fittings to prevent leaks and maintain suction.
How to measure hose diameter and thread type
To determine the correct replacement connector, the hose’s inner and outer diameters and the thread type must be measured accurately.
These dimensions guarantee a watertight fit and compatible threading with the skimmer, vacuum head, or pump.
Use calipers to record inner (ID) and outer (OD) in millimeters/inches. Count thread pitch per inch or use a gauge.
Note whether threads are straight or tapered.
Visual clues: barb vs. slip vs. quick-connect vs. threaded
A quick visual inspection usually reveals whether a pool vacuum hose uses a barb, slip, quick-connect, or threaded connector by focusing on shape and attachment features:
Barbs show tapered ridges for clamping; slip is smooth, straight tubing meant to fit over a spigot; quick-connect has a spring‑loaded collar or latch; threaded displays helical grooves.
Note material, diameter, and any locking tabs.
Matching connectors to skimmer, cleaner head, and pump fittings
Matching each connector to the skimmer, cleaner head, and pump requires identifying both the connection style and the exact diameter so fittings seat securely and maintain suction.
Measure inner and outer diameters with calipers or a tape, note barb, slip, quick‑connect, or threaded styles, and verify male/female ends.
Cross‑reference measurements with manufacturer specs or bring parts to a pool store for exact matches.
Step-by-Step Replacement Procedure
Before beginning, the pool should be prepared and equipment powered down to guarantee safe maintenance.
The technician removes the old hose and connector, then cleans and inspects hose ends, fittings, and O-rings for wear or damage.
Finally, the appropriate new connector—slip, barb, threaded, or quick-connect—is fitted and secured using clamps, adhesive, or proper O-ring seating techniques.
Prepare the pool and equipment for safe maintenance
Shut down the pump and filter, then secure electrical breakers to prevent accidental restart while work proceeds.
Drain water from the skimmer or vacuum line slightly to avoid spills.
Gather tools: replacement connector, hose clamps, screwdriver, pliers, lubricant, clean rag.
Wear gloves and eye protection.
Clear poolside area of trip hazards and keep a bucket nearby for fittings and debris.
Remove the old hose and connector safely
Begin by confirming the pump remains off and the breaker is secured. Then release any remaining water in the skimmer or vacuum line so the hose can be handled without dripping.
Detach the hose from the vacuum head and skimmer or wall fitting, loosening clamps or twist fittings as needed.
Withdraw the connector gently to avoid damaging hose ends or adjacent plumbing; set parts aside for inspection.
Clean and inspect hose ends, fittings, and O-rings
With the hose and connector removed, thoroughly rinse each hose end and fitting with clean water to remove grit and chemical residue. Then wipe dry with a lint-free cloth.
Inspect ends for cracks, splits, or softened plastic; check fittings for warping or corrosion.
Examine O-rings for nicks, flattening, or brittleness. Replace any damaged components and lightly lubricate O-rings with silicone grease before reassembly.
Fit the new connector: methods for slip, barb, threaded, and quick-connect types
Several common connector types—slip, barb, threaded, and quick-connect—require distinct fitting steps and tools, so the installer should verify the chosen style before proceeding.
For slip, push softened hose onto smooth shank; for barb, fully seat over ridges often after heating; for threaded, align and hand-start threads, then tighten evenly; for quick-connect, insert until audible click guarantees engagement and correct orientation.
Secure the connection: clamps, adhesive, or O-ring seating techniques
After the connector is seated, securing the hose prevents leaks and maintains suction during operation.
Use stainless-steel worm-gear clamps snugged but not over-tightened to avoid crushing.
For slip fittings, apply pool-grade PVC cement sparingly and cure per instructions.
Threaded joints may require Teflon tape.
O-rings must be clean, lubricated with silicone, and properly seated in grooves for a watertight seal.
Test suction and check for leaks after reassembly
Once the connector and hose are reassembled, the technician should run a systematic suction and leak check to confirm proper function before regular use.
They power the pump, observe steady suction at the skimmer or vacuum plate, and inspect joints for air bubbles or water seepage.
Any detected leak prompts shutdown, re-tightening or resealing, and retest until no loss of vacuum or visible leakage occurs.
Alternative Repair Options When Replacement Isn’t Possible
When a direct replacement is not feasible, practical alternatives include temporary seals or patch methods to stop leaks and restore suction.
Hose reducers or adapters can bypass or bridge damaged sections when original fittings are unavailable.
Persistent leaks, complex damage, or uncertainty about a safe repair should prompt consultation with a professional.
Temporary seals and patch methods
Explore temporary seals and patch methods as practical stopgaps for a damaged pool vacuum hose connector when immediate replacement is impractical.
Apply waterproof silicone or marine-grade epoxy to small cracks, or wrap with self-fusing silicone tape for flexible seals.
For larger breaches, combine a rigid patch (plastic or rubber) secured with stainless hose clamps.
Monitor repairs and schedule replacement promptly to guarantee long-term reliability.
Using hose reducers or adapters to bypass damaged sections
Fit a hose reducer or adapter to bridge around a damaged section of pool vacuum hose when cutting out and replacing the connector is not immediately feasible.
Select an adapter sized to the inner diameters, push it firmly into both hose ends, secure with stainless steel clamps, and test for leaks.
This bypass restores flow quickly and preserves existing fittings until permanent repair or replacement occurs.
When to call a professional
If a hose reducer provides only a temporary fix or the damage is extensive, a professional should be contacted to evaluate alternative repairs that preserve system integrity.
A technician can assess internal fittings, replace hard-to-access sections, or recommend pump and skimmer adjustments.
Calling a pro prevents improper seals, avoids warranty voiding, and guarantees long-term leak resolution when DIY options are inadequate or risk further damage.
Troubleshooting Common Problems
The guide next addresses common issues that can arise after installing a new vacuum hose connector.
It covers diagnosing persistent leaks, identifying causes of loss of suction or reduced cleaning performance, and resolving connectors that loosen during operation.
Practical checks and quick fixes are provided to isolate and correct each problem.
Persistent leaks after replacement and how to diagnose them
Even after a correct hose connector installation, a small number of systems continue to show persistent leaks that require systematic diagnosis.
Inspect fittings, O-rings, and hose ends for cracks or deformation. Check clamp tightness and proper seating.
Pressure-test sections by blocking flow and observing bubbles.
Examine adjacent plumbing, skimmer gaskets, and valve seals to isolate source before replacing components.
Loss of suction or reduced cleaning performance
Diagnose reduced suction by methodically checking the vacuum system from hose to pump: inspect the hose connector and hose for cracks or air leaks, verify clamps and O-rings are seated and intact, confirm the skimmer and pump baskets are clear, and guarantee valves are fully open and the pump lid seal is tight.
If suction remains weak, test for blockages in the head, check hose length for excessive kinks, and examine pump impeller for debris.
Connector loosening during operation
Check the hose connector for looseness during operation by observing for wobble, water spray, or popping sounds that indicate movement at the joint.
If loosened, stop use, detach hose, inspect for cracked fittings, worn O-rings, or corrosion.
Replace damaged parts or tighten fittings with appropriate clamps.
Reassemble, test under pressure, and verify a secure, vibration-free connection before resuming cleaning.
Preventive Maintenance to Extend Connector Life
A concise preventive maintenance routine can prolong connector life through a simple inspection checklist that covers cracks, leaks, and fit.
Proper winterizing and storage—draining, protecting from UV, and storing in a temperature-stable place—helps prevent cracking and brittleness.
Scheduled replacement intervals and keeping a small inventory of common fittings guarantee downtime is minimized when a connector fails.
Routine inspection checklist
When performed at regular intervals, a concise routine inspection can catch seal wear, cracks, loose clamps, and hose deterioration before they cause leaks or system failure.
Inspect connectors visually for cracks, squeeze seals for pliability, and verify clamps are snug. Check hose ends for fraying and ascertain fittings seat firmly.
- Visual crack scan
- Seal squeeze test
- Clamp torque check
- Hose-end inspection
Proper winterizing and storage tips to prevent cracking
Several simple winterizing steps greatly reduce the risk of hose connector cracking by keeping materials dry, supported, and protected from freeze-thaw cycles.
Drain hoses completely, detach connectors, and dry parts thoroughly. Store connectors indoors in a cool, dry place away from direct sunlight.
Coil hoses loosely on reels or hang to avoid kinks. Use protective caps or wrap to prevent dust and UV damage.
Recommended replacement intervals and inventory tips
Because connectors experience wear from UV exposure, chemical contact, and mechanical stress, manufacturers and experienced pool technicians recommend replacing flexible vacuum hose connectors on a regular schedule rather than waiting for visible failure.
Replace annually for outdoor pools, every 18–24 months for sheltered installations, or sooner with heavy use.
Maintain a small inventory of common sizes and clamps, label spares, and rotate stock after purchase.
Cost, Time, and Difficulty Estimates
Typical replacement connectors cost between $5 and $20 and are available at pool supply stores, hardware chains, and online retailers.
The repair generally takes 15–45 minutes depending on access and tools on hand. The task requires basic DIY skills; common pitfalls include incorrect sizing, over-tightening, and failing to check seals.
Typical parts cost and where to buy
When replacing a pool vacuum hose connector, homeowners can expect modest parts costs, short purchase times, and low installation difficulty for most common repairs.
Typical connectors, clamps, and O-rings run $5–$20. Specialty quick-connect fittings or adapters may reach $25–$40.
Parts are available at pool supply stores, big-box retailers, and online marketplaces; compare sizes and materials before buying to guarantee compatibility.
Expected time to complete the repair
Efficiency is measured in straightforward steps: replacing a pool vacuum hose connector typically takes 15–45 minutes for a homeowner with basic tools and a matching replacement part.
More complex cases—corroded fittings, hard-to-reach connections, or improperly sized adapters—can extend the job to 1–2 hours or require a professional visit.
Preparation, drying time for sealants, and testing add minimal extra minutes.
Skill level required and common pitfalls to avoid
Confidence and a few basic tools are usually sufficient for replacing a pool vacuum hose connector. A homeowner with rudimentary plumbing skills, a screwdriver, pliers, and a correctly sized replacement part can complete most jobs in 15–45 minutes.
Typical cost is low—$5–$25 for parts.
Common pitfalls include incorrect part size, overtightening, damaged hose ends, and failing to test for leaks before finishing.
Comparison of Connector Types and Best Uses
Different connector types are compared by durability, ease of installation, compatibility, and cost to guide selection for specific pool setups. The table below summarizes typical trade-offs to aid quick decisions. Practical examples follow to match connector choice to use case.
| Connector Type | Typical Strengths |
|---|---|
| Barb/Slip | Low cost, easy install, moderate durability |
| Quick-Connect | High compatibility, fast install, higher cost |
Durability, ease of installation, compatibility, and cost
Evaluating durability, ease of installation, compatibility, and cost helps determine which vacuum hose connector best suits a pool system.
Plastic fittings are affordable and easy to install but less durable. Brass offers longevity and leak resistance but costs more and may require tools.
Barbed and slip connectors balance simplicity and compatibility with common hoses.
Choose based on expected use, budget, and maintenance frequency.
Helpful Accessories and Upgrades
The article then considers accessories that improve durability and convenience, such as heavy-duty clamps, quick-release fittings, and reinforced hoses.
It also notes the benefits of upgrading to universal connectors for broader compatibility or choosing automatic cleaner–specific fittings for optimized performance.
Readers are guided to weigh cost, ease of installation, and compatibility when selecting upgrades.
Heavy-duty clamps, quick-release fittings, and reinforced hoses
Consider upgrading hose connections with heavy-duty clamps, quick-release fittings, and reinforced hoses to improve durability and ease of use.
These upgrades resist leaks, simplify maintenance, and extend hose life.
Visualize options:
- Stainless steel worm-drive clamp securing a ribbed hose.
- Snap-style quick-release coupling for fast swaps.
- Braided-reinforced vacuum hose resisting kinks.
- Corrosion-resistant fittings for pool chemicals.
Upgrading to universal connectors or automatic cleaner-specific fittings
Upgrade options include universal connectors and model-specific fittings that tailor hose connections to different vacuums without major plumbing changes.
Universal connectors offer adjustable diameters and quick locks for varied hose sizes; they simplify replacements and reduce leaks.
Manufacturer-specific fittings guarantee perfect mating with automatic cleaners, preserving suction performance.
Choose corrosion-resistant materials and confirm compatibility before purchase to avoid flow restrictions or premature wear.
Final Checklist Before Resuming Pool Cleaning
Before returning to routine pool cleaning, a brief checklist verifies the new connector performs properly.
They should inspect for leaks, confirm strong suction through the hose, and verify that all safety measures—power off where required and secure fittings—are in place.
Only after these items pass should normal vacuuming resume.
Leak test, suction check, and safety confirmation
Perform a systematic leak test, suction check, and safety confirmation to confirm the replaced vacuum hose connector functions correctly and poses no hazard.
Inspect joints for drips; tighten or reseal as needed. Run the pump, observe steady suction, and confirm debris flows into the skimmer.
Verify electrical safety and clear tools before restarting cleaning.
- Visual leak inspection
- Pressure/suction test
- Debris flow check
- Safety/equipment review
Conclusion
A properly replaced pool vacuum hose connector restores suction and prevents leaks, ensuring efficient cleaning and longer equipment life. Like a well-fitted puzzle piece, the correct connector aligns hoses and fittings to maintain steady water flow. By choosing the right type and size, using proper tools, and following the step-by-step procedure, routine maintenance becomes quicker and less stressful. With a final pressure check and secure clamps, the pool is ready for reliable, leak-free cleaning.
