How to Keep Water Pipes From Freezing Without Electricity: 12 Reliable DIY Methods
To prevent water pipes from freezing without electricity, homeowners can take several effective measures. Install foam sleeves or fiberglass wrap on exposed pipes, seal any gaps and vents, and enclose pipes in insulated boxes. Rerouting lines inward can also help, as well as using thermal mass or passive-solar panels to retain warmth. In urgent situations, keep faucets open, apply warm compresses, and shut off the main water supply if multiple lines are at risk. Continue reading for detailed step-by-step methods and materials.
Why pipes freeze and when freezing is most likely
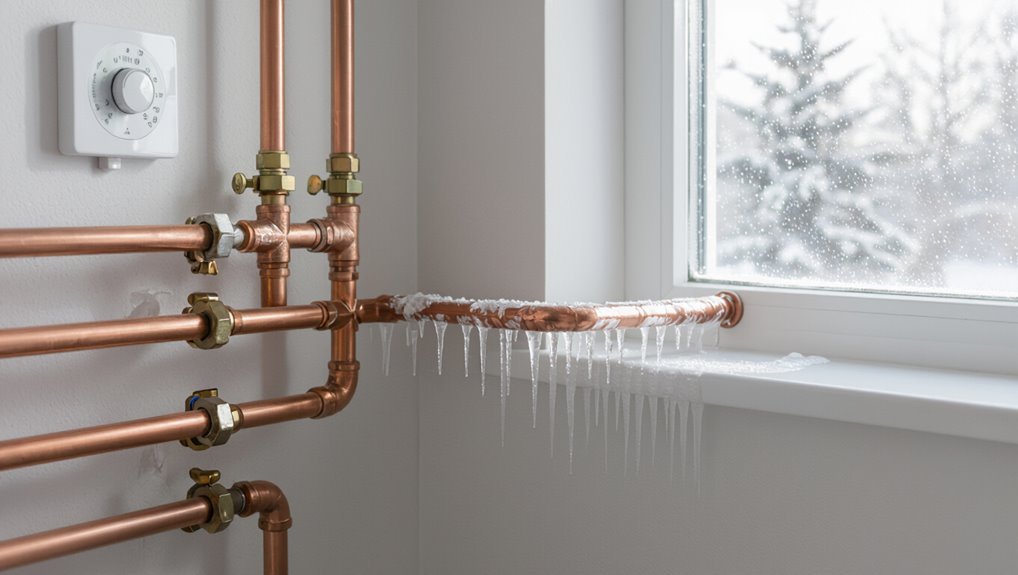
Freezing occurs when water in pipes reaches 32°F (0°C), with the risk increasing as outdoor temperature drops, pipes sit in unheated spaces, or insulation is inadequate.
Pipes most often freeze in exterior walls, crawl spaces, attics, basements, garages, and detached outbuildings where exposure and poor insulation combine.
Early warning signs include frost or condensation on pipes, reduced or no water flow, and unusually cold fixtures or rattling sounds as ice forms.
How temperature, pipe location, and insulation affect freezing
Because water expands as it freezes, pipes exposed to low temperatures are vulnerable when their surroundings fall below freezing. The risk increases with colder air, uninsulated or poorly insulated locations (crawlspaces, attics, exterior walls), and temperature differentials that draw heat away from the pipe.
This makes freeze events most likely during prolonged cold spells or overnight drops when heating is reduced. Insulation thickness, placement, and thermal breaks determine success in how to keep water pipes from freezing without electricity.
Common vulnerable pipe locations in homes and outbuildings
Having outlined how temperature gradients and insulation determine a pipe’s resistance to cold, attention turns to specific locations where those factors most often align to cause freezing.
Common vulnerable spots include unheated basements, crawlspaces, attics, exterior walls, garages, and meter pits.
Long exposed runs, poorly insulated joints, and pipes near drafty vents or windows are especially susceptible during prolonged subfreezing periods.
Signs that pipes are at risk of freezing
When do pipes show early warning signs of imminent freezing?
Frost on exterior walls, visible condensation that later ice over, unusually cold pipe surfaces, and sluggish or reduced water flow indicate danger.
Repeated unexplained pressure drops, creaking or ticking sounds, and localized cold drafts near pipe routes also signal increased risk.
These signs most commonly appear during prolonged subfreezing temperatures and overnight lows.
Immediate actions when you suspect pipes may freeze
When freezing is suspected, the homeowner should first inspect visible and accessible pipes for cold spots, frost, or bulging while avoiding risky areas and using a non-contact thermometer or touch with caution.
If a freeze is possible and power is unavailable, simple measures such as opening faucets to relieve pressure, insulating exposed sections with towels or foam, and applying warm (not boiling) water can be employed.
If multiple pipes are affected or a burst is suspected, shutting off the main water supply and draining the system are immediate steps to prevent extensive damage.
How to safely check exposed and hidden pipes
Start by visually inspecting all accessible water lines, focusing on areas that lose heat fastest—crawl spaces, uninsulated attics, exterior walls, basements, and utility rooms.
Listen for dripping or air movement, feel pipes through insulation for cold spots, and check meter and fixture flow.
For hidden runs, follow wall and floor layouts, probe gently with a coated wire, and note locations for targeted insulation or professional service.
Emergency temporary measures that require no electricity
Act quickly to reduce the risk of freezing by relying on simple, non-electric steps:
- Open cabinet doors to expose pipes and allow warmer air circulation.
- Let a slow drip from faucets relieve pressure and prevent freezing.
- Wrap pipes with towels, foam, or insulation and secure with tape.
- Apply warm (not boiling) water via soaked cloths, replacing as they cool.
When to shut off the main water supply and drain lines
Why shut off the main water supply now? When temperatures plummet and pipes show frost, the main should be closed to prevent pressurized water from expanding into ice and causing bursts.
After shutting off, open faucets and drain lines, including outdoor spigots and low points. This reduces trapped water, relieves pressure, and limits damage until thawing or permanent repairs occur.
Passive insulation methods that work without electricity
Passive insulation methods rely on materials like foam, fiberglass, polyethylene pipe wrap and non-powered heat-tape alternatives to slow heat loss.
Proper installation—snugly wrapping straight runs, overlapping and sealing joints, and adding extra insulation at fittings and valves—ensures effectiveness across copper, PVC and PEX lines.
In walls and crawlspaces, pre-formed pipe sleeves and rigid foam board can be fitted around pipes and service penetrations to block cold air and maintain thermal continuity.
Insulating materials to use (foam, fiberglass, pipe wrap, heat tape alternatives)
Insulation choices determine how effectively pipes resist freezing without relying on power: closed-cell foam sleeves, mineral wool or fiberglass wraps, polyethylene pipe insulation, and multi-layer pipe wrap combine thermal resistance and ease of installation to slow heat loss.
Reflective foil-faced wraps add radiant barrier value in unconditioned spaces. Dense, moisture-resistant materials outperform thin wraps; choose sizes matched to pipe diameter and exposure.
How to properly wrap and insulate different pipe types and joints
Having selected appropriate materials, attention shifts to correct application on different pipe types and vulnerable joints to maximize freeze protection without power.
Rigid copper needs overlapping foam wraps; plastic benefits from snug fiberglass batts; threaded joints require tape plus sleeve; elbows and tees get extra layering and sealed tape.
Steps prioritize tight contact, sealed seams, and moisture barriers.
- Copper: overlap foam
- Plastic: snug fiberglass
- Threads: tape+sleeve
- Elbows/tees: extra layers
Using pipe sleeves and foam board in walls and crawlspaces
Install pipe sleeves and foam board strategically in walls and crawlspaces to create continuous thermal barriers around vulnerable plumbing runs.
Fit closed-cell foam pipe insulation snugly over pipes, seal seams with foil tape, and cut rigid foam board to block cold air pathways.
Support insulation to prevent gaps, maintain ventilation where required, and inspect periodically for compression or moisture that reduces effectiveness.
Using heat-retaining strategies without power
The section outlines methods to trap and retain heat around vulnerable pipes, including sealing cabinet doors, enclosing crawlspaces, and concentrating insulation where pipes run.
It discusses thermal mass options—such as water-filled barrels or stacked rocks—that absorb daytime warmth and release it slowly overnight.
It also covers simple solar and passive-solar tactics, like orienting south-facing glazing or using sun-warmed thermal stores to raise local temperatures.
How to trap heat in cabinets, crawlspaces, and near pipes
When temperatures drop and mains power is unavailable, trapping residual heat around vulnerable plumbing becomes essential to prevent freezing. Enclose pipes in insulated boxes or foam-lined cabinets, seal gaps and vents to reduce drafts, and install removable flaps to retain warmth when access is unnecessary.
Use reflective foil barriers behind fixtures and place tightly wrapped heat-retaining fabric or closed-cell foam around exposed pipe runs.
Thermal mass and heat-storage techniques (water barrels, rocks)
Harnessing thermal mass provides a passive way to release stored heat slowly into cold spaces, reducing the risk of pipe freeze without relying on electricity.
Position barrels of water, masonry, or dense stones near vulnerable pipes; these materials absorb daytime warmth and emit it at night.
Confirm containers are sealed, frost-proof, and placed where heat conduction to pipes is maximized while avoiding freezing hazards.
Solar- and passive-solar methods to warm areas with pipes
Capture sunlight and store its warmth near vulnerable plumbing to reduce freeze risk without electricity.
Passive solar glazing, insulated windowed boxes, and south-facing thermal benches concentrate heat beside pipes.
Use dark, high-heat-capacity surfaces and insulated covers to retain warmth overnight.
Implement:
- South-facing glazing
- Thermal mass placement
- Insulated heat-trap boxes
- Reflective sun-directing panels
Mechanical and structural solutions that don’t require electricity
Mechanical and structural measures can reduce freeze risk without relying on power. Options include rerouting or relocating pipes to interior walls and other heated areas, and adding insulation to surrounding walls, floors, and ceilings.
For outdoor connections, installing frost‑proof faucets and proper vacuum breakers prevents backflow and exposure to freezing.
Re-routing or relocating pipes to interior walls and heated areas
Rerouting or relocating pipes toward interior walls and consistently warm spaces reduces exposure to freezing temperatures by shortening the length of vulnerable runs and placing plumbing within the building’s thermal envelope.
Homeowners should plan routes through heated rooms, closets, or crawlspaces, consolidate exterior-facing lines, and reposition fixtures when feasible.
Professional consultation guarantees proper slope, access, and compliance with codes while minimizing disruption and leak risk.
Adding insulation to walls, floors, and ceilings around plumbing
When placed around pipes within walls, floors, and ceilings, insulation reduces heat loss and raises the ambient temperature enough to prevent freezing without using power.
Install closed-cell foam, fiberglass batts, or foam board adjacent to pipe runs; seal gaps and air leaks with spray foam or caulk.
Guarantee adequate thickness, maintain ventilation where required, and inspect periodically for moisture, compression, or gaps compromising thermal performance.
Installing frost-proof outdoor faucets and vacuum breakers
Install frost‑proof outdoor faucets and vacuum breakers to prevent standing water in exterior plumbing from freezing and to protect potable water from backflow without relying on electricity.
Frost‑proof faucets locate the shutoff and drain point inside heated walls, eliminating trapped water. Vacuum breakers prevent contamination when hoses are attached.
Proper installation, correct slope, and winterizing hose removal guarantee reliable, passive freeze protection.
DIY low-tech heating options
Practical, low-tech heat sources—such as hot water bottles, warm towels, and commercially made heat packs—can be used near vulnerable pipes if applied with insulation and periodic checks to prevent burns or moisture issues.
Small chemical hand warmers may be arranged in ventilated, noncombustible holders to provide localized warmth without direct contact with pipe surfaces.
Careful placement and nonflammable barriers are essential to prevent fires when using open flames or heated containers, and users should never leave such setups unattended.
Using hot water bottles, warm towels, and heat packs safely
Several simple heat sources—hot water bottles, warm towels, and chemical heat packs—can reduce the risk of frozen pipes when used correctly.
Use insulated barriers, avoid direct contact with plastic pipe finishes, monitor regularly, and remove when warmer.
Maintain ventilation, secure placement, and check for leaks.
Follow manufacturer heat-pack instructions and never leave unattended near combustible materials.
- Insulate
- Protect
- Monitor
- Secure
How to create safe chemical hand warmer setups near pipes
When temperatures dip and traditional heating is unavailable, chemical hand warmers can provide a controlled, low-tech source of localized heat for vulnerable pipe sections.
Place single-use or reusable warmers in breathable pouches and tuck them into insulation wraps or fabric sleeves around exposed pipes.
Monitor periodically, replace before exhaustion, keep dry, and position to avoid direct contact with plastic fittings or insulation materials that might degrade.
Precautions to avoid fire hazards with open flames and heated containers
After using chemical warmers, attention must turn to low-tech heat sources that pose greater fire risk: open flames, hot plates, torches, and heated containers.
Maintain clearances from combustibles, never leave devices unattended, and place on nonflammable surfaces. Use thermostatic controls or timers when possible, keep a fire extinguisher nearby, guarantee proper ventilation, and test setups briefly before extended use.
Preparing plumbing before cold seasons
Before temperatures drop, the homeowner should winterize water lines and outdoor plumbing by shutting off supplies, insulating exposed pipes, and closing exterior valves.
Irrigation and seasonal systems require draining and, where appropriate, blowing out with compressed air to remove standing water.
A concise annual maintenance checklist—including insulation checks, valve exercises, and leak inspections—reduces the risk of freeze damage.
Steps to winterize water lines and outdoor plumbing
Prepare outdoor and exposed water lines for freezing temperatures by draining, insulating, and shutting off supply points to eliminate trapped water and reduce heat loss.
Close exterior shutoffs, open faucets to relieve remaining pressure, remove and store hoses, and clear valves.
Wrap pipes with foam or heat‑tape alternatives, secure insulation with tape, and check for drafts near entries to prevent cold air intrusion.
How to drain and blow out irrigation and seasonal systems
Winterizing irrigation and seasonal systems requires removing residual water and preventing freeze damage by draining, using compressed air to clear lines, and isolating backflow devices.
Professionals or capable homeowners shut valves, open drain ports, and depressurize controllers. Attach an air compressor at the irrigation manifold, apply short bursts to expel water from each zone, then close drains and protect exposed components with insulation or covers.
Annual maintenance checklist to reduce freeze risk
A yearly checklist helps identify and correct vulnerabilities in a home’s plumbing before freezing temperatures arrive.
Inspect exposed pipes and insulation; seal gaps and replace worn insulation.
Test outdoor hose bibs and shutoff valves; drain and cap as needed.
Verify attic, crawlspace, and basement ventilation and heating.
Maintain landscape to prevent cold drafts near piping.
- Inspect insulation
- Seal gaps
- Drain externals
- Test valves
Long-term upgrades to prevent freezing without relying on electricity
Long-term strategies prioritize passive measures that reduce freeze risk without power dependence. Options include upgraded pipe insulation and using freeze-resistant materials, bolstering the building envelope through air sealing and added insulation, and routing plumbing to minimize exposure in unheated spaces.
Each approach should be evaluated for cost, climate suitability, and ease of retrofit.
Pipe insulation upgrades and material choices
Several effective material choices and insulation upgrades can considerably reduce the risk of pipe freezing without relying on electricity.
Use closed-cell foam sleeves for exterior or unheated spaces; fiberglass with vapor barrier suits irregular runs and higher temperatures.
Consider pipe replacement to PEX or larger-diameter lines where feasible.
Seal gaps at penetrations and add removable insulated access panels for valves and meters.
Passive building envelope improvements (air sealing, insulation)
Resilience in the building envelope reduces cold air infiltration and stabilizes interior temperatures, protecting pipes without electricity.
Air sealing gaps around windows, doors, and utility penetrations minimizes drafts.
Adding continuous insulation to exterior walls, attic, and crawlspaces raises thermal resistance.
Seal and insulate basement and garage areas where plumbing runs.
Durable vapor control and proper flashing prevent moisture issues while maintaining long-term pipe protection.
Designing plumbing layout for cold climates
When plumbing is planned with cold-climate principles in mind, pipe routing, material choice, and fixture placement collectively reduce freeze risk without relying on active heating.
Designers favor interior runs, minimize exterior walls crossings, slope lines for drainage, and avoid low spots.
Use freeze-resistant materials, larger diameters, and locate vulnerable fixtures (meters, pumps) inside insulated zones.
Strategic isolation and redundancy enhance resilience.
Troubleshooting frozen pipes and safe thawing methods without power
When water stops flowing, the homeowner should first distinguish a frozen section—common where pipes run through unheated spaces—from a ruptured pipe by checking for cold, bulging, or damp areas and listening for leaks.
If frozen, safe thawing methods without electricity include opening faucets, applying warm (not boiling) water with cloths, using a hairdryer on a generator-free extension only if battery-powered, or directing sun and insulation to the affected run.
If a pipe has burst, immediate steps are to shut off the main valve, contain water with buckets and towels, and call for professional repairs while documenting damage for insurance.
How to identify a frozen section versus a burst pipe
How can a homeowner tell whether a pipe is frozen or has actually ruptured?
Check for absence of water at fixtures; listen for dripping or hissing inside walls.
Inspect exposed pipes for frost, bulging, or cracking.
Feel along pipe runs for cold spots versus wetness.
Monitor water meter: movement with all fixtures off indicates a leak.
Visible pooling or steady water flow signals a burst.
Safe thawing techniques that do not use electricity
Several practical methods exist to thaw frozen pipes safely without electricity, focusing on gentle, controlled warming and preventing pressure buildup.
Use warm compresses, hot towels, or heated water applied gradually; open faucets to relieve pressure; increase ambient heat where possible; and monitor for leaks.
- Warm compresses
- Hot towels/hot water
- Open faucets
- Monitor continuously
Steps to take if a pipe has burst (containment and repairs)
Act quickly to limit water damage and secure safety once a pipe bursts: shut off the main water supply, open nearby faucets to drain remaining water and relieve pressure, and turn off electricity to affected areas if flooding threatens outlets or appliances.
Contain leaks with buckets, towels, and temporary clamps or rubber patched with hose clamps.
Document damage, call a plumber, and dry the area to prevent mold.
Cost, materials, and time estimates for DIY solutions
Costs, materials, and time commitments vary by the chosen DIY approach and should be weighed before starting.
| Item | Typical range |
|---|---|
| Materials (insulation, heat tape, pipe sleeves) | $10–$75 |
| Time (quick fixes vs. projects) | 15 minutes–6 hours |
A homeowner can often resolve minor freezes in under an hour, while full insulation or rerouting may take a weekend and modest additional labor costs.
Typical costs for materials and simple labor
Estimating expenses for preventing frozen pipes depends on the chosen method, the length of exposed piping, and regional labor rates.
Basic materials—pipe insulation foam, heat tape (if used with solar/alternative power), sealant, and weatherstripping—typically range $10–$100.
Simple handyman labor adds $50–$150 per hour locally.
Small DIY kits lower costs; larger retrofits raise materials and labor proportionally.
Time required for quick fixes vs. longer projects
After outlining typical material and labor expenses, attention shifts to how much time different preventive measures demand.
Quick fixes—pipe insulation wraps, faucet drip, and localized heat tape substitutes—take 15–60 minutes and usually cost little.
Longer projects—rerouting, adding crawlspace insulation, or installing passive heat boxes—require several hours to days, more materials, and sometimes skilled help, increasing overall time and expense.
Common mistakes to avoid when protecting pipes from freezing
The section highlights frequent errors that undermine pipe protection, such as partial insulation and blocked airflow that leave cold spots.
It also warns against using open flames or improvised heat sources, which present fire and carbon-monoxide risks.
Practical, safer alternatives are then recommended.
Why partial insulation and blocked air flow fail
When insulation covers only portions of a pipe or vents and registers are blocked, the protection against freezing is compromised because thermal bridges and restricted air movement allow cold pockets to form.
As a result, moisture-laden air or cold drafts can reach exposed spots and trigger ice formation even where most of the line appears insulated.
Partial coverage leaves gaps, and blocked airflow prevents warm air circulation, concentrating cold.
Dangers of using open flame or unsafe heat sources
Although using open flames or makeshift heat sources might seem expedient, they pose significant fire, carbon monoxide, and pipe-damage risks that outweigh any short-term benefit.
Portable torches, unvented heaters, candles, and cooking appliances can ignite insulation, warp or burst pipes from uneven heating, and produce deadly fumes.
Safer alternatives—proper insulation, heat tape designed for pipes, and passive warming—are strongly recommended.
Quick-reference checklist for preventing frozen pipes without electricity
A compact checklist helps homeowners rapidly prepare for freezing weather when electricity is unavailable.
Use concise steps to prioritize insulation, water flow, and emergency heating while minimizing risk.
- Insulate exposed pipes and seal drafts.
- Open cabinet doors and drip faucets.
- Apply safe heat sources (space heater alternatives) and monitor.
- Shut off and drain outdoor lines; have tools and materials ready.
Conclusion
When freezing threats loom, homeowners should treat prevention like wrapping a sleeping child: layers of care, patience, and attention keep danger at bay. Combining insulation, heat-retaining techniques, and simple mechanical fixes provides reliable protection without electricity. Immediate, calm responses and safe thawing methods limit damage if pipes freeze. Regular inspections, avoiding common mistakes, and using appropriate materials deliver cost-effective resilience so plumbing weathers cold snaps until power or professional help returns.