How to Thaw Frozen Drain Pipes Underground Safely and Prevent Recurring Freezes
To safely thaw frozen underground drain pipes and prevent future freezes, first locate and isolate the affected pipes. Expose only minimal soil for access and apply controlled heat using methods like heat tape, circulating lukewarm water, or steam. Ensure you’re using GFCIs and moisture-rated equipment for safety. After thawing, inspect for leaks and use temporary clamps if necessary. To prevent recurring issues, improve insulation, increase the burial depth of pipes, and address any drainage problems. For detailed methods, tools, and safety steps, further guidance is provided.
Why Underground Drain Pipes Freeze and How to Recognize the Problem
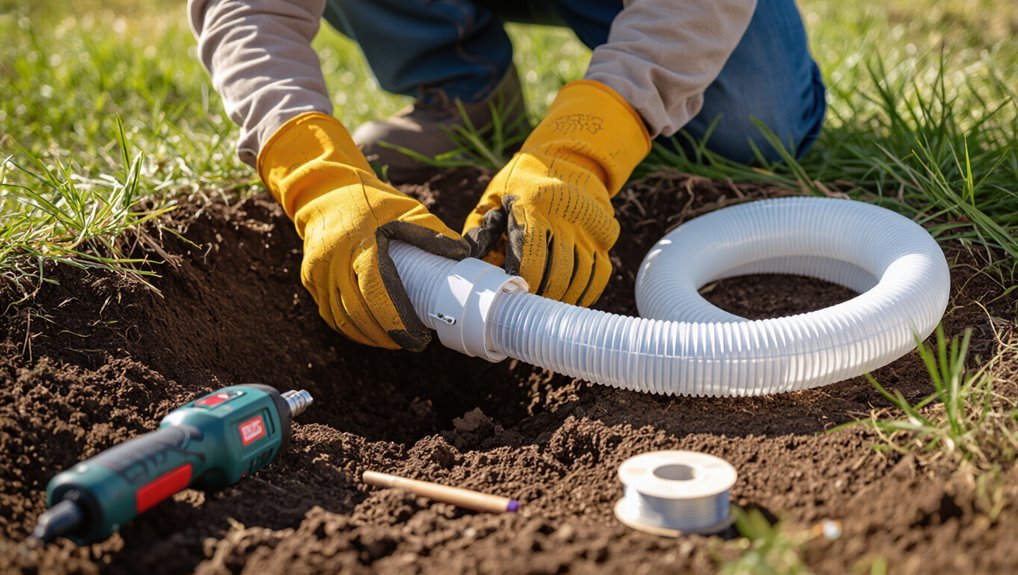
Frozen conditions form in buried drain lines when groundwater or residual water within the pipe cools below freezing, often exacerbated by shallow burial depth, poor insulation, or shifting soil that exposes lines to cold air.
Typical signs include slow drainage, gurgling noises, localized frost heave or ice near cleanouts, and sudden backups when thawing begins.
Incorrect thawing methods can crack pipes, dislodge joints, and cause flooding or contamination, so recognition and proper technique are critical.
How freezing occurs in buried drain lines
When soil temperatures drop below freezing and groundwater or residual water in a buried drain line is exposed to that cold—usually because of shallow burial depth, inadequate insulation, or prolonged cold snaps—ice forms inside the pipe, constricting flow and often creating blockages.
Thermal gradients, soil moisture, pipe material, and slope influence freeze onset. Understanding these factors guides decisions about how to thaw frozen drain pipes underground safely and effectively.
Common signs of a frozen underground drain pipe
Having outlined how buried drain lines freeze, attention turns to recognizing the problem before it worsens.
Indicators include slow drains, repeated backups, gurgling or bubbling from fixtures, unusual odors, and localized cold spots in yard or pavement above the line.
Reduced water flow from outdoor taps and sudden wet patches once thawing begins also suggest prior freezing within an underground drain pipe.
Risks and consequences of thawing incorrectly
Thawing an underground drain pipe improperly can lead to structural damage, costly repairs, and safety hazards.
Incorrect methods—rapid heating, using open flames, or applying localized heat—can crack pipes, burst joints, flood foundations, and destabilize soil.
Electrical or fire risks, mold from unnoticed leaks, and disrupted sewage lines pose health hazards.
Professional assessment and controlled thawing minimize these consequences.
Immediate Safe Steps to Take Before Thawing
Before attempting to thaw a frozen drain pipe, the situation should be assessed for accessible points, available tools, and clear safety hazards.
The decision to proceed as a DIY task or to call a professional depends on pipe location, severity of the freeze, and the homeowner’s experience and equipment.
Required safety equipment—insulated gloves, eye protection, and a safe heating method—should be confirmed and any electrical or gas risks mitigated before work begins.
Assessing the situation: tools, access points, and safety checks
Begin by conducting a quick, systematic assessment of the frozen drain pipe scenario: identify the exact location of the freeze, note visible signs of pipe damage or bulging, and confirm the accessibility of the affected section (basement, crawlspace, exterior wall).
Gather the basic tools and safety equipment needed for a controlled thaw. Check for gas lines, electrical hazards, adequate ventilation, stable footing, and an assistant before proceeding.
When to call a professional vs. DIY
When should a homeowner attempt a DIY thaw and when is a professional required?
Homeowners may proceed if the freeze is localized, access is clear, basic thawing tools are available, and no structural or sewer backups exist.
Call a professional if multiple lines freeze, access is restricted underground, odors or sewage backup appear, pipes are damaged, or uncertainty about diagnosis or risk persists.
Required safety equipment and precautions
Any homeowner preparing to thaw frozen pipes must first assemble basic personal protective equipment and take specific safety steps to minimize injury and property damage.
They should wear insulated gloves, safety goggles, non-slip boots, and a dust mask.
Before thawing, shut off water and electricity to affected areas, ventilate confined spaces, clear combustibles, position a drip pan, and have a fire extinguisher nearby.
Step-by-Step Safe Methods to Thaw Frozen Underground Drain Pipes
The section outlines practical, step‑by‑step methods for safely thawing frozen underground drain pipes.
It covers gradual warming with running water, use of heat tape, pipe heaters or portable electric heaters, and controlled hot‑water circulation or flushing.
It also explains safe steam or heated‑air options and warns against open flames or high‑heat torches.
Thawing by running water and gradual warming
Begin by directing a steady stream of lukewarm water into fixtures connected to the frozen underground line while applying gentle, uniform external heat along accessible sections of the pipe; this combination promotes gradual thawing from the open end inward, reduces pressure buildup, and helps avoid sudden bursts.
- Monitor flow at multiple fixtures
- Increase water temperature slowly
- Inspect for leaks continuously
- Stop if pressure spikes or noises occur
Using heat tape, pipe heaters, and portable electric heaters
Apply heat tape, pipe heaters, or portable electric heaters methodically to thaw frozen underground drain pipes while observing safety and manufacturer guidelines.
Position devices evenly along insulated sections, avoid direct soil contact unless rated, and maintain dry connections.
Monitor temperature, circuit load, and nearby combustible materials.
Use GFCI protection, follow run-time limits, and inspect for leaks as ice clears to prevent damage and recurrence.
Applying hot water circulation and flushing techniques
After using heat tape or electric heaters along accessible runs, attention shifts to circulating hot water and flushing to remove remaining ice within underground drain lines.
Technicians introduce warm water at upstream access points, maintain steady flow, and open downstream fixtures to promote movement.
Small-volume, controlled pours prevent pressure spikes. Continuous flushing confirms thaw progress; inspect for leaks and restore insulation once clear.
Using steam or heated air safely
When using steam or heated air to thaw frozen underground drain pipes, technicians should follow controlled, incremental procedures that prioritize safety, pressure management, and containment of condensate. They monitor temperature, limit exposure time, and apply heat from access points while avoiding overpressurization.
Personnel wear protective gear, use calibrated delivery equipment, vent and capture discharge, and verify thaw progress with cameras or probes before restoring normal flow.
Techniques to avoid (why not to use open flame or high-heat torches)
Avoid using open flames or high-heat torches on frozen underground drain pipes because they create severe fire, pressure, and material-failure hazards: such heat can rapidly expand trapped ice, rupture pipe joints, ignite nearby combustibles, and damage insulation or sewer lines.
Instead, recommend controlled methods—electric pipe heaters, circulated warm water, steam from approved equipment, or professional thawing services—to minimize risk and guarantee integrity.
Tools and Materials Needed for Thawing and Repair
The discussion shifts to the specific tools and materials required for thawing and any subsequent repairs.
It covers essential hand tools and inspection gear, the specifications and safety ratings for electric or heated equipment, and temporary repair materials to manage leaks found during thawing.
Clear selection criteria and safety considerations help guarantee effective and safe work.
Essential hand tools and inspection gear
A compact set of hand tools and basic inspection gear enables safe, efficient thawing and quick assessment of frozen drain pipes.
Essential items focus on access, detection, and minor repairs:
- Flashlight or headlamp for visibility in trenches and cavities
- Adjustable wrench, pliers, and pipe cutter for fittings
- Hand auger or drain snake for blockages
- Inspection mirror and small camera for visual checks
Electric and heated equipment specifications and safety ratings
When selecting electric and heated equipment for thawing frozen drain pipes, users should prioritize devices rated for plumbing use with clear temperature limits, wattage output, and built-in safety features such as thermostat control and automatic shutoff; certified markings (UL, CSA, or equivalent) and waterproof or moisture-resistant ratings (IPX4 or higher for wet environments) indicate suitability and reduce risk of electrical hazard.
| Device | Rating | Key feature |
|---|---|---|
| Heating cable | 120–240V | Thermostat |
| Heat gun | 500–1500W | Overheat cutout |
| Pad heater | IPX4+ | Even heat |
| Temperature monitor | -50–150°C | Alarms |
| GFCI | N/A | Ground fault protection |
Temporary repair materials for leaks discovered during thawing
Having chosen electrically rated thawing equipment with appropriate safety features, attention should turn to temporary repair materials for leaks that may appear as ice melts.
Recommended items: pipe repair clamps, rubber repair sleeves, self-fusing silicone tape, epoxy putty, hose repair kits, and approved pipe sealants.
Include gloves, rags, a heat-resistant utility knife, and a flashlight.
Use materials rated for buried pipe conditions.
How to Locate the Frozen Section Underground
Locating an underground freeze begins by tracing the drain line from the affected fixture toward likely cold spots, following visible runs and fittings.
Thermal imaging or infrared cameras, supplemented by handheld probes, can pinpoint temperature differentials along the buried pipe.
Once identified, the location should be marked and exposed with minimal digging to confirm access before thawing.
Tracing methods from the fixture to the freeze point
Begin tracing from the affected fixture and work outward along the pipe’s known route, using temperature cues and sound to narrow the search to the underground freeze point.
Inspect accessible pipe runs, fittings, junctions, and low spots where water pools.
Tap gently and listen for muted or hollow tones.
Note colder sections and changes in pipe insulation or soil cover to pinpoint probable freeze locations.
Using thermal imaging, infrared, and probes
Employ thermal imaging cameras, infrared thermometers, and soil probes to pinpoint the underground frozen section with speed and accuracy.
Thermal cameras reveal temperature differentials over ground surfaces; infrared thermometers verify spot readings.
Push slender soil probes to detect cold zones and ice depth.
Combine readings with pipe layout maps to confirm location before excavation or targeted thawing, minimizing time and unnecessary disturbance.
Marking and exposing the pipe with minimal digging
With the frozen section identified by thermal tools and probes, the next step is to mark and expose the pipe using the smallest practical excavation.
Stake or spray-mark trench lines, confirm depth with a soil probe, and hand-dig the initial access to avoid utility damage.
Excavate only enough to reach insulation or pipe bedding, preserving surrounding soil and minimizing disturbance for efficient repair and backfill.
Common Problems During Thawing and How to Solve Them
Thawing can reveal or cause problems that require prompt, specific responses. Technicians often encounter burst joints or leaks once ice melts, obstructing debris and ice chunks that must be removed without damaging pipes.
Internal corrosion or structural defects become apparent only after thawing. Each issue demands a different approach — temporary shutoffs and repairs for leaks, careful mechanical or warm-water methods for clogs, and assessment for corrosion-related replacement.
Dealing with burst joints or leaking after thawing
If pipes or joints leak after ice melts, the immediate priority is to stop water flow and assess damage before further thawing or repairs proceed.
Isolate the section via shutoff valves, drain residual water, and document leak locations.
Temporarily contain seepage with clamps or sleeves.
Contact a qualified plumber for permanent joint repairs or pipe replacement, and inspect surrounding soil for erosion or contamination risks.
Clogs and trapped ice chunks’ safe removal methods
Begin by identifying whether reduced flow stems from soft sludge, mineral buildup, or solid ice chunks lodged in the line.
Use noninvasive flushing, low-pressure hot water, or mechanical augers sized for the pipe.
Remove loosened ice fragments with vacuum or shop-vac designed for water.
Inspect after clearing to confirm full flow.
Avoid high-pressure jets that risk dislodging debris into traps.
When thawing uncovers corrosion or structural damage
Detecting corrosion or fractures as ice melts requires immediate assessment to prevent leaks or collapse.
The responder should stop thawing, isolate the section, and relieve pressure. Document damage, brace soil if collapse risk exists, and arrange professional inspection.
Temporary repairs (clamps, sleeves) may hold, but permanent replacement of compromised pipe material is usually required to restore integrity and prevent repeat failures.
Permanent Preventive Measures to Avoid Recurring Freezes
To prevent recurrent freezes, the article now examines durable strategies such as selecting appropriate pipe insulation and correct installation, increasing burial depth and proper slope, and employing heat trace systems with thermostatic controls.
It also considers improving drainage and backflow protection, choosing soil and grading that reduce standing water, and using landscaping or external measures to shield drain lines from cold exposure.
Practical guidance on when to consult a professional for installation or repairs will follow.
Proper pipe insulation options and installation tips
When preventing recurring freezes, selecting the right pipe insulation and installing it correctly are essential for long-term protection; choices should balance thermal resistance, moisture resistance, and ease of installation for the specific pipe location.
Closed-cell foam, rubber sleeves, and polyethylene with vapor barriers suit underground drains.
Guarantee continuous coverage, sealed joints with waterproof tape or sealant, and protective outer jacketing to prevent compression and water intrusion.
Adjusting burial depth and slope for freeze protection
After selecting and installing suitable insulation, attention should turn to the physical positioning of underground drain pipes: increasing burial depth and ensuring a consistent fall reduce the chance of standing water freezing and damaging the line.
Install pipes below local frost depth, maintain uniform slope (typically 1/8–1/4 inch per foot for drains), avoid low spots, and compact backfill to prevent settling that creates water pockets.
Heat trace systems and thermostatic controls for drains
Consider heat trace systems and thermostatic controls as active, long-term defenses against recurring drain freezes: electrically heated cables or mats applied along pipe runs deliver targeted warmth, while integrated thermostats or ambient sensors automate power only when temperatures approach freezing.
Properly installed with waterproof connections and ground-fault protection, they minimize energy use, reduce maintenance, and provide reliable freeze prevention when combined with appropriate insulation and professional installation.
Improving drainage, backflow prevention, and soil considerations
Improve site drainage, secure backflow protections, and address soil conditions to remove the environmental factors that allow drain pipes to freeze repeatedly.
Grade soil away from pipe lines, install frost-proof drains and check valves, and reroute surface runoff.
Improve subsoil compaction and add coarse, well-draining backfill.
Guarantee reliable backflow preventers and accessible inspection ports to reduce standing water and minimize freeze risk long-term.
Landscaping and external measures to reduce freeze risk
Landscaping and external site modifications offer durable defenses against frozen drain pipes by altering surface water flow, insulating vulnerable lines, and reducing exposure to cold air.
Strategic grading, French drains, and permeable surfaces divert water away from pipes.
Adding mulch, berms, and windbreaks insulates and shields lines.
Plant selection and avoiding shallow planting near trenches minimize disruption and maintain consistent soil temperatures.
Cost, Timeframe, and When to Hire a Professional
Cost and time considerations help determine whether a homeowner handles a frozen drain pipe or hires a pro.
Typical DIY thawing expenses are low but can escalate if repairs are needed, while professional services carry higher upfront fees but include diagnostics and warrantyed repairs.
Guidance on expected timeframes for common scenarios and key questions to ask a plumber—licensing, insurance, estimate breakdown, and emergency availability—will assist in choosing the right professional.
Typical costs for DIY thawing vs. professional service
When a frozen drain appears, homeowners must weigh the modest expenses of DIY thawing—usually limited to tools like a hair dryer, heat wrap, or plumbing snake costing $20–$150—against professional services that commonly range from $150 to $500 for a single visit, with emergency or after-hours calls often doubling the fee.
| Option | Typical Cost | Notes |
|---|---|---|
| DIY tools | $20–$150 | Low cost; limited reach |
| Local plumber | $150–$500 | Standard call-out |
| Emergency/after-hours | $300–$1000+ | Higher urgency fee |
Time estimates for common thawing and repair scenarios
After weighing DIY tool costs against professional fees, homeowners also need realistic timelines for thawing and any follow-up repairs.
Minor surface freezes often thaw in 1–3 hours with heat or hot water.
Deeper underground freezes or pipe replacements can require 4–12+ hours or multiple days if excavation or permits are needed.
Hire a professional when time, access, or risk exceed DIY capability.
Choosing the right professional and questions to ask
Which professional is best depends on the scope of the freeze and the services required: general plumbers handle most indoor and accessible pipe thawing and minor repairs, while licensed contractors, excavators, or utility specialists may be necessary for buried lines, extensive replacements, or permit‑required work.
Ask about licensing, insurance, prior experience with underground thawing, estimated cost and timeframe, emergency availability, warranties, and permitting.
Routine Maintenance and Seasonal Checklist to Prevent Freezing
Before the first hard freeze, a concise checklist of pre-winter inspections and preventive actions—insulating exposed pipes, sealing drafts, and disconnecting outdoor hoses—reduces freeze risk.
During cold spells, routine monitoring of vulnerable areas, thermostat settings, and occasional faucet trickles helps catch problems early.
Clear documentation of inspections, repairs, and a long-term maintenance schedule supports consistent prevention year to year.
Pre-winter inspections and preventive actions
Inspecting drain pipes and related systems ahead of cold weather reduces the risk of freezing and costly damage.
A concise pre‑winter checklist targets vulnerabilities and readiness, prioritizing insulation, clearance, and repair.
- Verify insulation on exposed runs and joints.
- Clear debris from vents and access points.
- Repair cracks, loose fittings, and sagging sections.
- Test backups, valves, and emergency shutoffs for proper function.
Monitoring tips during cold spells
When temperatures drop, routine monitoring during cold spells focuses on early detection of temperature-related risks and confirming protective measures remain effective.
Inspect exposed access points daily, check insulation integrity, verify heat tape functionality and thermostat settings, and monitor outdoor and buried pipe temperatures with portable sensors.
Note any frost heave, damp spots, reduced flow signs, and respond immediately to anomalies to prevent freezing.
Documentation and long-term maintenance plan
After monitoring routines detect temperature risks and verify protective measures, documentation and a long-term maintenance plan formalize those observations into repeatable actions.
Records should log dates, locations, temperatures, interventions, materials used, and responsible personnel.
A seasonal checklist schedules insulation inspection, heat-trace testing, valve exercises, and vegetation control.
Review intervals, budget estimates, and contractor contacts guarantee accountability and continuous improvement to prevent recurring freezes.
Case Examples and Before/After Scenarios
The section presents concise case examples illustrating common outcomes.
One account describes a homeowner who thawed a frozen drain and added insulation with lasting success.
Follow-up examples include a professional repair after a burst underground drain and a long-term prevention retrofit that reduced future risk.
Simple DIY thaw and insulation success story
A homeowner in a northern suburb documented a straightforward DIY thaw-and-insulate approach that restored drain flow within hours and prevented repeat freezing.
They traced the frost point, applied gentle heat with a hair dryer and warm water, then wrapped exposed pipe runs with foam insulation and heat tape.
Follow-up inspections showed steady flow and no re-freeze after subsequent cold snaps, confirming effectiveness.
Professional repair after a burst underground drain
While the DIY thaw-and-insulate method resolved a surface freeze, some situations require professional intervention: underground drain lines that have burst from ice expansion demand excavation, pipe replacement, and restoration work beyond homeowner scope.
Case examples show contractors locating breaks, replacing sections with frost-resistant materials, regrading and compacting backfill, then restoring landscaping or pavement.
Before/after photos illustrate leak elimination, restored flow, and repaired surfaces.
Long-term prevention retrofit example
Several retrofit projects illustrate how targeted long-term measures prevent future freezes and breaches in drain systems.
One case replaced shallow pipes with insulated, deeper runs, added heat-tracing cable and improved slope for drainage.
Post-retrofit monitoring showed eliminated freeze incidents and fewer blockages.
Costs recouped via reduced emergency repairs and property damage, demonstrating practical return on investment for thorough underground drain retrofits.
Quick Reference: Do’s and Don’ts for Thawing Underground Drain Pipes
Follow clearly defined do’s and don’ts when thawing underground drain pipes to minimize property damage and personal injury.
Practical guidance emphasizes safety, tools, and escalation to professionals when uncertain.
- Do inspect access points and shut off water before work.
- Don’t use open flames or uncontrolled heat.
- Do use insulated heat tape or warm water circulation.
- Don’t delay calling a licensed plumber for suspected cracks.
Conclusion
When underground drain pipes freeze, patience and proper technique thaw both ice and anxiety. The homeowner should treat the situation like a delicate surgery: gentle, precise, and informed. Follow safe pre-checks, use recommended thawing methods and tools, and call a professional for complex or recurring freezes. Long-term prevention—insulation, rerouting, or heat tracing—keeps systems flowing. With vigilance and timely maintenance, frozen pipes can be a rare nuisance rather than a recurring crisis.