How to Dissolve Sediment in Water Heater: Simple Steps to Restore Hot Water Flow
To effectively dissolve sediment in your water heater and restore hot water flow, follow these steps: First, ensure the unit is powered off, gas is isolated, the cold water supply is shut off, and pressure is relieved. Next, drain the tank using a hose and flush it multiple times with short refills to dislodge deposits. For stubborn scale, soak the tank with vinegar or an approved descaler, then flush thoroughly. Don’t forget to inspect and replace the anode rod or any damaged parts. Always adhere to safety guidelines and your manufacturer’s instructions. For further details and preventative measures, continue reading.
How Sediment Builds Up in Water Heaters and Why It Matters
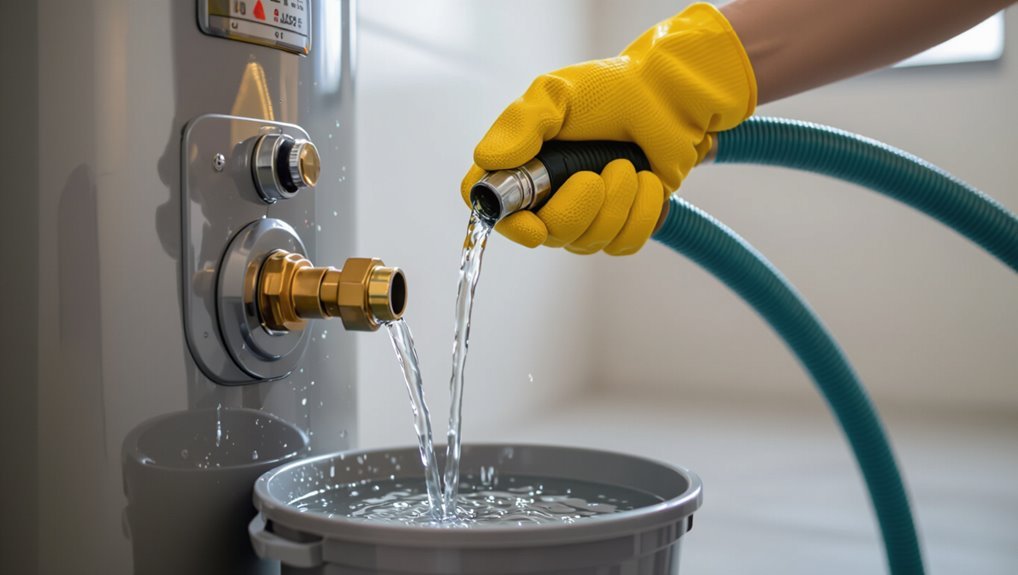
Sediment in a water heater consists of minerals, rust, and other debris that settle out of heated water and accumulate on the tank bottom.
This buildup impairs heat transfer, reduces efficiency, shortens component life, and can cause noisy operation or reduced hot water availability.
Common signs of sediment include rumbling or popping sounds, discolored water, and a noticeable drop in hot water performance.
What sediment is (minerals, rust, debris) and how it forms
When water circulates through a heater, dissolved minerals, flakes of rust, and particles of pipe scale settle out and accumulate on the tank bottom and heating elements.
Sediment consists of calcium and magnesium salts from hard water, iron oxides from corroding pipes, and loose debris.
Understanding its composition and formation guides choices for how to dissolve sediment in water heater and targeted removal methods.
Effects of sediment on performance, efficiency, and lifespan
Even a thin layer of deposits can greatly reduce a water heater’s effectiveness by insulating heat sources and restricting water flow.
Sediment lowers heat transfer, forcing longer heating cycles and raising energy use. Pressure and circulation patterns change, stressing components like burners, thermostats, and tanks.
Over time, corrosion and overheating increase failure risk and shorten service life, raising maintenance and replacement costs.
Signs your water heater has sediment (noisy tank, reduced hot water, discolored water)
How can a homeowner tell that a water heater is carrying a harmful buildup? Indicators include rumbling or popping noises as sediment traps steam, diminished hot water duration and slower recovery, and brown or cloudy tap water from rust and mineral disturbance.
Increased energy bills, frequent pilot outages, and visible sediment when flushing confirm buildup. Timely inspection avoids damage and restores efficiency.
Quick Assessment: Is Sediment the Problem?
A quick assessment can help determine whether sediment is causing a water heater’s issues by combining simple visual and auditory checks with a few no-tools tests.
Observing cloudy or discolored water, listening for rumbling or popping sounds, and flushing a small amount from the drain valve to check for grit are effective initial steps.
If problems persist, water is severely discolored, or the user is uncomfortable performing tests, a professional should be called.
Simple visual and auditory checks
Inspecting the water heater for signs of sediment begins with simple visual and auditory checks that can quickly indicate whether buildup is the likely cause of performance issues.
Look for discolored or cloudy drain water, rusty residue around fittings, and sediment at the tank bottom.
Listen for popping, rumbling, or gurgling during heating cycles—audible symptoms often correlate with trapped mineral deposits.
How to test for sediment without tools
Those initial visual and auditory signs can point toward sediment, but a quick hands-on check helps confirm it without tools.
The person should open a hot faucet, note flow irregularities, and collect a small sample in a clear glass to inspect for particles or cloudiness.
Tapping the tank for dull, granular sounds and comparing hot versus cold flow can further indicate sediment buildup.
When to call a professional
When should a homeowner call a professional? If flushing and basic checks don’t restore hot water, noises persist, leaks appear, or discoloration continues, a licensed plumber or HVAC technician should inspect the tank.
Professionals are needed for compromised heating elements, sediment-packed tanks, gas burner issues, or corroded components. Immediate service is advised if safety concerns like gas smells or pilot problems arise.
Safety First: Precautions Before You Start
Before any work begins, the heater must be shut off properly—gas units require turning off the gas supply and pilot, while electric units need power isolated at the breaker.
Appropriate personal protective equipment (gloves, eye protection) should be used and precautions taken to avoid scalding when draining or testing hot water.
If the unit is under warranty, involves complex disassembly, or includes gas plumbing beyond basic shutoff, professional service is recommended.
Turn-off procedures for gas and electric heaters
Shut down the heater following the manufacturer’s procedure and local codes to eliminate ignition and electrical hazards before any work begins.
For gas units, close the gas supply valve, turn pilot to off, and verify no odor.
For electric units, switch off the dedicated circuit breaker and tag it.
Confirm power and gas isolation with appropriate testing before proceeding with sediment removal.
Necessary personal protective equipment
Because handling a water heater involves hot water, sharp edges, and chemical exposure, appropriate personal protective equipment (PPE) is essential to reduce injury risk.
Recommended PPE includes chemical-resistant gloves, safety goggles or a face shield, long-sleeved work clothes, and sturdy slip-resistant footwear.
Hearing protection is advised during noisy flushing.
Inspect PPE for damage and replace contaminated items before beginning sediment removal and cleaning tasks.
Handling hot water and scald risk
Having selected appropriate PPE, attention turns to managing hot water and scald hazards that pose the greatest immediate risk during heater maintenance.
The unit should be cooled, power or gas supply isolated, and water pressure relieved before draining.
Test taps with caution, use insulated tools, and keep bystanders—especially children and elderly—away.
Verify temperature settings after service to prevent future scalding incidents.
When not to attempt DIY (warranty, complexity, gas lines)
When should a homeowner refuse a DIY approach? If the heater is under warranty, tampering may void coverage.
Avoid DIY when the job involves gas lines, complex controls, corroded fittings, or unclear diagnostics.
Call a licensed technician for gas connections, suspected internal damage, or if specialized tools and permits are required.
Prioritize safety and professional assessment over risky repairs.
Tools and Materials You’ll Need
A concise list of basic tools and supplies is provided to prepare for sediment removal from a water heater.
It includes common items such as a garden hose, bucket, adjustable wrench, screwdriver, and safety gear.
Optional specialized tools and commercial cleaners are noted for tougher buildup or professional-grade results.
Basic tools list
Essential tools and materials for dissolving sediment in a water heater include items for safety, flushing, chemical treatment, and minor repairs: safety goggles and gloves, a garden hose, a wrench or adjustable pliers, a wet/dry vacuum or submersible pump (optional), white vinegar or a commercial descaler, a bucket, screwdrivers, Teflon tape, and rags.
- Safety gear
- Flushing hose and fittings
- Basic hand tools
- Descaling solution
Optional specialized tools and cleaners
Consider adding specialized tools and cleaners to speed up and deepen sediment removal in a water heater.
Professional options reduce manual effort and improve effectiveness when flushing or chemically treating tanks.
- Pumice or sediment vacuum for precise suction
- Descaling solutions rated for water heaters
- Flexible tank cleaning brushes
- Inline flushing adapters and high-flow hoses
Draining and Flushing a Water Heater: Step-by-Step Guide
Before beginning, the technician guarantees the heater is powered off and the water supply is closed to prevent hazards.
They drain the tank through the drain valve, then use a controlled flush to dislodge and remove loose sediment from the bottom.
After flushing, the unit is refilled, air is bled from the system, and power or gas is safely restored.
Preparing the unit (power/gas off, shutoff valve)
Shut down the heater and isolate it from the house plumbing to guarantee a safe, controlled drain: turn off the electrical breaker for an electric unit or set the gas control to “pilot” for a gas model, then close the cold-water shutoff valve feeding the tank.
Verify power is off with a tester or confirm pilot-only status, then relieve pressure by opening a hot faucet.
Draining the tank safely
With power isolated and the cold-water feed closed, the next step is to drain and flush the tank to remove sediment.
Attach a hose to the drain valve, route it to a safe drain or outdoors, and open the valve slowly.
Open a hot faucet to relieve vacuum.
Monitor flow and temperature; close valve and remove hose when empty.
Refill before restoring power.
Flushing procedure to remove loose sediment
Begin the flush by opening the drain valve fully and letting the tank empty until flow slows.
Then briefly backfill and repeat to agitate and carry out loosened sediment.
Continue cycles of draining and short refills until discharged water runs clear.
Use a garden hose to direct effluent to a safe drain.
Close the valve after final draining and allow residual runoff to finish.
Refilling and restoring power safely
After the tank has been flushed and the drain valve closed, the technician should refill the water heater slowly to prevent airlocks and check for leaks before restoring power or gas.
Open the cold supply valve until a steady hot-water flow appears at a nearby tap.
Confirm all fittings remain dry, purge trapped air, then restore electrical supply or relight the pilot following manufacturer instructions.
Deep Descaling Methods for Stubborn Sediment
For persistent sediment, a focused descaling approach may be required, including a vinegar or mild acid flush applied under controlled conditions.
Commercial descaling products and pump-assisted flushes offer stronger options but require selection based on product compatibility and manufacturer guidance.
Attention to tank materials, seals, and anode rods is essential to avoid corrosion or warranty voidance.
Vinegar and mild acid flush method (when and how)
When mineral buildup proves resistant to routine flushing, a vinegar or mild acid circulating flush offers a safe, effective way to dissolve and remove stubborn sediment without harsh chemicals.
The method involves isolating the heater, diluting white vinegar or citric acid per guidelines, circulating solution through the tank with a pump, allowing soak time, then thoroughly flushing with fresh water and neutralizing residues before restoring normal operation.
Commercial descaling products: selection and usage
Consider commercial descaling products as a stronger, purpose-formulated option for dissolving heavy mineral buildup that resists household acids.
Professionals select products rated for water heaters, matching metal type and tank lining.
Follow manufacturer instructions: dilute as directed, guarantee proper ventilation, isolate electrical/gas sources, and neutralize residues.
Rinse thoroughly after treatment. Dispose of chemicals per local regulations to prevent environmental harm.
Using a pump-assisted flush for heavy buildup
A pump-assisted flush uses forced circulation to break up and remove heavy sediment that standard draining cannot dislodge.
Technicians connect a hose and submersible or inline pump to circulate water and dislodging agents through the tank. Continuous agitation and repeated flush cycles expel compacted deposits via the drain.
Proper flow direction, monitoring, and multiple passes guarantee more complete sediment removal than passive draining.
Risks and compatibility with tank materials
After employing pump-assisted flushing to remove bulk deposits, attention must turn to how deep descaling agents and methods interact with the tank’s materials and components.
Corrosive acids, chelants, and mechanical agitation can damage steel, sacrificial anodes, gaskets, and glass linings.
Compatibility checks, manufacturer guidance, neutralization, and controlled contact time minimize corrosion, leaks, and voided warranties when addressing stubborn sediment.
Addressing Specific Types of Sediment and Problems
Different sediment types and related failures call for targeted responses: hard water mineral deposits require descaling, while rust indicates corrosion that may need component replacement.
The condition of the sacrificial anode rod should be inspected and replaced if corroded to prevent further deterioration.
If sediment has compromised the heating element or dip tube, the affected parts must be assessed and replaced to restore safe, efficient operation.
Hard water mineral deposits vs. rust
While both hard water minerals and rust appear as sediment in a water heater, they differ in composition, source, and treatment: mineral scales are primarily calcium and magnesium carbonate deposited from hard water, whereas rust consists of iron oxides formed by corrosion of metal components.
Mineral deposits usually require descaling with vinegar or commercial descalers; rust often indicates corroded parts or failing sacrificial components and may need replacement.
Dealing with corroded anode rods
Inspecting the anode rod is the first step when sediment in a water heater is accompanied by reddish or flaky deposits. This is because a corroded anode rod accelerates tank corrosion and contributes iron-rich sediment.
If badly degraded, replace the rod with a compatible magnesium or aluminum-zinc unit. Periodic inspection and timely replacement reduce rust, extend tank life, and limit recurring sediment buildup.
When sediment has damaged the heating element or dip tube
When sediment accumulates heavily, it can abrade or clog the heating element and erode the dip tube, reducing heat transfer efficiency and causing cold water stratification.
In such cases, visual inspection and resistance testing reveal element failure; dip tube degradation allows cold inlet mixing.
Replacement of damaged components is necessary rather than cleaning alone.
Professional evaluation guarantees correct parts, safe installation, and restored performance.
Replacing and Repairing Parts After Sediment Damage
After sediment has accumulated, the next step is to inspect and, if necessary, replace sacrificial anode rods to prevent accelerated corrosion.
Electric units require testing and possible replacement of heating elements, while gas systems may need burner servicing or evaluation of tank lining for pitting and leaks.
Decisions about repairs should be based on clear signs of wear, manufacturer guidance, and safety considerations.
Inspecting and replacing anode rods
A thorough check of the water heater’s anode rod reveals whether sediment-induced corrosion has compromised its protective function and if replacement is required.
Inspect visually for heavy pitting, thinning, or complete consumption. If deterioration is evident, drain enough water, loosen the rod at the top fitting, and install a matching new anode.
Tighten and refill, then restore power or gas.
Checking and replacing heating elements (electric)
With the anode rod inspected or replaced, attention shifts to the electric heating elements, which often bear the brunt of sediment accumulation and can lose efficiency or fail outright.
Technicians isolate power, drain the tank partially, remove element access covers, and test elements with a multimeter. Corroded or shorted elements are replaced, gaskets renewed, and seals tightened before refilling and restoring power to verify proper operation.
Repair options for gas burner and tank lining issues
Inspecting gas burners and tank linings determines the scope of repairs needed after sediment damage, since buildup can clog burner ports, distort flame patterns, and abrade or corrode the tank interior.
Technicians may clean or replace burners, install new thermocouples or gas valves, and reline or replace severely pitted tanks.
Costs vary; safety checks and combustion testing confirm proper repair before returning the unit to service.
Preventive Measures to Minimize Future Sediment
To minimize future sediment buildup, homeowners should follow a flushing schedule tailored to water hardness and tank size.
They should also consider installing a water softener or whole-house filter, and evaluate upgrades such as tankless or low-sediment systems with attention to their trade-offs.
Each option carries costs and maintenance requirements that influence long-term performance and savings.
A simple monitoring and maintenance checklist can help prioritize actions and track effectiveness over time.
Recommended flushing schedule by water hardness and tank size
A regular flushing schedule tied to local water hardness and tank volume greatly reduces sediment buildup and extends heater life.
For soft water, flush annually for 40–80 gallon tanks; for moderately hard water, flush every 6 months; for very hard water, flush quarterly.
Smaller tanks may need slightly more frequent flushing; larger tanks slightly less.
Always adjust based on visible sediment and performance.
Installing a water softener or whole-house filter
Consider installing a water softener or whole-house filter to greatly reduce dissolved minerals and particulate matter before they enter the water heater.
These systems trap or exchange hardness ions and filter sediments, decreasing scale buildup and extending tank lifespan.
Proper sizing, periodic maintenance, and professional installation guarantee peak performance.
Routine filter replacements and resin regeneration schedules prevent breakthrough and maintain water quality.
Upgrading to a tankless or low-sediment system: pros and cons
Why choose a tankless or low-sediment water heater over a conventional tank model?
Tankless units reduce standing water, lowering sediment buildup and improving efficiency; low-sediment tanks use design features to limit deposits.
Pros: longer lifespan, consistent hot water, reduced flushing frequency.
Cons: higher upfront cost, potential retrofit complexity, and variable performance with very hard water unless paired with treatment.
Monitoring and maintenance checklist
Routine inspection and targeted upkeep form the backbone of a monitoring and maintenance checklist to minimize sediment in water heaters.
A concise schedule guarantees early detection and prevention:
- Flush tank every 6–12 months.
- Inspect anode rod annually; replace if corroded.
- Check temperature/pressure relief valve and thermostat settings.
- Monitor water hardness and install softener if necessary.
Common Mistakes and How to Avoid Them
Common mistakes when addressing sediment in a water heater include draining the tank without switching off power, using incorrect chemicals or concentrations, and overlooking the anode rod’s condition.
Ignoring manufacturer guidelines or procedures can void warranties and create safety hazards.
Awareness of these errors and following correct steps prevents damage and guarantees effective sediment removal.
Draining without turning power off
Draining a water heater without first shutting off its power can create hazardous conditions and damage the appliance. Technicians and homeowners should never begin the drain unless the electrical breaker or gas supply has been safely isolated.
Failure to isolate risks scalding, electric shock, or burner damage. Always confirm power is off, verify with a tester or pilot check, and post warnings to prevent accidental re-energizing.
Using improper chemicals or concentrations
Using the wrong chemicals or incorrect concentrations can rapidly corrode tank components, damage fittings, void warranties, and create toxic byproducts.
Professionals and homeowners must consequently select products and mixes with care. Incorrect additives or over-diluted solutions reduce sediment removal effectiveness and risk plumbing deterioration.
Always follow manufacturer guidelines, use approved descalers, measure concentrations precisely, ventilate, and neutralize residues before refilling to prevent harm.
Overlooking anode rod condition
Chemicals and mixtures are only part of the equation; neglecting the anode rod undermines sediment management and overall tank longevity.
Corroded or depleted anode rods accelerate rust and sediment buildup, reducing efficiency and causing odor or discoloration.
Regular inspection and timely replacement preserve sacrificial protection, limit internal corrosion, and complement sediment removal efforts without altering recommended maintenance intervals.
Ignoring manufacturer guidelines
Although well-intentioned DIY tweaks may seem efficient, ignoring the manufacturer’s guidelines risks voiding warranties and creating unsafe conditions in the water heater.
Technicians and owners should follow prescribed maintenance intervals, flushing procedures, and approved descaling agents.
Deviating from instructions can damage components, reduce efficiency, and create liability.
Consult manuals or manufacturer support before attempting sediment removal or chemical treatments to guarantee safety and preserve coverage.
Cost, Time, and When to Hire a Professional
Typical time and cost estimates for DIY sediment flushing versus hiring a professional vary widely, with homeowners often spending an hour and minimal supplies for a DIY flush while professional services can take 1–3 hours and cost hundreds of dollars.
Clear signs that a licensed technician is needed include persistent sediment buildup, unusual noises, leaks, or signs of corrosion that suggest repairs beyond routine maintenance.
Before hiring a plumber, one should ask about licensing, insurance, experience with water heater sediment removal, an itemized estimate, and any warranties on parts and labor.
Typical time and cost estimates for DIY vs. professional service
A single flush-and-vacuum DIY flush usually takes 1–3 hours and costs between $20–$100 for rented equipment and replacement anode/supplies, while a professional service typically completes the job in 1–2 hours on-site but charges $150–$400 including labor and disposal; the choice depends on the homeowner’s comfort with tools, warranty concerns, and the heater’s age or damage risk.
| Option | Time | Typical Cost |
|---|---|---|
| DIY basic | 1–3 hrs | $20–$100 |
| DIY with parts | 2–4 hrs | $50–$150 |
| Professional | 1–2 hrs | $150–$400 |
Signs the job requires a licensed technician
When persistent issues, safety hazards, or complex repairs are present, hiring a licensed technician is the prudent choice.
Indicators include recurring sediment despite flushing, leaks at fittings or tank corrosion, unreliable temperature control, gas smell or pilot problems, and electrical or gas line work required.
Consider professional service if warranty concerns exist or estimated DIY time and cost approach a certified repair.
Questions to ask a plumber before hiring
How much will this repair actually cost, and how long will it take are core questions a homeowner should ask a prospective plumber before hiring—clarifying estimated labor, parts, service call fees, warranty coverage, and any contingencies for unexpected findings prevents surprises and helps determine whether the job warrants a professional versus a DIY approach.
Also request credentials, references, insurance, diagnostic fees, timeline, disposal charges, and written estimates.
Quick Troubleshooting After Cleaning
After flushing, the technician notes any persistent noise or unusual odors as indicators of remaining sediment or trapped air.
They verify hot-water output to confirm the heater is delivering expected volume and temperature.
Finally, they inspect water clarity and check temperatures at several fixtures to guarantee the system is functioning properly.
Persistent noise or smell after flush
Noticeable noise or a lingering odor that persists after flushing a water heater often indicates incomplete sediment removal or trapped debris and air pockets within the tank or plumbing.
Check the drain valve and dip tube for residual buildup, bleed air by opening hot taps sequentially, and flush longer with higher flow.
If odors remain, sanitize the tank with a mild bleach solution and retest.
Low hot-water output post-service
A sudden drop in hot-water output following a service often signals issues introduced or left unresolved during cleaning rather than a failing heater unit.
Technicians should verify inlet/outlet valves fully open, flush lines to remove trapped air, check thermostatic mixing valves and dip tube alignment, and inspect sediment blockage at the drain or screen.
Rechecking connections and a brief restart often restores normal flow.
Water clarity and temperature checks
Several quick checks help confirm that cleaning resolved sediment issues: observe water clarity from a hot tap for cloudiness or particulate, verify stable outlet temperature at the setpoint, and monitor flow rate for drops that indicate residual blockage.
If water runs clear, temperature matches the thermostat, and flow is steady, cleaning was effective; otherwise repeat flushing, inspect elements and valves, or consult a technician.
Maintenance Log Template for Your Water Heater
A concise maintenance log should note dates of service, specific actions taken, and any parts replaced to provide a clear history of work performed.
Recording these details helps identify recurring problems and schedule preventive maintenance.
Consistent logging supports longer equipment life and sustained heating efficiency.
What to record (dates, actions, parts replaced)
Maintaining a concise, dated record of all water heater maintenance helps diagnose recurring issues and verify warranty compliance.
The log should capture key facts for each service event to enable clear tracking and accountability.
- Date and technician or owner who performed the work
- Actions taken (flushing, valve replacement, inspection)
- Parts replaced with model/serial numbers
- Observed symptoms and follow-up recommendations
How a maintenance log improves lifespan and efficiency
Record-keeping provides a clear timeline of interventions and conditions that directly supports longer service life and improved energy performance of a water heater.
A concise maintenance log enables timely flushing, identifies recurring issues, tracks component replacements and warranty periods, and reveals performance degradation.
Technicians use entries to prioritize repairs, optimize settings, and verify efficiency gains, reducing failures, lowering energy costs, and extending operational lifespan.
Resources and Further Reading
Manufacturer manuals and model-specific guidance are recommended as the primary reference for safe sediment removal and maintenance procedures.
A concise roundup of reliable products and tools—such as suitable flush kits, sediment filters, and compatible replacement anodes—can help readers select appropriate items for their system.
Links to official manuals and vetted tool reviews provide practical next steps for implementation.
Manufacturer manuals and model-specific guidance
Because tank design, heating elements, and drain configurations vary widely, consulting the appliance’s manufacturer manual or model-specific documentation is essential before attempting sediment removal.
Manuals clarify safe shutdown, warranty limits, and recommended cleaning steps. Refer to model-specific guidance for torque specs, anode location, and electrical cautions.
- Shutdown and safety steps
- Warranty and service notes
- Model cleaning procedures
- Parts diagrams and specs
Reliable products and tools roundup
After consulting model-specific manuals, the next step is assembling reliable products and tools tailored to the heater’s design and the chosen cleaning method.
Recommended essentials include corrosion-resistant hoses, a submersible pump for flushes, pH-neutral descaling solutions approved for potable systems, and a quality wrench set.
Choose brand-certified items and personal protective equipment to guarantee safe, effective sediment removal.
- Corrosion-resistant hoses
- Submersible flush pump
- pH-neutral descaler
- Quality wrench set
Conclusion
With routine attention, sediment stops causing trouble before it snowballs into costly repairs. The homeowner who follows safety steps, uses the right tools, and flushes the tank regularly will restore hot water flow and extend appliance life. If doubts remain or complications arise, calling a professional is the safer bet. Staying on top of maintenance keeps problems from piling up, and peace of mind follows when the system runs smoothly.