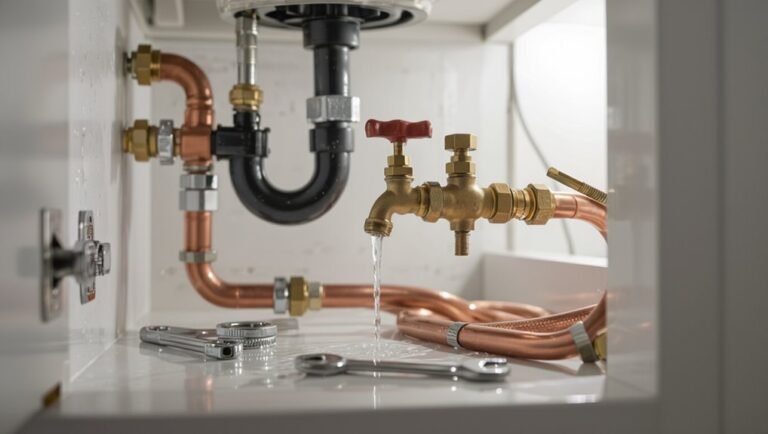
How to Bury a Sump Pump Discharge Line: Step-by-Step Guide for a Safe, Code-Compliant Installation
Burying a sump pump discharge line is essential for effective drainage and involves careful planning and adherence to local codes. Begin by checking for underground utilities, then choose appropriate materials such as PVC or HDPE pipe. Dig a sloped trench (about 1/8 to 1/4 inch per foot) for proper water flow, install a check valve and necessary fittings, and ensure there are accessible cleanouts for maintenance. After testing for leaks, backfill the trench with compacted soil and gravel. Consider freeze protection measures to prevent clogs and damage. Follow local regulations and best practices for a reliable, long-lasting installation. Further steps and troubleshooting guidance are provided below.
Overview of Sump Pump Discharge Line Burial Requirements
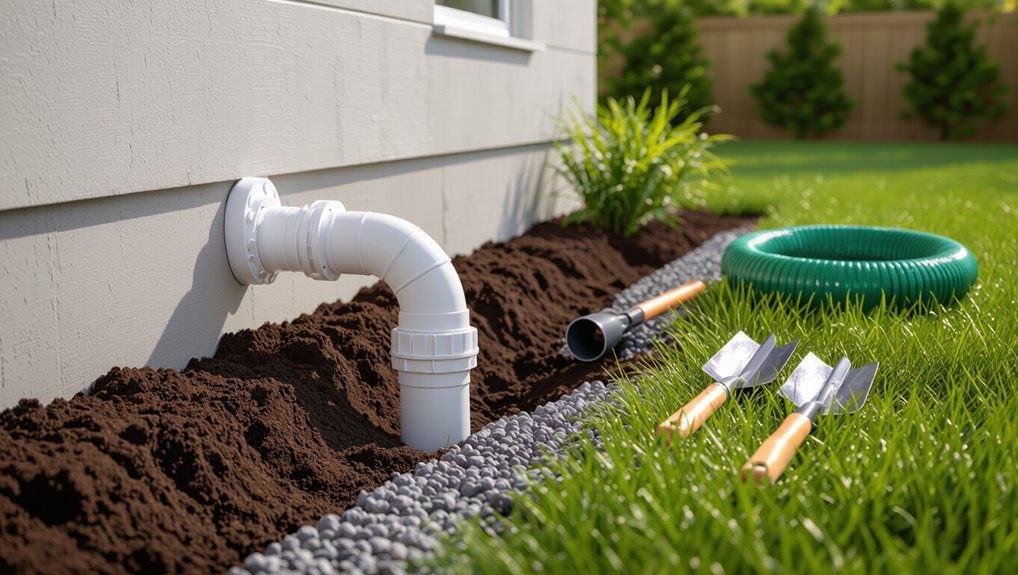
Burying a sump pump discharge line can reduce trip hazards and visual clutter but also introduces risks such as freezing, blockages, and harder access for repairs.
Before any burial work begins, applicable building codes and local regulations must be checked to guarantee permitted depths, materials, and discharge locations are met.
In some situations—poor soil drainage, frequent freeze-thaw cycles, or strict municipal rules—burying the line is not recommended.
Why bury a sump pump discharge line benefits and risks
Several homeowners choose to place a sump pump discharge line underground to protect the pipe from freezing, reduce trip hazards, and improve curb appeal; however, burial introduces added installation complexity, maintenance challenges, and potential code compliance issues.
Proper planning for how to bury sump pump discharge line balances benefits—freeze protection, aesthetics, reduced damage—with risks like clogs, inaccessible repairs, backflow potential, and excavation costs.
Building codes and local regulations to check before you start
Before any digging begins, homeowners should verify applicable building codes, municipal ordinances, and utility rules that govern buried sump pump discharge lines.
Check setback, depth, and routing requirements; prohibited discharge locations; freeze-protection mandates; backflow and anti-siphon device rules; and permit or inspection requirements.
Contact local building department and utility-locate services for accurate, up-to-date regulations before proceeding.
When burying is not recommended
When local soils are prone to standing water, the ground freezes deeply, or property slopes make safe routing impossible, burying a sump pump discharge line is generally not recommended.
In such cases, alternatives include aboveground insulated piping, rerouting to a daylight drain, or installing a dry well where permitted.
Prioritize frost protection, access for maintenance, and adherence to local codes to prevent backups and damage.
Materials, Tools, and Safety Preparations
The section outlines the specific materials needed—such as rigid or flexible discharge pipe, fittings, gravel or drain tile, and adapters—along with recommended tools like shovels, pipe cutters, a level, and a trenching tool.
It also covers essential safety steps, including utility locates and pre-dig checks, plus site protection and traffic considerations.
Finally, required personal protective equipment (gloves, eye protection, boots) and measures to secure the work area are summarized.
Required materials (pipe types, fittings, gravel, drain tile, adapters)
A clear inventory of materials guarantees a reliable, code-compliant sump pump discharge installation: schedule 40 PVC or corrugated HDPE pipe sized to the pump outlet, appropriate solvent-weld or threaded fittings (elbows, couplings, unions), a backflow or check valve, adapters to match pump discharge to pipe, and end fittings or standpipes as needed.
For burial, include perforated drain tile or solid pipe depending on drainage strategy, a gravel trench for bedding and filtration, geotextile fabric to prevent clogging, and corrosion-resistant clamps and fasteners.
- Primary discharge pipe, fittings, adapters
- Perforated drain tile, gravel, geotextile fabric
- Check valve, clamps, corrosion-resistant fasteners
Recommended tools and equipment
Following the materials inventory, attention turns to the tools and safety equipment required to install and bury the discharge line.
Essential items include trenching tools, pipe cutters, primer/cement, clamps, and shovels.
Personal protective equipment—gloves, safety glasses, steel-toe boots, and high-visibility clothing—should be used.
Proper testing tools for leak checks and a tape measure guarantee correct installation.
- Trenching and cutting tools
- PPE and visibility gear
- Testing and measuring tools
Safety checks and utility locates before digging
Before any shovel breaks ground, confirm all underground utilities have been located and marked and that a site-specific safety plan is in place.
Contact local utility-locate services (811 in the U.S.), verify marks, review property plans, and note easements.
Inspect surface conditions, identify drainage paths, and establish emergency procedures.
Obtain required permits and notify neighbors when work may affect shared infrastructure.
Personal protective equipment and site protection
With utilities located and a site safety plan confirmed, attention turns to personal protective equipment and surface protection to keep workers and property safe.
Workers don gloves, safety glasses, hard hats, high-visibility vests, and steel-toe boots.
Lay down plywood or mats to protect turf and driveways. Use barriers, caution tape, and warning signs.
Keep a first-aid kit and fire extinguisher accessible.
Planning the Discharge Route and Sizing
The homeowner should identify the shortest, safest route to daylight or a storm drain while keeping the line clear of foundation runoff and neighboring properties.
Pipe size and a minimum slope must be selected to maintain flow and prevent low spots where water can pool.
Options include a direct run to the street, a dry well, a rock bed, or connection to the storm sewer depending on site constraints and local regulations.
Choosing the shortest, safest route to daylight or storm drain
Although route planning must balance distance with safety, prioritizing the most direct path to daylight or a municipal storm drain minimizes head loss and reduces the risk of backups.
The chosen route should avoid utility lines, property lines, landscaping features, and low spots prone to pooling.
Prefer unobstructed public right-of-way or easements and verify local codes and permits before excavation begins.
Minimum slope and pipe diameter guidance
Because proper flow depends on both gradient and cross-sectional area, specifying a minimum slope and appropriate pipe diameter is essential when planning a sump pump discharge route.
Typically a 1% slope (1 inch per 10 feet) prevents standing water; use 1¼–1½ inch tubing for small pumps, 2-inch PVC for larger flows.
Confirm local code and pump manufacturer recommendations.
Avoiding low spots, foundation runoff, and neighboring properties
Many homeowners should plan the discharge route to keep water moving away from low spots, foundation walls, and neighboring properties to prevent backups and nuisance runoff.
The route should maintain consistent slope, avoid depressions, clear surface drainage paths, and terminate where water can disperse without harming adjacent lots.
Verify local setbacks, document grades, and adjust alignment to prevent concentrated flows toward foundations or neighbors.
Routing options: direct to street, dry well, rock bed, or storm sewer
After planning a route that keeps water away from low spots, foundations, and neighboring lots, homeowners must choose a discharge endpoint that matches site conditions and local rules.
Options vary by permit, soil, and capacity:
- direct street requires municipal approval;
- dry well needs percolation and size;
- rock bed dissipates flow and limits freezing.
- Direct to street
- Dry well
- Rock bed
Step-by-Step Installation: Burying a Sump Pump Discharge Line
Before beginning, the installer shuts off pump power and inspects the existing discharge assembly for damage or obstructions.
Next, they mark the route, dig a trench with the required depth and slope, and prepare the trench base with gravel or bedding.
Finally, the pipe and fittings are laid and connected, then the system is tested for proper flow, grade, and leaks.
Step 1 Shut off pump power and inspect existing discharge assembly
Power to the sump pump should be disconnected at the circuit breaker or unplugged, and the existing discharge assembly examined for cracks, loose fittings, corrosion, or clogs.
The inspector verifies check valve function, measures pipe condition, and notes joint types and fasteners. Any damaged components are documented for replacement.
Photos and measurements are taken to inform materials and guarantee compatible, code-compliant repairs.
Step 2 Mark route and dig trench to required depth and slope
Measure and mark the discharge route from the sump pump exit to the final outlet, taking into account property boundaries, sidewalks, driveways, and underground utilities.
Determine required depth per local code and guarantee a continuous downward slope (typically 1/8–1/4 inch per foot).
Use spray paint or flags to trace the line, then excavate a straight trench, keeping spoil clear and preserving a stable, uniform profile for pipe placement.
Step 3 Prepare trench base with gravel or bedding
Prepare a firm, level bedding in the trench by spreading 2–3 inches of clean, coarse gravel or sand along the bottom to support the pipe and maintain the designed slope.
Compact the bedding lightly to remove voids, checking slope with a level or slope rod.
Add a thin cushion around sharp stones, keeping the surface even and free of debris before proceeding to pipe placement.
Step 4 Lay pipe, joints, and check fittings for watertight connections
Begin by laying the discharge pipe into the prepared bedding, starting at the sump outlet and working outward while maintaining the designed slope.
Align sections, cut squarely, and dry-fit joints.
Apply appropriate primer and solvent or use threaded/sealed fittings per manufacturer instructions.
Tighten clamps, check couplings for full engagement, and guarantee clean, debris-free surfaces for each connection before covering.
Step 5 Test flow and check for leaks and proper grade
Once the pipe is laid and fittings secured, run the pump briefly to verify steady flow, confirm the line holds pressure, and inspect all joints and connections for leaks.
Observe discharge rate, watching for air locks or slow spots. Use a level or string line to confirm consistent downhill grade toward the outlet.
Repair any leaks, reseat fittings, and adjust slope until flow is uniform.
Step 6 Backfill, compact, and restore surface with sod or gravel
After confirming the line is leak-free and properly pitched, backfill the trench in layers, compacting each lift to prevent future settling.
Use native soil for most fills, adding sand or fine gravel around the pipe for drainage. Compact with a hand tamper or plate compactor.
Restore the surface: lay sod for lawns or spread crushed stone for gravel areas, matching surrounding grade and appearance.
Step 7 Final inspection and reconnecting power
Perform a thorough final inspection of the buried discharge line and fittings before restoring power to the sump pump.
Verify all connections are secure, venting and check valve orientation are correct, and the line slopes away from the foundation.
Confirm the trench is fully compacted and surface restoration is complete.
Test the pump briefly with power restored, observing for leaks, proper discharge, and normal operation.
Alternatives and Additions to Buried Discharge Lines
The section outlines several alternatives and add-ons to a buried discharge line, including check valves, air gaps, and anti-siphon devices to protect the sump system.
It compares rigid PVC and corrugated pipe for strength, flexibility, and longevity.
Additionally, it describes options like dry wells or rock-filled infiltration pits for on-site disposal.
Routing to a storm sewer or curb outlet is also considered, with attention to local permit and code requirements.
Installing a check valve, air gap, or anti-siphon device
Consider adding a check valve, air gap, or anti-siphon device to a buried sump pump discharge to prevent backflow, reduce siphoning, and protect the pump from damage.
A check valve stops reverse flow; install above the pump, accessible for maintenance.
An air gap or anti-siphon loop prevents continuous drainage when the pump stops.
Choose code-compliant, frost-resistant fittings and position for easy inspection.
Using rigid PVC vs corrugated pipe pros and cons
Choosing between rigid PVC and corrugated pipe for a buried sump pump discharge hinges on trade-offs in durability, flow performance, ease of installation, and long-term maintenance. Rigid PVC: smoother, stronger, easier to join, resists clogging; stiffer excavation. Corrugated: flexible, faster layout, cheaper, more prone to sediment buildup and crush.
| Rigid PVC | Corrugated |
|---|---|
| Smooth flow | Flexible routing |
| Durable | Lower cost |
| Harder to bend | Susceptible to clogging |
Installing a dry well or rock-filled infiltration pit
After weighing rigid PVC against corrugated pipe for routing discharge, attention can shift to containment options that reduce surface runoff and downstream impact: installing a dry well or a rock-filled infiltration pit provides on-site absorption of sump pump effluent.
Proper sizing, perforated pipe inlet, geotextile liner, clean stone backfill, and locating away from foundations guarantee infiltration without saturation; local codes and soil percolation dictate design.
Routing to storm sewer or curb outlet considerations and permits
Routing a sump pump discharge to a municipal storm sewer or curb outlet offers a direct, low-maintenance solution but triggers specific regulatory, hydraulic, and practical considerations.
Confirm local ordinances, obtain permits, and verify outlet capacity and downstream impacts.
Prevent backflow with check valves, avoid discharge during freeze, and maintain visible access for inspections.
Coordinate with utilities and adhere to setback, erosion, and public safety requirements.
Common Problems, Troubleshooting, and How to Fix Them
Common issues with buried sump pump discharge lines include freezing, backups or slow drainage, leaks or joint separation, and erosion or disputes caused by the outlet.
Troubleshooting begins with inspecting the exposed pipe, checking flow at the pump, and tracing the line for blockages, damage, or improper slope.
Solutions range from insulating or re-routing the line and thawing techniques to repairing joints, clearing clogs, installing erosion controls, or relocating the outlet to resolve property concerns.
Frozen discharge line causes and preventive solutions
When temperatures drop below freezing, discharge lines for buried sump pumps can ice over, blocking flow and causing backups or excessive wear on the pump.
Identifying why a line froze—insufficient burial depth, standing water in low spots, inadequate slope, or exposed above-ground sections—helps determine the appropriate preventive measures.
Solutions include deeper burial to frost line, regrading for continuous slope, insulation or heat tape on vulnerable runs, and eliminating above-ground exposure.
Backup of water or slow drainage diagnosis steps
After addressing freeze-related issues, attention shifts to diagnosing backups and slow drainage, which often stem from clogs, collapsed or crushed pipe sections, improper slope, or a failing check valve.
Inspect visible pipe runs, probe buried sections with a camera, verify slope with a level, test the check valve operation, and run the pump while observing outflow.
Record findings and prioritize repairs.
Leaks, clogs, and joint separation repair methods
Addressing leaks, clogs, and separated joints requires systematic inspection and targeted repairs to restore reliable discharge flow.
Inspect visible pipe runs, fittings, and buried sections for moisture, deformation, or misalignment.
Clear clogs with a plumber’s snake or pressurized water, replace damaged PVC sections, reseat and solvent-weld joints, or use proper couplings and clamps.
Test under pump load to confirm sealed, unobstructed flow.
What to do if the outlet causes erosion or property disputes
Prevent erosion and neighbor conflicts by evaluating where the sump pump discharge releases water and how runoff affects soil, landscaping, and adjacent properties.
Redirect flow with splash blocks, rock beds, or buried extension pipes to disperse energy and prevent gullying.
Obtain permits and communicate with neighbors; consider shared drainage solutions or municipal right-of-way options.
Repair affected areas with topsoil and native plants to stabilize.
Maintenance and Seasonal Care
A concise maintenance routine helps guarantee a buried sump pump discharge line remains functional and free of damage.
The article will list a simple inspection checklist for annual checks and after storms, steps for winterizing buried lines to prevent freezing, and guidance on expected component lifespan with signs that replacement is needed.
Practical, periodic attention reduces failures and costly repairs.
Routine inspection checklist (annual and after storms)
When inspecting a buried sump pump discharge line annually and after major storms, homeowners should follow a concise checklist to confirm the line’s integrity and function:
- Check for visible erosion, pooling, exposed piping, crushed sections, or dislodged fittings along the route.
- Run the pump to verify unobstructed flow, listen for abnormal noises, and observe discharge at the outlet.
- Inspect check valve operation, joints, and any surface runoff for signs of blockage or leaks.
Winterizing buried discharge lines
Prepare the buried discharge line for freezing temperatures by draining residual water, insulating vulnerable sections, and verifying valve and check-valve functionality to prevent ice blockages and pipe damage.
Inspect surface discharge points, clear debris, and slope remaining piping to avoid standing water.
Apply frost-resistant covers where aboveground, secure exposed fittings, and document winter checks for timely spring reassessment.
Long-term lifespan and when to replace components
Plan for component lifespan and timely replacement by tracking material type, exposure conditions, and usage cycles.
Inspect PVC, couplers, check valves, and discharge fittings annually for cracks, corrosion, or leaks.
Replace rubber seals and flexible connectors every 3–7 years depending on UV and freeze exposure.
Schedule full system review every 5–10 years; replace sections showing wear or multiple repairs to prevent failures.
Cost Estimates, Permits, and When to Hire a Professional
A brief overview compares typical DIY expenses—materials, pipe, and trenching tools—with professional bids that include labor, permits, and liability.
It notes when local codes require permits and what documentation inspectors typically request.
Clear indicators for hiring a licensed plumber or contractor, such as complex grading, unknown utility lines, or persistent drainage issues, are highlighted.
Typical cost breakdown for DIY vs professional installation
Several factors determine whether burying a sump pump discharge line is an economical DIY project or worth hiring a professional.
DIY materials—pipe, fittings, gravel, trenching tools—typically range $50–$300. Renting equipment adds $50–$150.
Professional installation commonly costs $300–$1,200 depending on labor, complexity, and local rates.
Unexpected soil conditions or landscape restoration can increase both DIY time and contractor fees.
When to pull permits and required documentation
When should a permit be pulled for burying a sump pump discharge line?
Local regulations often require permits when work alters drainage, connects to storm or sewer systems, crosses public easements, or involves extensive trenching.
Required documentation typically includes site plans, discharge routing, depth details, pipe specifications, and inspection requests.
Consult the municipality for specific codes, fees, and inspection schedules before starting.
Signs you should call a licensed plumber or contractor
How can a homeowner tell if a sump pump discharge job requires professional help?
Persistent backing up, repeated failures, complex piping ties, or unknown groundwater issues indicate expertise is needed.
If local code, setback, or permit questions arise, hire a licensed plumber or contractor.
Also call a pro when excavation encounters utilities, poor drainage patterns, sizable elevation changes, or quoted costs exceed DIY scope.
Quick Reference: Code-Compliant Best Practices and Checklist
This quick-reference section distills essential code-compliant practices and a concise checklist for burying a sump pump discharge line, enabling professionals and informed homeowners to verify compliance at a glance.
Follow required depth, slope, frost protection, backflow prevention, and municipal discharge rules. Inspect materials, cleanouts, and outlet location before burial.
- Verify depth, slope, and frost protection.
- Install check valve/backflow device.
- Confirm outlet and permit compliance.
Conclusion
In summary, the installer completed the burial following modern codes yet kept a quaint sundial in the yard as a reminder to check slopes and frost lines seasonally. Proper bedding, insulation, and accessible cleanouts assure reliable discharge and protect foundations. Regular inspections, winterizing, and adherence to permits prevent backups and fines. When unsure, a licensed plumber or contractor should be consulted to guarantee safety, compliance, and long-term performance.