How to Clean a Hot Water Heater With Vinegar: Step-By-Step Guide for Fast Descaling
To clean a tank-style hot water heater with vinegar, follow these steps to effectively dissolve mineral buildup and enhance efficiency. First, shut off the power or gas supply and isolate the water source. Next, drain or partially drain the tank and introduce white vinegar through the drain or with a pump. Allow the vinegar to soak for several hours, gently agitate the tank, then flush until the water runs clear before refilling. Don’t forget to inspect the anode rod and heating elements for any issues. For a detailed procedure and troubleshooting tips, continue reading.
What Happens When a Hot Water Heater Needs Cleaning
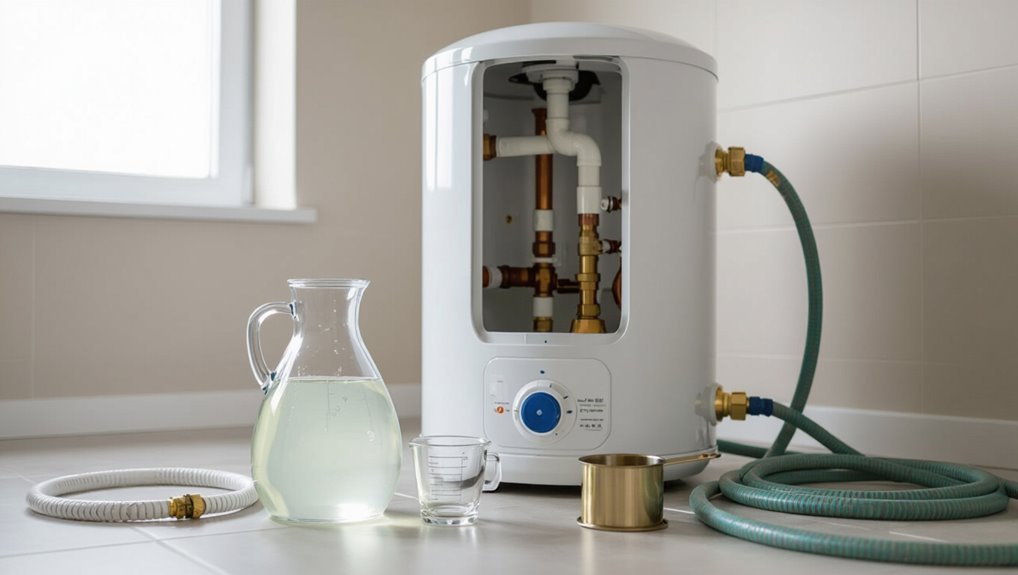
When a hot water heater needs cleaning, owners may notice rumbling noises, reduced hot water volume, longer recovery times, or cloudy/dirty water indicating sediment buildup.
Left unchecked, mineral deposits can accelerate corrosion, reduce efficiency, and shorten the tank’s lifespan, increasing the risk of leaks or failure.
Regular descaling with vinegar helps dissolve deposits, restore performance, and prolong equipment life.
Common signs of sediment buildup and reduced performance
Several clear indicators signal that a hot water heater is suffering from sediment buildup and declining performance.
Users notice noisy rumbling or popping, reduced hot water volume, fluctuating temperatures, longer recovery times, and visible discoloration at faucets.
Increased energy bills and frequent pilot outages also appear.
Guides on how to clean a hot water heater with vinegar address these symptoms through descaling and flushing procedures.
Risks of ignoring mineral deposits and corrosion
Ignoring mineral deposits and corrosion in a hot water heater quickly escalates problems beyond reduced performance.
Sediment accelerates element failure, lowers efficiency, and raises energy bills.
Corrosion thins tank walls, increasing leak risk and sudden rupture.
Contaminated water quality and premature appliance replacement follow.
Neglected tanks can cause costly water damage and pose safety hazards if pressure relief mechanisms fail.
Benefits of regular descaling with vinegar
Descaling a hot water heater with vinegar restores heat-transfer efficiency by dissolving mineral buildup, reducing energy use and extending the lifespan of heating elements and the tank.
Regular vinegar treatments prevent sediment accumulation, lower operating costs, maintain consistent water temperature, minimize repair frequency, and reduce corrosion risk.
They also improve water quality and system reliability, supporting predictable performance and delaying full replacement.
Quick Answer: Can You Clean a Hot Water Heater with Vinegar?
Vinegar is an effective mild descaler for removing light mineral buildup but has limits against heavy sediment and corrosion.
It is generally suitable for tank heaters during a flush and for some tankless models when used according to the manufacturer’s service procedure.
Care should be taken to confirm compatibility with the heater materials and warranty before use.
Short summary of effectiveness and limitations
Some homeowners can reduce mineral buildup inside a hot water heater by circulating household white vinegar through the tank; however, its effectiveness is limited to light to moderate lime and sediment deposits and depends on water hardness, tank condition, and proper application.
It can postpone professional descaling, improve efficiency, and remove mild odors, but severe scaling, corroded components, or compacted sediment require mechanical cleaning or replacement.
Types of heaters suited for vinegar descaling (tank vs tankless)
A straightforward household white vinegar flush can be effective for conventional tank-style water heaters with light to moderate mineral buildup, because the liquid can circulate through the tank and dissolve soft scale.
However, it is generally unsuitable for most tankless (on-demand) units, which require specialized descaling solutions, isolated pump circulation, and manufacturer-approved procedures to avoid damage to heat exchangers and warranties.
Tank units: DIY viable.
Tankless: follow manual.
Safety Precautions Before You Start
Before beginning, the reader should assemble required tools and protective gear and verify the heater type.
Power or gas must be shut off, the water supply turned off, and tank pressure safely relieved.
If complications or uncertainty arise—such as suspected leaks, corrosion, or gas concerns—a qualified professional should be contacted.
Tools and protective gear checklist
Essential tools and protective gear should be assembled and inspected before any work begins to guarantee safety and efficiency.
The technician verifies items for condition and suitability, ensuring protection from chemical exposure, hot water, and debris while enabling efficient descaling.
- Safety goggles and chemical-resistant gloves
- Long-sleeve work clothing and closed-toe shoes
- Adjustable wrench and hose for drainage
- Bucket and sturdy funnel
Shutting off power and fuel supply (electric and gas models)
With tools and protective gear confirmed, the technician next isolates all energy sources to prevent scalding, electrical shock, or gas leaks.
For electric heaters the breaker is switched off and a lockout-tagout applied.
For gas units the pilot is extinguished and the gas valve closed.
Verification includes testing for no power and confirming no gas odor before proceeding.
Turning off water supply and relieving pressure
Shut off the cold-water inlet valve at the tank and confirm any nearby supply stops are closed to isolate the heater from the house plumbing.
Open a hot water faucet downstream to verify flow stops.
Attach a hose to the drain valve and open it into a safe drain.
Open the pressure-relief valve briefly to release trapped pressure before beginning descaling.
When to call a professional
If any of the following conditions exist, a qualified technician should be contacted rather than attempting further work.
Presence of gas smell, corroded or leaking tank, faulty pressure relief valve, unclear wiring or damaged elements, recurring brown water or insufficient heating after descaling, or inability to isolate water or power.
Professional assessment prevents injury, fire, or costly mistakes.
Materials and Tools Needed
A concise list of household items—bucket, garden hose, adjustable wrench, and white vinegar (distilled or cleaning-grade)—is provided to prepare for tank flushing and mild descaling.
For heavier buildup, optional descaling tools such as a pump, descaler solution, or a hose-backed brush are recommended.
Replacement parts to have on hand include anode rods, drain valves, and T&P valve cartridges.
Household items and vinegar types to use
Essential supplies for flushing and descaling a hot water heater include common household items and a food-grade vinegar; these are safe, effective, and widely available for routine maintenance.
Use white distilled or apple cider vinegar (food-grade), basic household buckets, a garden hose, and a funnel to direct flow.
Recommended items:
- Food-grade white distilled vinegar
- Sturdy bucket (1–5 gallons)
- Garden hose
- Plastic funnel
Optional descaling tools and parts to replace
Consider adding specialized descaling tools and replacement parts to streamline the job and extend the heater’s life.
Recommended items include a garden hose, wet/dry vacuum adapter, long-handled scrub brush, funnel, and pump for circulating vinegar.
Replacement parts: sacrificial anode rod, temperature/pressure relief valve, drain valve, and rubber gaskets.
Select compatible sizes and materials for the specific heater model.
Step-by-Step Guide to Descale a Tank-Style Hot Water Heater with Vinegar
First, the technician prepares the heater and workspace by cutting power or gas, shutting off water supply, and creating a safe drainage area.
Next, the process covers draining the tank partially or fully, introducing vinegar by pouring, using a hose flush, or employing pump circulation.
Then, allowing appropriate soak time with occasional agitation.
Finally, the procedure concludes with thorough flushing of the tank to remove loosened scale and residual vinegar.
Preparing the heater and workspace
Before any work begins, the heater and surrounding area should be prepared to confirm safety, accessibility, and containment of spills.
Turn power or gas off, close cold-water supply, and relieve pressure at a safe valve.
Clear floor space, protect surfaces with absorbent pads, position buckets and hoses, verify ventilation, and keep a wrench, towels, gloves, and a flashlight within reach.
Draining the tank partially or fully
With power or gas off and pressure relieved, attention turns to removing water so scale and sediment can be accessed.
The drain valve is opened to a hose leading to a safe discharge.
For partial drain, stop when sediment level is exposed; for full drain, open a hot tap and the T&P until empty.
Close valves before proceeding with descaling.
Introducing vinegar: methods (direct pour, hose/flush, pump circulation)
Introduce vinegar using one of three practical methods—direct pouring, hose/flush, or pump circulation—each chosen based on tank access, sediment level, and available equipment.
Direct pouring suits small tanks with removed access panels.
Hose/flush feeds vinegar via the drain valve for easier distribution.
Pump circulation recirculates vinegar for larger tanks or stubborn scale, using a submersible or transfer pump and appropriate fittings.
Soak time and agitation techniques
Allow sufficient soak time and purposeful agitation to dissolve and dislodge mineral buildup effectively.
For moderate scale, soak four to six hours; for heavy deposits, 12–24 hours.
Periodically agitate with gentle taps, short cycles of pumped circulation, or manual stirring via a flexible tube to break loose flakes.
Avoid vigorous actions that risk damage; monitor progress and repeat soaking if residue persists.
Flushing the tank thoroughly after soaking
Begin by closing the drain valve and turning off any pumps used for agitation.
Open the cold-water supply briefly to stir and loosen remaining deposits, then reopen the drain and flush until runoff runs clear.
Cycle cold-water flushes and short fills several times, checking the drain for sediment.
Finish when water is free of visible particles and odor, ensuring all vinegar and debris are expelled.
Refilling, restoring power, and checking for leaks
Close the drain valve, open the cold-water supply to slowly refill the tank, and monitor the pressure-relief valve and all fittings for leaks as the unit reaches full capacity.
Once water flows steadily from a nearby hot faucet, restore power or relight the pilot according to the manufacturer’s instructions and verify the heater cycles normally and remains watertight.
Inspect around fittings, dip tube, and base for any seepage.
Step-by-Step for Tankless Water Heaters
Tankless water heaters require a different cleaning method because their compact heat exchangers are sensitive to scale and cannot be treated like tank units.
The procedure typically involves isolating the unit, attaching inlet and outlet hoses, and circulating a vinegar solution with a pump or flushing kit.
After sufficient circulation, the system is flushed with clean water and the unit is reconnected and restarted according to manufacturer instructions.
Why tankless units need different approach
Recognize that tankless water heaters require a different cleaning method because they operate on continuous flow, have smaller heat exchangers, and are more sensitive to mineral buildup than traditional storage tanks.
Their compact coils clog faster, reducing efficiency and causing overheating.
Descaling must be gentler, more frequent, and targeted to heat exchanger passages.
Incorrect procedures risk damaged sensors, burners, or flow restrictions.
Isolating unit and attaching hoses
Before any hoses are attached, the water heater must be isolated from the plumbing and power sources to prevent flow and electrical hazards; this means shutting off the cold-water supply valve, closing the hot-water outlet valve, and disconnecting electrical or gas power according to the manufacturer’s instructions.
Then attach service valves to inlet and outlet ports, connect dedicated hoses to drain and return fittings, and open service valves slowly to check seals.
Circulating vinegar with a pump or kit
Begin by preparing a descaling solution—typically white vinegar diluted per the manufacturer’s guide—and confirming the pump or kit components are clean and intact.
Connect hoses to the inlet and outlet service ports, secure clamps, and place the pump inline.
Start circulation at the recommended flow rate and duration, monitor for leaks and proper pressure, and observe solution clarity.
Stop pump when descaling time is complete.
Flushing, rinsing, and restarting the unit
After descaling, the technician flushes the tankless unit to remove residual vinegar and loosened mineral deposits by circulating clean water through the inlet and outlet service ports until the discharge runs clear.
The process includes turning off the pump, replacing the solution with fresh water, restarting circulation at a low flow to avoid pressure spikes, and continuing until no sediment or odor remains.
Then valves are returned to normal, air is purged, and the unit is powered and tested for proper operation and leak-free connections.
When Vinegar Alone Is Not Enough
When whitening or slow flow persist despite repeated vinegar flushes, heavy crusting, metallic discharge, or persistent heating issues indicate severe scale that may require stronger chemicals or component replacement.
Professional-grade descalers (acidic or chelating agents) and clear safety steps — proper ventilation, protective gear, and following manufacturer instructions — should be considered.
If anode rods are heavily corroded, valves leak or stick, or the tank integrity is compromised, replacement of those parts or the entire heater becomes the prudent next step.
Indicators of severe scale requiring stronger chemicals or replacement
How can one tell if descaling needs more than household vinegar?
Visible thick, crusty deposits inside the tank, persistent low hot-water flow after vinegar treatment, frequent reheating cycles, rumbling noises, and rapid sediment buildup indicate advanced scaling.
Corroded anode rods, reduced tank capacity, or leaking seams suggest replacement consideration.
These signs warrant professional assessment and stronger remediation beyond household vinegar.
Alternative descalers and safe use guidelines
If vinegar fails to remove heavy scale, stronger commercial descalers and targeted chemical treatments are available and should be considered with care.
Professionals recommend choosing product-compatible formulas, following label PPE and ventilation instructions, neutralizing residues, and testing small areas first.
- Select manufacturer-approved descalers
- Wear gloves, eye protection, and respirator if required
- Flush thoroughly after treatment
- Store chemicals securely and dispose per local rules
When to replace anode rods, valves, or the entire heater
Although vinegar and descaling chemicals can restore many heaters, persistent corrosion, leaking valves, or a heavily degraded anode rod indicate the need for part or unit replacement.
Replacement is advised when anodes are less than 50% intact, T&P or drain valves leak after tightening, or tank walls show rust or weeping.
Prioritize safety: shut power and water, consult a pro for full-unit swaps.
Troubleshooting Common Problems During Descaling
Stubborn sediment may resist standard descaling and often requires mechanical agitation or a stronger, manufacturer-approved descaler to loosen deposits.
Clogged drains and valves should be inspected and carefully cleared or replaced to restore proper flushing.
If a persistent odor remains after cleaning, a systematic check for bacterial contamination, trapped debris, or anode rod deterioration is recommended.
Stubborn sediment deposits and how to remove them
Hard-packed sediment that resists normal flushing can form dense layers on the tank bottom or around the heating element, reducing capacity and heat transfer.
Mechanical agitation with a long brush or flexible scraper loosens deposits.
Repeated vinegar soaks (several hours) dissolve mineral bonds.
Remove loosened material by careful flushing and vacuuming.
Inspect anode and elements, replacing corroded parts to prevent recurrence.
Dealing with clogged drains and valves
When drains or shutoff valves clog during descaling, water and loosened sediment can back up, prolonging the job and risking leaks or pressure issues.
The technician should shut off power, relieve pressure, and attempt gentle agitation with a flexible snake or compressed air.
If obstruction persists, remove and inspect valve components, replace faulty washers or valves, and retest flow before resuming vinegar descaling.
What to do if there’s a persistent odor after cleaning
If a noticeable odor lingers after descaling, it usually indicates trapped organic residue, bacterial growth, or a reaction between cleaning agents and tank materials.
The technician should first confirm the source by isolating hot and cold plumbing and smelling at the tank, anode, and nearby drains.
If bacterial, sanitize with hydrogen peroxide or bleach per manufacturer guidelines, flush thoroughly, replace a corroded anode, and retest.
Maintenance Schedule and Prevention Strategies
Frequency of descaling should align with local water hardness, with harder water requiring more frequent attention.
Simple monthly checks (pressure relief valve, visible leaks) and annual tasks (flushing, anode rod inspection) help extend heater life.
Where scale is a persistent issue, water softeners or point-of-entry/point-of-use filtration can considerably reduce buildup.
Recommended frequency for descaling based on water hardness
How often should descaling occur depends largely on the mineral content of the supply water: soft water may only require descaling every 3–5 years, moderately hard water every 1–2 years, and very hard water as often as every 6–12 months.
Local water testing or utility hardness reports guide scheduling; high-use households and older heaters merit more frequent checks.
Adjust intervals based on sediment buildup and performance indicators.
Simple monthly and annual tasks to extend heater life
Having established descaling intervals tied to water hardness, a simple maintenance schedule of monthly and annual tasks helps prevent common problems and prolong a heater’s service life.
Monthly checks catch early issues; annual service addresses wear. Recommended actions include:
- Inspect for leaks and corrosion.
- Test pressure relief valve.
- Flush a few gallons to remove sediment.
- Schedule professional inspection and anode replacement yearly.
Water softeners and filtration options to reduce scale
Several practical water-treatment options can greatly reduce scale buildup and extend a heater’s life:
Ion-exchange softeners replace hardness minerals with sodium or potassium.
Template-assisted crystallization units convert dissolved calcium and magnesium into harmless micro-crystals.
Point-of-entry carbon or sediment filters remove particulates that accelerate scaling.
Choosing systems based on water hardness, flow demand, maintenance frequency, and budget optimizes prevention and longevity.
Cost, Time, and Effort Comparison
A comparison of DIY vinegar descaling and hiring a professional service highlights differences in cost, time, and required effort.
For a typical home, DIY supplies and an hour or two of labor generally cost far less than a professional visit, though the latter may save time and reduce risk of mistakes.
Readers should weigh estimated material costs and time commitments against the value of technician expertise and warranty coverage.
DIY vinegar descaling vs professional service
Which option offers the best balance of cost, time, and effort: DIY vinegar descaling or hiring a professional service? DIY saves money and offers control but requires time, tools, and caution. Professionals charge more yet provide speed, expertise, and warranty. Choose based on skill, schedule, and risk tolerance.
| DIY | Professional |
|---|---|
| Low cost | Higher cost |
| Time-consuming | Fast |
| Requires effort | Minimal effort |
| No warranty | Warranty/guarantee |
Estimated time and material costs for typical homes
For a typical single-family home, estimating time and material costs for hot water heater cleaning hinges on tank size, sediment level, and whether the homeowner performs a vinegar flush or hires a technician.
DIY vinegar flush: 1–3 hours, $10–30 (vinegar, hoses, wrench).
Professional service: 1–2 hours, $100–300 depending on service scope, travel, and required repairs.
Useful Tips and Best Practices
Guidance covers safe disposal of vinegar and flushed water to protect drains and landscaping.
It also recommends keeping clear records of maintenance dates and parts replaced for warranty and troubleshooting.
Finally, it lists signs—unusual noises, persistent leaks, or loss of efficiency—that indicate a professional inspection is overdue.
How to safely dispose of vinegar and flushed water
When disposing of vinegar and flushed water from a hot water heater, the homeowner should follow simple steps to protect plumbing, landscaping, and local wastewater systems:
Neutralize strong vinegar by diluting with plenty of water.
Run the drain slowly to avoid surges.
Direct flow to sanitary sewers or gravel areas (not storm drains).
Avoid pouring onto sensitive plants, and check local regulations for chemical disposal.
Record-keeping: tracking maintenance and parts replaced
After flushing and neutralizing cleaning solutions, homeowners should begin a simple record-keeping routine to document maintenance and parts replaced.
Records enable cost tracking, warranty claims, and scheduling future descaling. Use dated entries and receipts.
- Date and task performed
- Parts replaced (model, serial)
- Cost and vendor
- Next recommended service date
Signs that professional inspection is overdue
How can a homeowner tell if it’s time to call a professional?
Persistent sediment buildup, unusual noises (popping, rumbling), discolored or foul-smelling water, fluctuating temperatures, visible leaks, frequent pressure relief valve discharge, or repeated pilot/light failures indicate deeper issues.
If basic descaling and maintenance don’t resolve these, a certified technician should inspect for corrosion, element failure, sediment-packed tanks, or safety hazards.
Resources and Further Reading
The article directs readers to consult manufacturer guidelines and warranty terms before performing any maintenance.
It also recommends links to verified suppliers for tools and replacement parts to guarantee compatibility and safety.
Readers are encouraged to use these resources to confirm procedures and obtain correct components.
Manufacturer guidelines and warranty considerations
Understanding manufacturer guidelines and warranty considerations is essential for preserving a hot water heater’s performance and avoiding voided coverage.
Follow model-specific cleaning steps, use approved cleaning agents, document maintenance with dates and photos, and retain receipts. Failure to follow instructions or use unapproved parts may void warranty.
- Check owner’s manual for descaling procedures
- Note warranty exclusions
- Record service actions
- Contact manufacturer for clarification
Links to recommended tools and replacement parts
A concise list of recommended tools and replacement parts helps homeowners and technicians complete hot water heater cleaning safely and correctly.
The following links point to verified brands, replacement anode rods, hose and pump kits, and safety gear. Choose parts matching the unit model and follow manufacturer compatibility notes.
- Anode rods (stainless/copper options)
- Flexible flushing hose kit
- Submersible transfer pump
- Heat-resistant gloves and eye protection
Conclusion
Cleaning a hot water heater with vinegar provides a straightforward, low‑cost descaling method that restores efficiency and extends tank life. Some may doubt vinegar’s strength versus commercial descalers, but repeated vinegar flushes are effective for typical mineral buildup and are safer for DIYers. With basic precautions—power/gas off, proper draining, and using the right vinegar volume—homeowners can perform this routine maintenance confidently, saving money and preventing premature heater failure with minimal time and effort.