How to Change PVC Pipe: Step-by-Step Replacement Guide
To change a PVC pipe, follow these steps:
- Gather Tools and Materials: You will need a PVC cutter, primer, and cement.
- Shut Off Water Supply: Turn off the main water supply to prevent leaks.
- Identify and Cut Damaged Section: Locate the damaged pipe and use the cutter to remove it.
- Prepare New Pipe: Clean the ends of the new pipe and the fittings.
- Apply Primer and Cement: Apply primer to the joints, then follow with cement.
- Secure Connection: Fit the new pipe into place and hold for a few seconds to ensure a strong bond.
- Test for Leaks: Restore the water supply slowly and check for any leaks.
For thorough guidance and maintenance tips, additional resources may be helpful.
Understanding PVC Pipe Types and Sizes
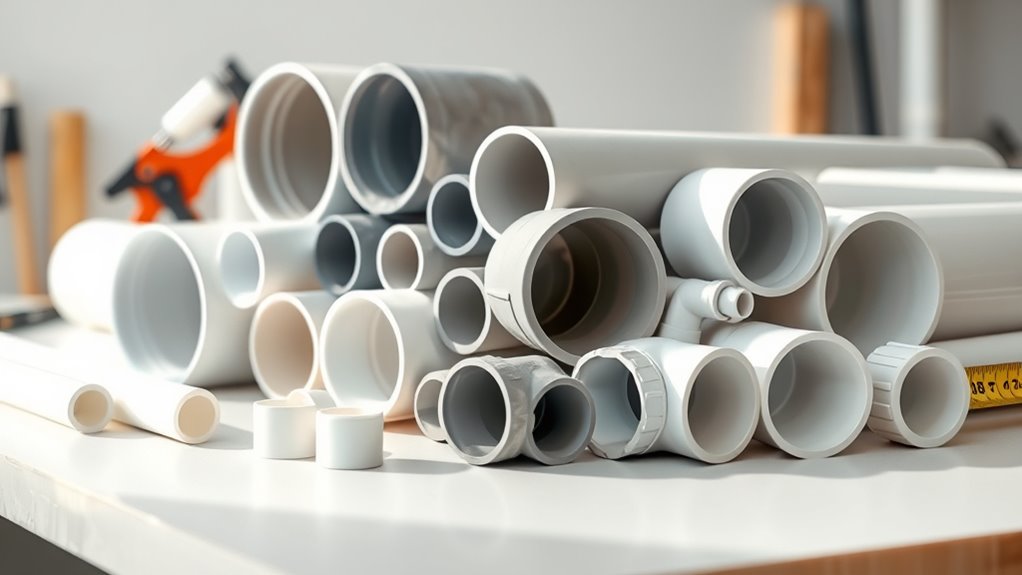
When choosing PVC pipe for your project, it’s important to understand the different types and sizes available. The most common types are Schedule 40 and Schedule 80.
Schedule 40 is typically used for residential plumbing due to its adequate strength for most home applications. In contrast, Schedule 80 features thicker walls, making it suitable for industrial use where higher pressure ratings are needed.
PVC pipes come in various diameters, from ½ inch to 12 inches, allowing you to find the right fit for your specific plumbing needs.
Selecting the correct size and type is crucial, as it affects flow rates and compatibility with fittings. By understanding these options, you can make informed decisions that enhance the performance and durability of your plumbing system.
Tools and Materials Needed for the Job
If you’re planning a PVC pipe project, having the right tools and materials is essential for a successful outcome. Here’s a concise list of what you’ll need:
| Tool/Material | Purpose | Quantity Needed |
|---|---|---|
| PVC Pipe Cutter | For accurate cuts of PVC pipes | 1 |
| Measuring Tape | To ensure precise measurements | 1 |
| PVC Primer and Cement | To securely bond joints | 1 can each |
| Adjustable Wrench | For tightening fittings | 1 |
| Safety Goggles | To protect eyes during cutting | 1 pair |
With these items on hand, you can efficiently execute your PVC pipe project.
Safety Precautions Before Starting
Before starting a PVC pipe project, prioritize safety with these essential precautions:
- Clear Workspace: Ensure your area is clutter-free and well-ventilated to avoid inhaling harmful fumes from adhesives.
- Wear PPE: Use safety goggles to protect your eyes from debris and gloves to shield your hands from sharp tools and chemicals.
- Have a First Aid Kit: Keep a first aid kit on hand for minor injuries.
- Inform Others: Let those nearby know about your project to avoid accidents.
- Follow Instructions: Always read and adhere to the manufacturer’s guidelines for tools and materials.
Taking these steps will help ensure a safe and effective PVC pipe project.
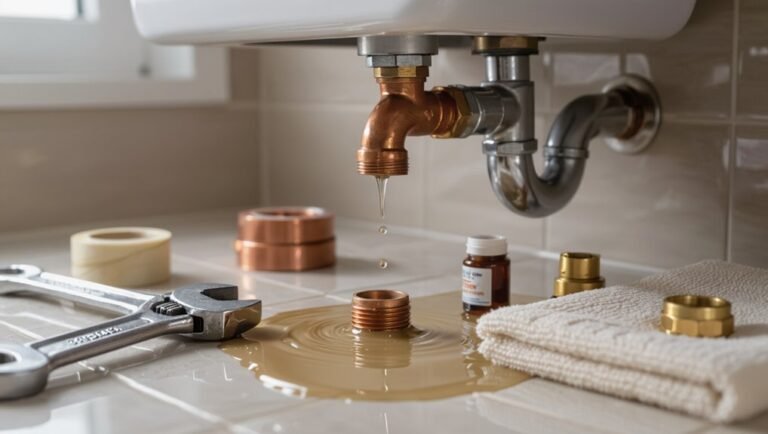
Identifying the Damaged Section of Pipe
Identifying the damaged section of PVC pipe is crucial for effective repairs.
Start with a thorough visual inspection to check for cracks or discoloration. If you suspect a leak, conduct pressure tests or use a leak detection dye.
Familiarizing yourself with common damage indicators can further enhance your assessment and help you pinpoint the issue quickly.
Visual Inspection Techniques
To identify damage in PVC pipes, perform a thorough visual inspection.
Start by examining the entire pipe for cracks, bulges, or discoloration. Pay special attention to joints and fittings, as these areas are prone to leaks.
Look for signs of corrosion or buildup, which can indicate deeper issues. Additionally, check the surrounding area for water stains or dampness that may suggest a leak.
Ensure you have proper lighting to enhance visibility for a more accurate assessment.
Testing for Leaks
To effectively test for leaks in PVC pipes, use these straightforward methods to quickly identify any damage:
- Pressure Testing: Seal the pipe and apply air or water pressure. A drop in pressure indicates a leak.
- Soapy Water Method: Apply a soap and water mixture to joints and seams. Bubbles will form at the leak site.
- Dye Testing: Introduce a colored dye into the system. This method is especially useful for locating leaks in buried or hard-to-reach areas.
These techniques will help you efficiently locate and address any leaks in your PVC piping.
Common Damage Indicators
After leak tests, it’s crucial to identify common damage indicators in PVC pipes to prevent further issues.
Here are key signs to look for:
- Visible Cracks or Warping: Check the pipe’s surface for any cracks or warping, which can compromise its integrity.
- Discoloration: Look for any changes in color that may signal deterioration.
- Texture Changes: A rough or flaking exterior often indicates damage.
- Unusual Sounds: Listen for hissing or gurgling sounds, which may suggest air leaks or blockages.
- Water Stains: Stains on nearby walls or ceilings can indicate hidden leaks.
- Swelling or Bulging: These signs suggest internal pressure issues.
Preparing the Work Area
To successfully change PVC pipes, it’s crucial to prepare your work area properly. Here are the essential steps to create an efficient and safe workspace:
- Clear the Area: Ensure the work site is free of obstacles and debris to allow for safe movement.
- Protect Surrounding Surfaces: Use drop cloths or plastic sheeting to cover floors and fixtures, preventing damage from debris or spills.
- Gather Necessary Tools: Collect all required tools, such as pipe cutters and solvent, and keep them within easy reach for a smoother process.
Following these steps will enhance your efficiency and safety during the project.
Shutting Off the Water Supply
Before working on PVC pipes, it’s crucial to shut off the water supply to avoid leaks and water damage.
Start by locating the main shut-off valve, usually near the water meter or where the main line enters your home. Turn the valve clockwise to close it completely.
To ensure the water is off, test it by turning on a faucet; no water should flow. If there are additional shut-off valves for specific areas or fixtures, close those as well.
Shutting off the water supply creates a safer environment for your repairs and prevents flooding.
Removing the Damaged PVC Pipe
To effectively remove a damaged PVC pipe, follow these essential steps:
- Identify the Damaged Area: Determine the specific section of the pipe that needs to be replaced, ensuring it is accessible.
- Cut the Pipe: Utilize a pipe cutter or hacksaw to carefully slice through the damaged section. Always wear protective eyewear for safety.
- Detach the Pipe: After cutting, gently wiggle the pipe to disconnect it from any fittings or joints, avoiding damage to adjacent pipes.
Once these steps are completed, you’ll be ready to install a new PVC pipe.
Measuring and Cutting the New PVC Pipe
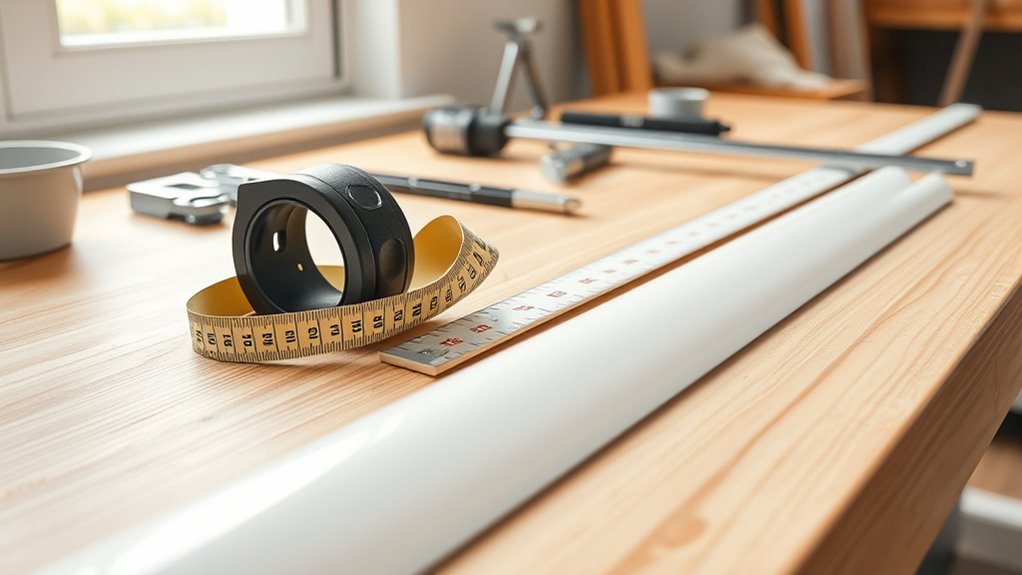
When installing a new PVC pipe, accurate measurements are crucial to prevent leaks and ensure proper fittings.
Start by measuring the length of the replacement pipe, ensuring it matches the distance between the connecting fittings. Use a measuring tape, keeping it straight and taut for precision.
Once you have the correct length, mark the cut line clearly with a fine-tip marker or pencil.
To cut the pipe, use a PVC pipe cutter or a hacksaw for a clean, straight cut.
Finally, deburr the edges to ensure a better fit during installation.
Dry Fitting the New Pipe
Before securing your new PVC pipe, it’s crucial to dry fit the components.
Start by measuring the existing pipe length and checking that all connections align correctly. This test fit allows you to make any necessary adjustments, helping you avoid costly mistakes during the gluing phase.
This step ensures a successful installation and saves you time and resources.
Measure Existing Pipe Length
How to Measure Existing Pipe Length for PVC Installation
Measuring the existing pipe length is crucial for ensuring a proper fit for your new PVC pipe. Follow these steps for accurate measurements:
- Use a Measuring Tape: Lay the measuring tape along the pipe’s length, making sure it’s straight for an accurate reading.
- Record the Measurement: Write down the length, including any extra needed for fittings or connections.
- Double-Check: Measure twice to ensure accuracy, as errors can lead to improper fittings and leaks.
Align Pipe Connections Properly
Aligning pipe connections properly is crucial for a successful PVC installation. To ensure a leak-free connection, follow these steps:
- Clean Cut Ends: Ensure that the cut ends of both the existing and new pipes are clean and free of debris.
- Insert New Pipe: Gently insert the new pipe into the existing fittings, ensuring a snug fit without forcing it.
- Check Alignment: Inspect for any misalignment. Proper alignment is essential to prevent leaks or pipe failure.
- Adjust as Needed: If misalignment is detected, carefully adjust the sections for a seamless connection.
Once you are satisfied with the alignment, you can proceed with securing the connections for a durable PVC installation.
Test Fit Before Gluing
Testing the fit of your new PVC pipe before gluing is essential to ensure a proper installation.
Follow these simple steps to confirm a seamless connection and prevent future issues:
- Dry Fit the Pieces: Assemble the pipe sections and fittings without adhesive to check for a snug fit.
- Ensure Proper Alignment: Make sure all connections are aligned correctly, and the pipe maintains the intended path without any bends or kinks.
- Adjust as Needed: If something doesn’t fit right, trim the pipe or reposition fittings before applying glue.
Performing these checks can save you time and resources by preventing leaks and misalignments in your installation.
Applying PVC Primer and Cement
To ensure a secure and leak-free joint when applying PVC primer and cement, follow these essential steps:
- Choose Quality Products: Select a high-quality PVC primer and cement. The primer softens the pipe surface for better bonding.
- Apply Primer: Use a clean brush to apply the primer evenly to both the pipe and fitting for complete coverage. Allow it to dry as per manufacturer instructions.
- Apply Cement: Quickly apply PVC cement in the same manner after the primer has dried.
- Join the Pieces: Push the two pieces together using a twisting motion to create a strong bond.
- Hold in Place: Maintain pressure for a few seconds to allow the cement to begin curing, ensuring a robust connection.
Installing the New PVC Pipe
Installing a New PVC Pipe: A Quick Guide
When installing a new PVC pipe, it’s crucial to ensure proper alignment and connection for optimal performance.
Follow these straightforward steps for a successful installation:
- Align the Pipe: Position the new PVC pipe so that it fits snugly into the existing connectors or fittings. This alignment is key for a leak-free connection.
- Check the Angle: Make sure the pipe is at the correct angle to promote efficient flow and prevent blockages.
- Secure Temporary Supports: Use temporary supports if needed to keep the pipe stable while you finalize the installation.
Sealing and Securing the Joints
Sealing and securing PVC pipe joints is crucial for preventing leaks.
To ensure a durable connection, select the appropriate sealant and align the joints correctly.
Paying attention to these factors will significantly improve the effectiveness of your installation.
Choosing the Right Sealant
When choosing a sealant for PVC pipe joints, it’s crucial to ensure a secure, leak-free connection by considering the following factors:
- Type of Sealant: Decide between solvent cement, which creates a chemical bond, or mechanical sealants that act as a physical barrier against leaks.
- Temperature Resistance: Ensure the sealant can handle the temperature changes expected in your installation environment.
- Application Method: Check if the sealant is easy to apply and compatible with your tools, which will help achieve a strong joint.
Proper Joint Alignment Techniques
Proper joint alignment is crucial for ensuring the durability and reliability of PVC pipe installations. Misaligned joints can result in leaks and structural issues.
Here’s how to achieve optimal joint alignment:
- Clean Pipe Ends: Ensure the pipe ends are free from dirt and moisture.
- Firm Seating: Push the pipes completely into the fitting to guarantee they are fully seated.
- Gentle Twist: A slight twist can enhance the seal during connection.
Testing for Leaks
After installing PVC pipes, it’s crucial to test for leaks to ensure a reliable plumbing system.
Here are the essential steps for an effective leak test:
- Visual Inspection: Check all joints and connections for any signs of moisture.
- Pressurization Test: Monitor the system’s pressure with a pressure gauge. A drop in pressure may indicate a leak.
- Dye Test: Add dye or food coloring to the system and look for any seepage at joints or connections.
Following these steps will help confirm the integrity of your plumbing system and prevent future issues.
Restoring the Water Supply
Once leak testing is complete, restoring your water supply is the next crucial step.
Start by turning off the main water supply to prevent any pressure build-up.
After confirming that all connections are secure, gradually restore the pressure while monitoring for any leaks.
This ensures a safe and effective return to normal water service.
Turn Off Water Supply
To restore the water supply after changing PVC pipe, follow these essential steps:
- Secure Connections: Ensure all connections are tight and the new pipe is installed correctly.
- Locate the Main Valve: Find the main water supply valve in your home.
- Open the Main Valve Slowly: Gradually turn the valve to avoid pressure shocks.
- Check Faucets: Turn on faucets at the highest and lowest points in your home to release trapped air.
- Inspect the New Pipe: Look for any leaks or unusual sounds that may indicate a problem.
These steps will help ensure a smooth restoration of your water supply.
Check for Leaks
Checking for leaks after installing new PVC pipe is crucial to ensure a reliable water supply.
Once the new pipe is securely in place, turn the water supply back on and closely inspect all joints and connections for any signs of leakage.
Look for water seeping or dripping, and use a dry cloth around the joints to help identify any moisture.
If you detect a leak, address it immediately by tightening connections or applying appropriate sealants.
This step is vital in preventing future damage and maintaining your plumbing system’s integrity.
Restore Pressure Gradually
How to Gradually Restore Water Pressure After PVC Pipe Installation
Restoring water pressure after installing new PVC pipes requires a careful approach to avoid damaging the system.
Follow these steps to ensure a smooth process:
- Open the Main Water Valve Slowly: Gradually turn the main water valve to allow a steady flow of water without sudden surges.
- Check for Leaks: As pressure increases, inspect all joints and connections for any leaks.
- Adjust Pressure Regulators: If your system has pressure regulators, adjust them to maintain a safe pressure level.
Final Tips for Maintaining PVC Pipes
To maintain the longevity and performance of your PVC pipes, follow these essential tips:
- Regular Inspections: Check for cracks, leaks, or signs of wear regularly to catch issues early before they escalate.
- Cleaning: Clean pipes periodically using a mixture of baking soda and vinegar to eliminate buildup without damaging the material.
- Temperature Protection: Avoid exposing PVC pipes to extreme temperatures. Insulate pipes in unconditioned spaces to prevent warping and brittleness.
- Avoid Heavy Loads: Do not place heavy objects on or near the pipes, as this can cause stress and lead to failure.
- Professional Help: For significant repairs or uncertainties about maintenance, consult a professional.
Implementing these practices will help ensure your PVC pipes remain in good condition and function effectively.
Conclusion
Changing a PVC pipe may seem daunting, but it’s a manageable task with the right tools and knowledge. PVC pipes are durable and can last over 100 years with proper maintenance. To successfully replace damaged sections, follow these steps:
- Gather your tools: PVC cutter, primer, cement, and replacement pipe.
- Turn off the water supply and drain the pipes.
- Cut out the damaged section of the pipe.
- Prepare the ends of the existing pipe and the new section with primer.
- Apply PVC cement and connect the new pipe.
- Allow the cement to cure before turning the water back on.
Regular inspections and maintenance can further enhance the lifespan of your plumbing system.