
How to Use a Moen Cartridge Puller: Step-by-Step Guide for Fast, Damage-Free Removal
To effectively use a Moen cartridge puller for removing stuck faucet cartridges without damaging the valve body, follow these steps:
- Shut Off Water: Turn off the water supply and relieve any pressure.
- Remove Handle and Escutcheon: Take off the faucet handle and escutcheon plate to access the cartridge.
- Select the Right Puller: Match your puller to the specific cartridge type you are working with.
- Position the Puller: Seat the jaws or threads of the puller centrally on the cartridge.
- Tighten Evenly: Gradually tighten the puller to ensure even pressure.
- Apply Force: Use steady, incremental force to extract the cartridge. If it’s stubborn, apply penetrating oil or gentle heat.
- Clean the Valve: Once removed, clean the valve body thoroughly.
- Install New Cartridge: Place a new cartridge into the valve.
- Test for Leaks: Turn the water supply back on and check for any leaks.
This guide will help you achieve a fast and damage-free removal of your Moen faucet cartridge.
What a Moen Cartridge Puller Is and When You Need One
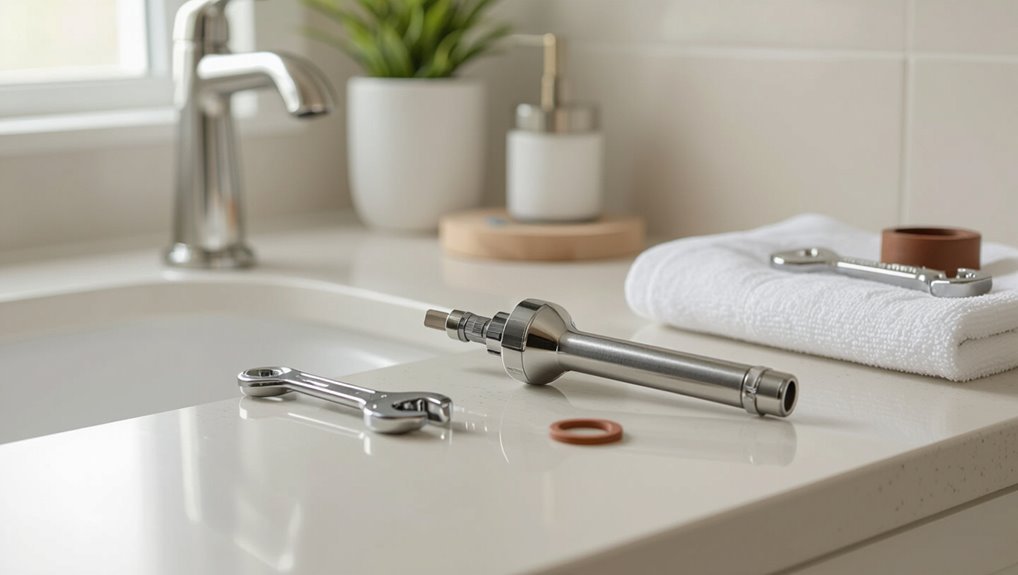
A Moen cartridge puller is a specialized tool that grips and extracts the faucet cartridge, working with the cartridge’s shape and retaining nut to allow safe removal without damaging the valve body.
Homeowners and plumbers commonly use one when a cartridge leaks, produces inconsistent water temperature or pressure, or becomes stuck from mineral buildup.
Different Moen cartridge designs (single-handle, Posi-Temp, and older two-handle types) require matching pullers or adapters to guarantee proper fit and removal.
How a Moen cartridge and cartridge puller work together
Using a cartridge puller simplifies removal of a stuck Moen cartridge by providing focused grip and leverage where hand force alone often fails.
The tool engages the cartridge body, allowing controlled axial pull while protecting valve seats. Proper alignment prevents twisting or breakage.
Instructions on how to use moen cartridge puller emphasize steady tension, incremental adjustments, and reversing direction if resistance indicates corrosion or debris.
Common signs you should remove a Moen cartridge
After explaining how a cartridge puller engages and extracts a stuck Moen cartridge, attention turns to the signs that indicate the cartridge itself needs removal.
Common indicators include persistent leaks despite tightened handles, intermittent or no hot/cold selection, visible corrosion or mineral buildup, reduced water flow, and wobbling or rough handle movement.
These symptoms justify cartridge inspection and replacement.
Types of Moen cartridges and compatible pullers
Moen cartridges come in several distinct designs—most commonly the 1225 (standard residential) and 1222/1225 hybrid variants, the ceramic-disk 1222/1225 family, and older brass-stem cartridges—each requiring a puller that matches its shape and retaining method. Selection guarantees safe removal: plastic-jaw pullers for 1225, threaded pullers for brass, and adapter kits for hybrids.
| Type | Puller |
|---|---|
| 1225 | Plastic-jaw |
| 1222 | Adapter kit |
| Brass | Threaded |
| Ceramic | Soft-grip |
Quick summary: Fast, damage-free cartridge removal in 4 steps
A concise four-step outline guides the fast, damage-free removal of a Moen cartridge.
Step 1: shut off water and remove trim.
Step 2: expose and secure the cartridge.
Step 3: attach and operate the puller.
Step 4: inspect and prepare the new cartridge.
One-line overview of each step
Follow four concise steps to remove the cartridge quickly and without damage:
shut off water and relieve pressure, expose and secure the cartridge, attach and operate the cartridge puller, then inspect and replace seals before reassembly.
Turn off supply, drain lines, remove handle and trim, unclip retaining clip, seat puller and tighten evenly, extract cartridge straight, clean bore, fit new O-rings, test for leaks.
Tools and materials required
The section lists the essential tools and helpful supplies needed to remove a Moen cartridge safely and efficiently.
It covers cartridge puller models, pliers, hex keys, plus useful items like a bucket, towels, penetrating oil, and a replacement cartridge.
Safety gear and precautions for eye protection and hand safety are also noted.
Essential tools (cartridge puller models, pliers, hex keys)
Essential tools for removing and replacing a Moen cartridge include a compatible cartridge puller model, adjustable pliers, and the correct hex (Allen) keys; choosing the right sizes and build quality guarantees a safe, efficient job without damaging the valve body.
Recommended pullers fit Moen’s single- and dual-cartridge types. Use smooth-jaw pliers to prevent scoring and hex keys that match retaining screw sizes precisely.
Helpful supplies (bucket, towels, penetrating oil, replacement cartridge)
After gathering the right cartridge puller, pliers, and hex keys, attention turns to supplemental supplies that make the job cleaner and smoother.
A small bucket captures residual water, absorbent towels protect surfaces, and penetrating oil eases seized cartridges.
Keep the correct replacement cartridge and any O-rings on hand.
A tray for fasteners and a marker for orientation simplify reassembly.
Safety gear and precautions
Personal protective equipment and basic precautions reduce risk when working on a faucet cartridge.
Safety glasses protect against debris; gloves improve grip and prevent cuts; knee pads increase comfort.
Confirm water supply is shut off and faucet drained. Use proper lighting and stable workspace.
Avoid electrical contact; keep small parts contained. Follow manufacturer instructions for tools and replacement components.
Preparing the faucet and workspace
Before using the cartridge puller, the water supply should be shut off at the shutoff valves and remaining pressure relieved by opening the faucet.
Handle assemblies and escutcheons must be removed carefully with the correct tools to avoid bending or scratching components.
Protective coverings and towels should be placed over nearby finishes and the countertop to prevent damage during the repair.
How to shut off water and relieve pressure
One effective first step is to shut off the water supply to the faucet and relieve any remaining pressure in the lines to prevent leaks or spray during cartridge removal.
Locate and close the local shutoff valves or the main water valve.
Open the faucet to drain residual water, place a towel beneath the work area, and wear safety glasses before beginning disassembly.
Removing handle assemblies and escutcheons without damage
Begin by clearing and protecting the work area: lay down a towel or drop cloth to catch small parts, set tools within reach, and keep a small container handy for screws and trim pieces.
Remove decorative caps or buttons with a soft tool, loosen set screws, and gently lift handles. Unscrew escutcheons evenly, supporting the trim to prevent bending or misalignment.
Keep parts organized.
Protecting finishes and surrounding areas
Protect the faucet finish and surrounding surfaces by covering exposed metal and nearby countertops with soft, non-abrasive materials—masking tape over delicate chrome, a microfiber cloth wrapped around trim, and a drop cloth for the work area.
Remove decorative pieces gently, protect adjacent fixtures and plumbing with foam or cloth, and place tools on a padded tray.
Keep cleaning solvents distant to prevent stains.
Step-by-step cartridge removal using a Moen cartridge puller
The cartridge removal process follows a clear sequence to safely extract the Moen cartridge without damaging the valve or surrounding parts. First, access and identify the cartridge, then secure and attach the puller properly before applying controlled force.
If the cartridge resists, use techniques for stuck or corroded units and inspect the valve body once removed.
- Locate the cartridge and clear surrounding obstructions for full access
- Set up the puller, align it squarely, and tighten to the cartridge stem per tool instructions
- Apply steady, moderate force and avoid sudden jerks to prevent breakage
- Use penetrating oil, heat, or incremental tightening for seized cartridges and check the valve body for wear or debris after extraction
Locate and access the cartridge
Locate the cartridge by first removing the handle, escutcheon, and any trim pieces to expose the valve body; the cartridge sits inside the valve housing and is accessible once these components are cleared away.
Inspect the exposed valve for retaining clips, screws, or protective sleeves.
Clear mineral deposits and debris, note cartridge orientation, and guarantee sufficient workspace and lighting before proceeding to removal.
Set up and attach the cartridge puller correctly
Begin by selecting a cartridge puller that matches the Moen model and preparing the workspace for a focused, unobstructed operation.
Inspect cartridge top for flats or slots, clean debris, and seat the puller centrally.
Engage jaws or threaded stud per tool design, tighten evenly until snug, and verify alignment.
Confirm secure attachment and clear access before proceeding to removal.
Applying the right amount of force tips to avoid breakage
Apply steady, controlled pressure while monitoring resistance to prevent sudden snaps or internal damage to the cartridge.
The technician increases force incrementally, pausing when resistance spikes and checking alignment. If movement is minimal, reposition the puller and try short, measured pulls rather than continuous force.
Stop immediately if plastic deforms or metal creaks; reassess attachment before proceeding.
Extracting stuck cartridges and dealing with corrosion
After pausing at any sign of deformation or unusual noise, the technician moves on to extracting stubborn cartridges that have seized from corrosion.
He applies penetrating lubricant around the cartridge, lets it dwell, then uses the Moen puller with incremental, even pressure.
If resistance persists, gentle heat and repeat lubrication aid release.
Removed debris and mineral deposits are brushed away before extraction completion.
Inspecting the valve body after removal
With the cartridge removed, the technician inspects the valve body for signs of wear, scoring, mineral buildup, and damaged O‑rings or seals.
They clean mineral deposits with vinegar or a descaling solution, gently remove debris, and assess bore smoothness and retaining clip condition.
Any damaged seals, corroded components, or deep scoring prompt replacement of the cartridge or valve body to guarantee leak-free operation.
Troubleshooting difficult removals
When the puller will not get a secure hold, the article outlines alternative attachment methods and options for extracting broken stems or fragments.
It also covers safe use of heat, penetrating oil, and controlled tapping to loosen stuck cartridges.
Guidance is provided on signs that indicate professional help is advisable to avoid further damage.
When the puller won’t grip: alternative attachment methods
If the cartridge puller fails to bite, alternatives can be employed to secure the tool and protect the faucet: fitting a rubber sleeve or strip around the cartridge to increase friction, wrapping a hose clamp or adjustable band tightly over the puller jaws, or using a few wraps of heavy-duty plumber’s tape to bulk up contact points.
Use gradual, even tension and inspect for slippage; apply penetrating lubricant if seized.
Removing broken cartridge stems or fragments
Extracting broken cartridge stems or fragments requires patience and the right small tools; a methodical approach minimizes damage to the valve body and surrounding finish.
Begin by clearing visible debris with needle-nose pliers and pick tools. Use a small extractor or screw set for stubborn fragments, turning counterclockwise gently.
Inspect the bore frequently, remove all shards, then clean and prepare for the replacement cartridge.
Using heat, penetrating oil, or gentle tapping safely
After clearing visible fragments and confirming the bore is free of shards, the next step is to evaluate controlled techniques—heat, penetrating oil, or gentle tapping—to loosen stubborn cartridges without damaging the valve body or finish.
Apply heat briefly with a hair dryer, use a few drops of penetrating oil around the stem, and tap lightly with a brass punch.
Reassess frequently and clean residue before pulling.
When to stop and call a professional
While minor resistance can often be overcome with patience and the right tools, persistent binding, visible damage to the valve body, stripped or rounded fasteners, or evidence of cross-threading signal it’s time to stop and consult a professional.
A plumber can assess corrosion, remove seized cartridges without further harm, restore threads, and prevent leaks or broken components that would increase repair complexity and cost.
Installing a new Moen cartridge after removal
After removing the old cartridge, the valve body should be cleaned and any debris or mineral buildup removed to guarantee a proper seal.
The replacement cartridge must be lubricated where recommended, seated squarely, and the handles reassembled with correct alignment.
Finally, the fixture should be tested for smooth operation and inspected for leaks before completing the job.
Cleaning and prepping the valve body surface
How should the valve body be prepared before installing a new Moen cartridge?
The technician inspects the bore for mineral deposits, corrosion, and old O‑ring remnants.
Debris is removed with a soft-bristled brush, dental pick, and clean cloth.
Mineral buildup is softened with vinegar or a mild descaler, then rinsed thoroughly.
Surfaces are dried and inspected for scratches or damage before cartridge insertion.
Lubricating and seating the replacement cartridge properly
Carefully lubricating and correctly seating the replacement Moen cartridge guarantees smooth operation and prevents leaks.
Apply a thin, even coat of plumber’s grease to O-rings and seals; avoid petroleum-based products.
Align cartridge tabs with valve slots, then press straight in until fully seated, feeling the detent.
Rotate gently to confirm free movement.
Wipe excess grease and inspect for proper engagement before restoring water.
Reassembling handles and checking alignment
Reinstall the handle assembly by aligning it with the cartridge stem and seating any escutcheon or trim before tightening fasteners; this guarantees the handle operates on the cartridge’s designed axis and prevents binding.
Verify lever or knob orientation matches original position, hand-tighten screws then torque evenly.
Confirm trim sits flush, clearances are even, and set retaining clips or caps to secure the assembly without over-tightening.
Testing for leaks and proper operation
Begin testing by restoring water supply and slowly operating the valve to pressurize the system while observing for drips and proper flow.
Check both hot and cold sides, cycle handle through full range, and inspect connections, escutcheon, and spout for seepage.
Verify steady pressure and smooth operation.
Tighten any fittings if needed, retest, and confirm no leaks before finishing.
Common mistakes and how to avoid them
Common errors during cartridge work can cause damage, persistent leaks, or premature part failure if not recognized and corrected. The following points summarize typical mistakes and practical ways to avoid them. Addressing these issues before reassembly reduces the chance of repeat service.
- Incorrect use of the puller leading to scratched or broken cartridge bodies
- Over-tightening fasteners or fittings that warp housings or damage seals
- Misalignment during removal or installation that prevents a proper seat
- Skipping preparatory steps (cleaning, corrosion removal, inspection) that result in leaks
Damage caused by incorrect puller use
Using a cartridge puller incorrectly can strip threads, crack the cartridge body, or deform the valve seat, turning a routine repair into a more costly replacement job.
Improper attachment, uneven force, or wrong puller size leads to bent stems, broken retaining clips, and damaged seals.
Careful selection, correct seating, and steady, centered pulling minimize risk and preserve surrounding plumbing components.
Over-tightening, misalignment, and ignoring corrosion
Apply steady, centered pressure and inspect connections before and during removal to prevent three frequent errors: over-tightening the puller, misaligning its jaws, and overlooking corrosion.
Over-tightening can fracture cartridge edges; stop when resistance eases.
Misalignment causes slippage and scoring—reposition until jaws seat evenly.
Corrosion weakens parts; clean and assess metal before pulling to choose appropriate force and technique.
Skipping preparatory steps that lead to leaks
Skipping preparatory steps often turns a straightforward cartridge removal into a source of leaks and extra repairs.
Failure to shut off water, relieve pressure, or protect surrounding seals risks damaged O-rings and compromised fittings.
Inspecting and replacing worn seals, cleaning buildup, and verifying shutoff valves prevent post-reassembly leaks.
Proper preparation saves time and avoids costly water damage.
Maintenance tips to extend cartridge life
Attention to water quality and the use of inline filters can greatly reduce mineral buildup that shortens cartridge life.
Regular visual inspections and cleaning catch wear or debris early, while monitoring performance helps decide whether cleaning or replacement is appropriate.
When leaks, persistent stiffness, or degraded sealing occur, replacement is usually more reliable than repeated repairs.
Water quality, filters, and periodic inspection
Regular checks of water quality and simple filtration can greatly extend the life of a Moen cartridge by reducing mineral buildup and debris that cause wear or sticking.
Install a sediment filter or softener where appropriate, flush lines after work, and inspect cartridges and seals biannually.
Record hardness, chlorine levels, and visible debris to plan timely cleaning and prevent premature failure.
When to replace vs. repair the cartridge
When should a cartridge be repaired and when is replacement the better option?
The cartridge merits repair for minor mineral buildup, worn seals, or intermittent leaks; cleaning, O-ring replacement, and lubrication suffice.
Replacement is prudent for persistent leaks, cracked bodies, severe corrosion, or performance decline despite repairs.
Cost, availability, and faucet age guide the decision; prioritize long-term reliability over temporary fixes.
Recommended cartridge puller models and buying considerations
Recommended cartridge puller models balance price, durability, and compatibility to suit both occasional DIYers and professional plumbers. Key features to look for include adjustable grips, corrosion-resistant materials, and clear warranty terms that protect against defects. The following quick reference compares typical options and buying considerations.
| Feature/Model | Notes |
|---|---|
| Budget puller | Lower price, limited warranty, may fit common Moen cartridges |
| Mid-range puller | Better build, multi-fit adapters, 1–2 year warranty |
| Professional-grade | Heavy-duty steel, broad compatibility, longer warranty |
| Essential features | Adjustable jaws, non-marring pads, corrosion resistance |
| Warranty considerations | Length, coverage of wear, manufacturer support |
Price vs. durability vs. compatibility
Although price often guides initial choices, balancing cost with durability and compatibility yields the best long-term value for a Moen cartridge puller. Buyers should prioritize tools that match the specific cartridge type and offer robust materials and replaceable parts over the cheapest option.
Midrange models often deliver hardened steel components and adaptable jaws, reducing damage risk and replacement frequency while fitting varied Moen cartridges.
Features to look for and warranty notes
Several key features distinguish reliable Moen cartridge pullers: hardened steel construction, adjustable jaws or adapters for different cartridge sizes, a smooth threaded spindle to prevent binding, and a corrosion-resistant finish for longevity.
Recommended models balance compatibility and warranty support; users should choose reputable brands offering lifetime or limited warranties, clear return policies, and readily available replacement parts or adapters to guarantee long-term value and safe operation.
Safety checklist and final walkthrough before finishing job
A final safety checklist and walkthrough guarantee the repair holds and the work area is left safe and clean. Technicians should perform a leak test, monitor for drips or pressure loss in the first 24 hours, and confirm all fasteners and seals are secure.
They should also clean the workspace and dispose of old cartridges and debris according to local regulations.
- Run the faucet at full and partial flow, check hot and cold, and inspect under-sink connections for any slow seepage.
- Note any pressure changes, sputtering, or new sounds during the first 24 hours and recheck fittings if issues appear.
- Wipe down surfaces, remove tools, and guarantee no residual water remains that could cause slips or mold.
- Package used cartridges and contaminated materials in a sealed bag and follow local disposal or recycling guidance.
Leak test steps and what to watch for in first 24 hours
Begin the leak test by restoring water supply slowly and observing all joints, handles, and connections for immediate drips or seepage.
Pressure should be increased gradually while checking for steady flow and proper shutoff.
Inspect under-sink areas, aerators, and diverters.
Recheck after one hour, then at 6 and 24 hours for slow leaks, pooling, or pressure loss.
Address any seepage immediately.
Post-job cleanup and disposal of old cartridges
Finish the job area by removing tools, wiping surfaces, and collecting debris to prevent hazards and guarantee a professional appearance.
The technician segregates used cartridges, contaminated rags, and small parts into sealed bags. Hazardous components follow local disposal rules; recyclables go to appropriate facilities.
Inspect for leaks, restore water pressure, and record work completed.
Leave the site clean, safe, and documented for the client.
Conclusion
Like a gardener coaxing an old root from fertile soil, the craftsman uses the Moen cartridge puller with patient precision, preserving the faucet’s life as one would protect a beloved tree. Each deliberate turn and steady pull honors function and form, avoiding needless harm. The tool becomes a steady hand, the technique the careful season; together they restore flow, proving that thoughtful technique yields lasting repair rather than hurried replacement.
