How to Plumb a Kitchen Sink with Disposal?
Are you looking to install a new kitchen sink with a disposal system? In this article, we’ll walk you through the step-by-step process of plumbing a kitchen sink with a disposal, so you can easily and efficiently get the job done.
From connecting the sink drain to installing the disposal unit correctly, we’ll provide you with expert tips and guidance to ensure your sink and disposal work seamlessly together. No more worrying about clogs or backups in your sink!
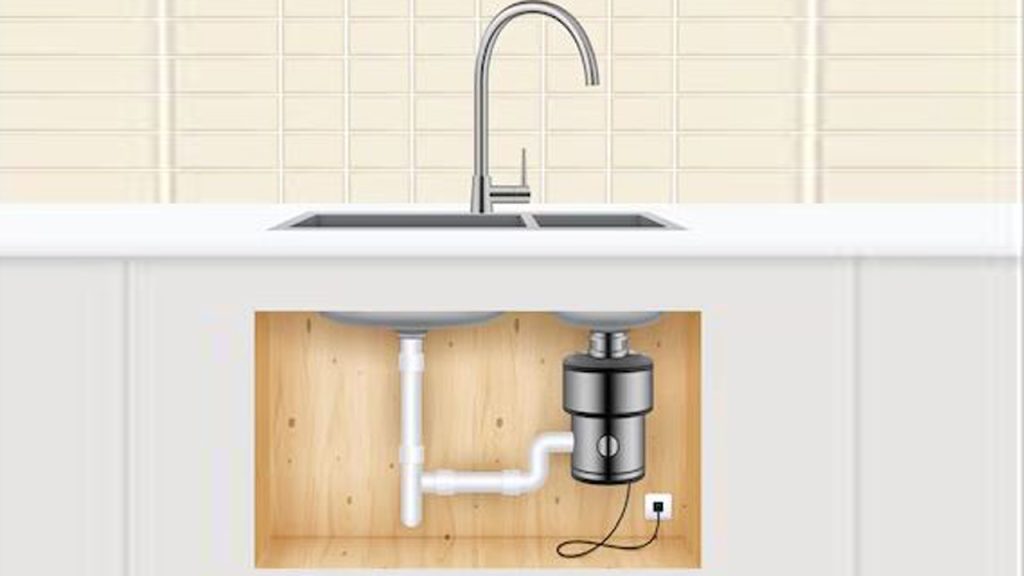
Image by freepik
Whether you’re a beginner, this guide will simplify the plumbing process and give you the confidence to tackle this project on your own. With our clear and concise instructions, you’ll have your kitchen sink with disposal up and running in no time.
Tools and Materials Needed for the Job
Before you start the installation process, it’s essential to gather all the necessary tools and materials. Here’s a list of what you’ll need:
- Adjustable wrench
- Pipe wrench
- Plumber’s putty
- Screwdriver
- Plumber’s tape
- Hacksaw
- Bucket
- Safety goggles
- Disposable gloves
- Sink strainer
- Disposal unit
- PVC pipes and connectors
- Electrical wire connectors
Now that you have everything ready, let’s move on to preparing the sink area for installation.
Preparing the Sink Area for Installation
The first step in plumbing a kitchen sink with a disposal is to prepare the sink area for installation. Follow these steps:
- Turn off the water supply: Locate the water shut-off valves under the sink and turn them off to prevent any water flow during the installation process. It’s important to have a dry workspace.
- Disconnect the old sink: If you’re replacing an existing sink, disconnect the plumbing connections and remove the old sink. Make sure to place a bucket underneath to catch any water that may be left in the pipes.
- Clean the sink area: Thoroughly clean the sink area to remove any debris or old putty. This will ensure a clean and secure installation.
Once you’ve completed these steps, you’re ready to install the disposal unit.
Installing the Disposal Unit
Installing the disposal unit requires careful handling and precise connections. Follow these instructions:
- Attach the sink strainer: Apply a thin layer of plumber’s putty around the bottom edge of the sink strainer. Insert the strainer into the sink drain opening and press it firmly in place. Wipe off any excess putty.
- Connect the disposal mounting ring: Place the mounting ring on top of the sink strainer and secure it with the provided screws. Use a screwdriver to tighten the screws evenly.
- Mount the disposal unit: Align the disposal unit with the mounting ring and twist it clockwise to lock it in place. Make sure it is aligned properly and sits securely.
Now that the disposal unit is installed, let’s move on to connecting it to the plumbing system.
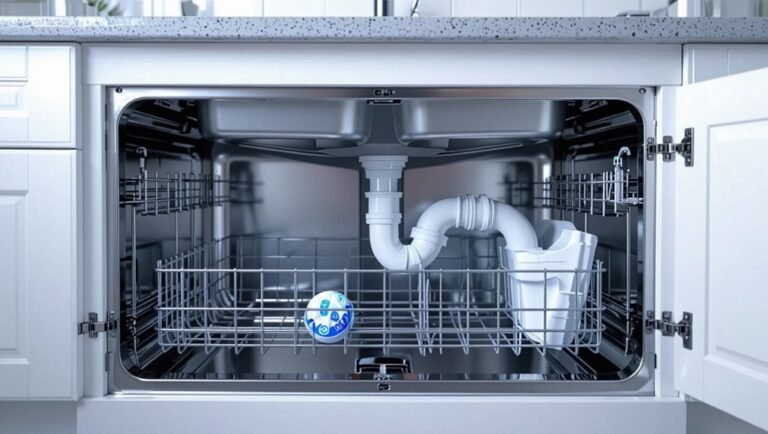
Connecting the Disposal Unit to the Plumbing System
To ensure proper functionality, it’s crucial to connect the disposal unit to the plumbing system correctly. Here’s what you need to do:
Install the drain pipe
Attach the drain pipe to the disposal unit’s discharge outlet. Use a pipe wrench to tighten the connection securely. Make sure the drain pipe is angled downward to allow for proper drainage.
Connect the dishwasher drain
If you have a dishwasher, locate the dishwasher inlet on the disposal unit and remove the knockout plug. Connect the dishwasher drain hose to the inlet and secure it with a hose clamp.
Install the P-trap and tailpiece
Connect the P-trap to the drain pipe and the tailpiece to the sink strainer. Use adjustable wrenches to tighten the connections, ensuring they are leak-free.
With the disposal unit connected to the plumbing system, it’s time to test its functionality.
Testing the Disposal Unit
Before you start using your kitchen sink with a disposal, it’s essential to test the unit to ensure everything is working correctly. Follow these steps:
- Turn on the water supply: Open the water shut-off valves under the sink to allow water flow.
- Turn on the disposal unit: Plug in the disposal unit and turn it on. Run cold water through the sink and turn on the disposal unit. It should start grinding food waste and draining properly.
- Check for leaks: Inspect all the connections for any signs of leaks. If you notice any leaks, tighten the connections or replace any defective parts.
Now! You have successfully plumbed your kitchen sink with a disposal unit. If you encounter any issues along the way, don’t worry. We’ve got you covered with some troubleshooting tips.
Troubleshooting Common Issues with Kitchen Sink Disposals
Even with proper installation, you may encounter some common issues with kitchen sink disposals. Here are a few troubleshooting tips to help you resolve them:
Jammed disposal: If the disposal unit gets jammed, turn it off immediately. Use a hex wrench or a specially designed tool to manually rotate the unit’s impellers and dislodge any obstructions.
Slow drainage: If your sink is draining slowly, it may indicate a clog in the drain pipes. Use a plunger or a drain snake to clear the clog. Avoid using harsh chemicals as they can damage the disposal unit.
Leaks: If you notice any leaks, check the connections for loose or damaged parts. Tighten the connections or replace any faulty components as needed.
By following these troubleshooting tips, you can resolve common issues and keep your kitchen sink with disposal functioning properly.
Maintenance Tips for Kitchen Sink Disposals
To ensure the longevity and optimal performance of your kitchen sink disposal, it’s essential to follow some maintenance practices. Here are a few tips:
Keep it clean: Regularly clean your disposal unit by grinding ice cubes and citrus peels. This helps remove debris and eliminate odors.
Avoid grinding certain items: Avoid grinding hard items like bones, fruit pits, and fibrous materials like corn husks. These can damage the unit and cause clogs.
Run water while in use: Always run cold water while using the disposal. This helps in flushing out the waste and prevents clogs.
By following these maintenance tips, you can extend the lifespan of your kitchen sink disposal and prevent any major issues.
Frequently Asked Questions about Plumbing a Kitchen Sink with a Disposal
Can I install a disposal unit on any sink?
Yes, most sinks can accommodate a disposal unit. However, it’s essential to check the manufacturer’s guidelines and ensure the sink is compatible.
Can I install a disposal unit myself?
Yes, with the right tools and instructions, you can install a disposal unit yourself. Just make sure to follow the steps carefully and take necessary safety precautions.
How long does a disposal unit typically last?
On average, a disposal unit can last between 10 to 15 years with proper maintenance and usage.
Can I use my disposal unit to grind all types of food waste?
No, it’s important to avoid grinding certain items like bones, fruit pits, and fibrous materials. These can damage the unit and cause clogs.
Should I hire a professional for the installation?
If you’re not confident in your plumbing skills or lack the necessary tools, it’s advisable to hire a professional. They can ensure a proper and safe installation.
Conclusion
Plumbing a kitchen sink with a disposal may seem like a daunting task, but with the right guidance, it can be a straightforward process. By following the step-by-step instructions provided in this guide, you can successfully install and connect your kitchen sink with a disposal unit.
Gather all the necessary tools and materials, prepare the sink area, install the disposal unit, connect it to the plumbing system, and test its functionality. In case of any issues, refer to our troubleshooting tips, and don’t forget to follow the maintenance practices to keep your disposal unit in optimal condition.
Now that you have the knowledge and confidence, go ahead and upgrade your kitchen with a new sink and disposal system. Enjoy the convenience and efficiency it brings to your everyday cooking and cleanup routine!